Integrate Entra ID (Azure AD)
This topic explains how to integrate Azure Active Directory (AD), now called Entra ID, as an OIDC provider for SSO with a Portworx Backup HTTPS-enabled endpoint.
Prerequisites
- Ensure you have an EKS cluster, Route 53 with a Register domain for which you can use an SSL certificate from AWS Certificate Manager (ACM) using Entra ID for SSO login.
- Attach the additional role
ALBIngressControllerIAMPolicyto your EKS cluster. Without this role, you cannot launch the Application Load Balancer (ALB).
Integrate Entra ID with Portworx Backup
To integrate Entra ID with Portworx Backup:
-
Log in to the Azure portal, and select View from Manage Azure Active Directory.
-
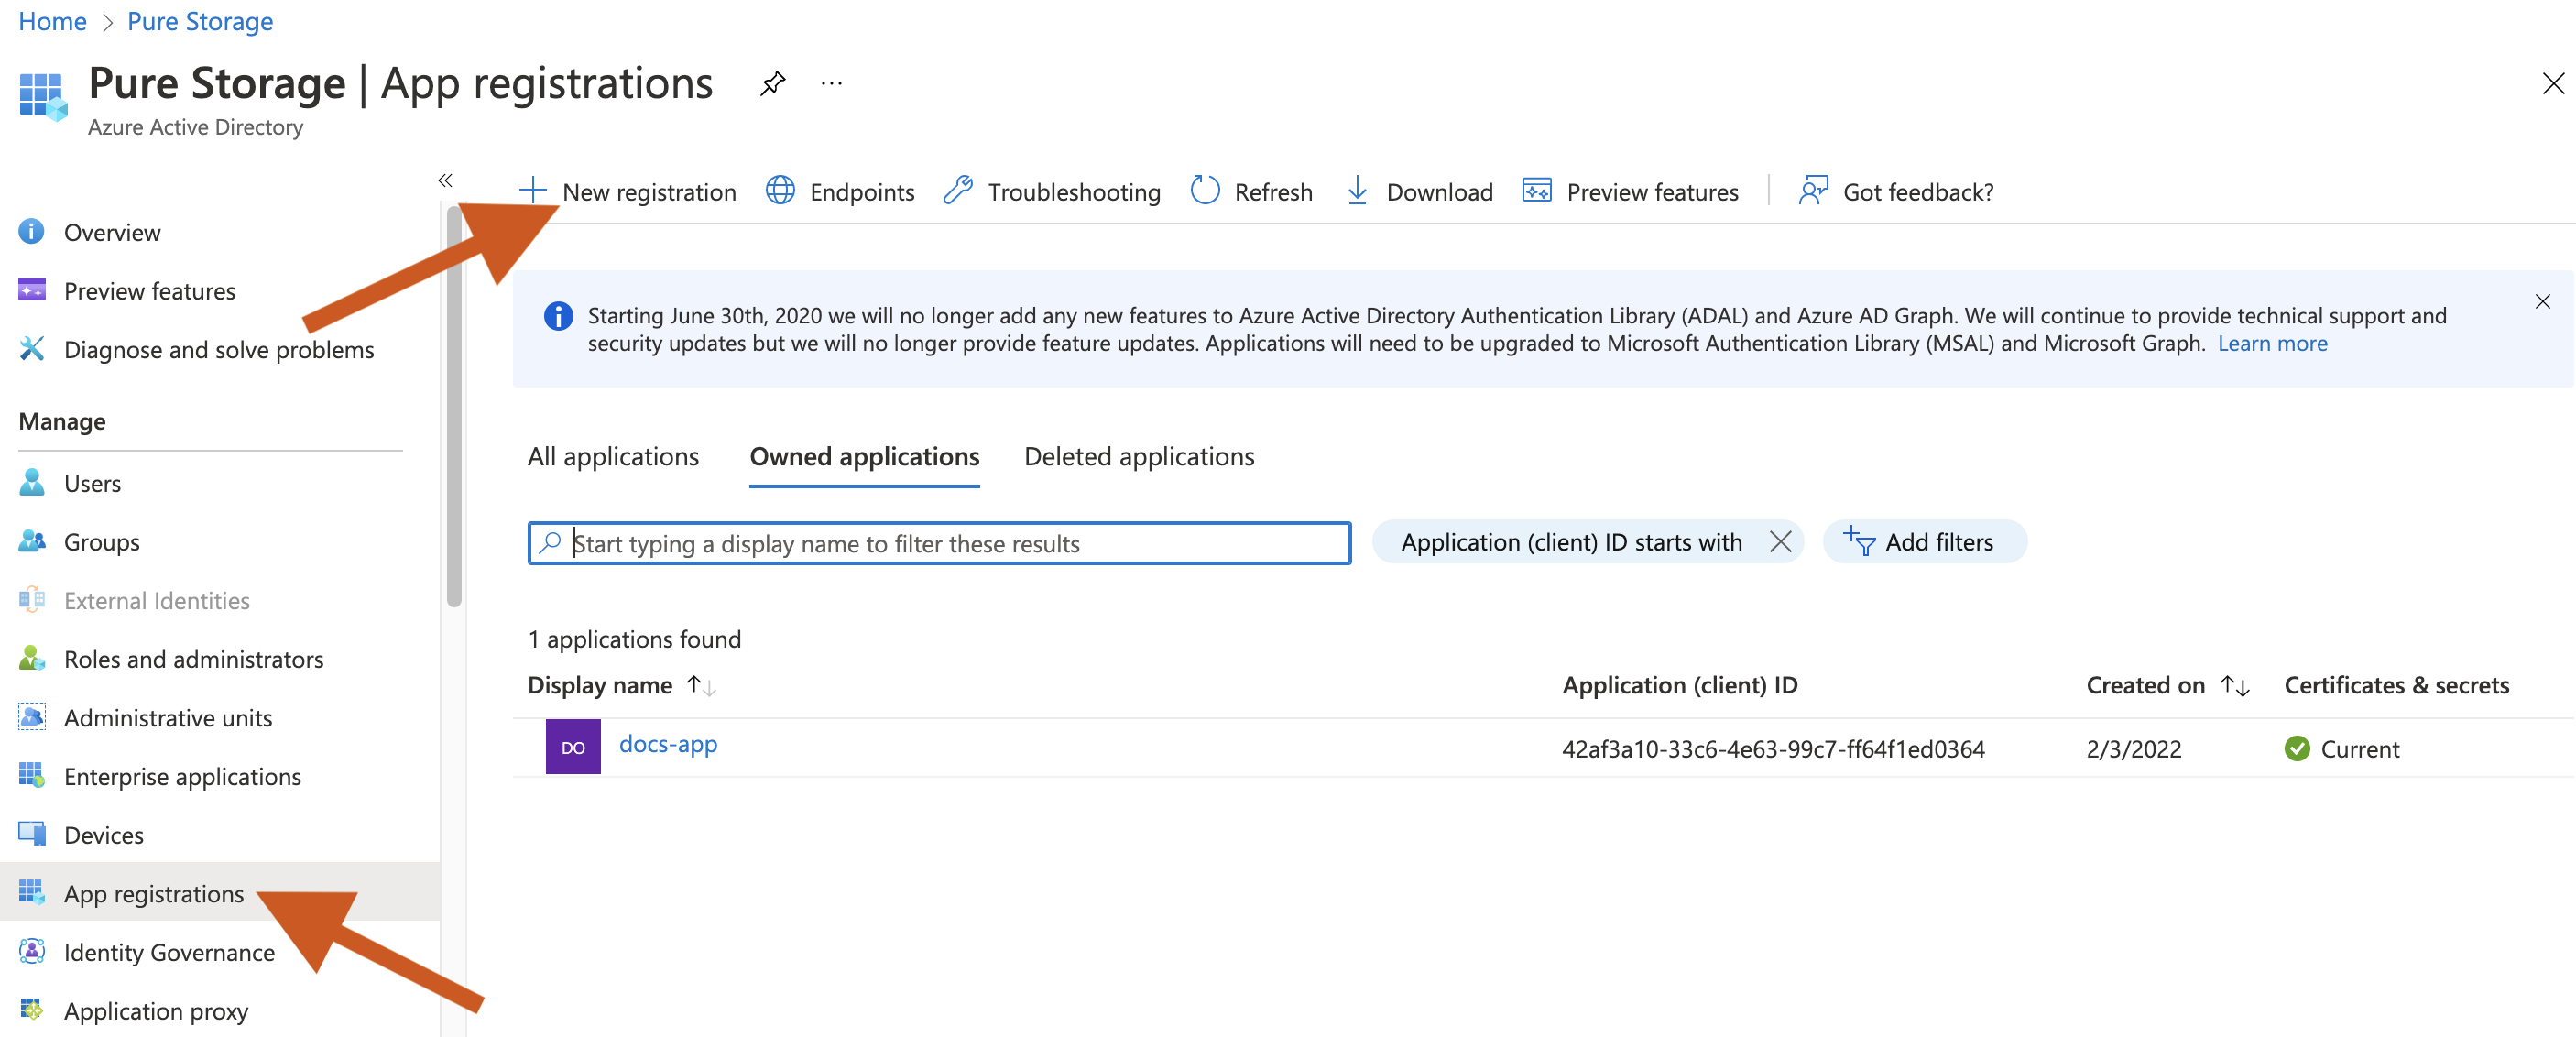
In the Entra ID page, select App registrations from the left pane > New registration.
-
In the Register an Application page, fill in the Name text box, choose an option from Supported account types, and click Register.
Your application is created.
-
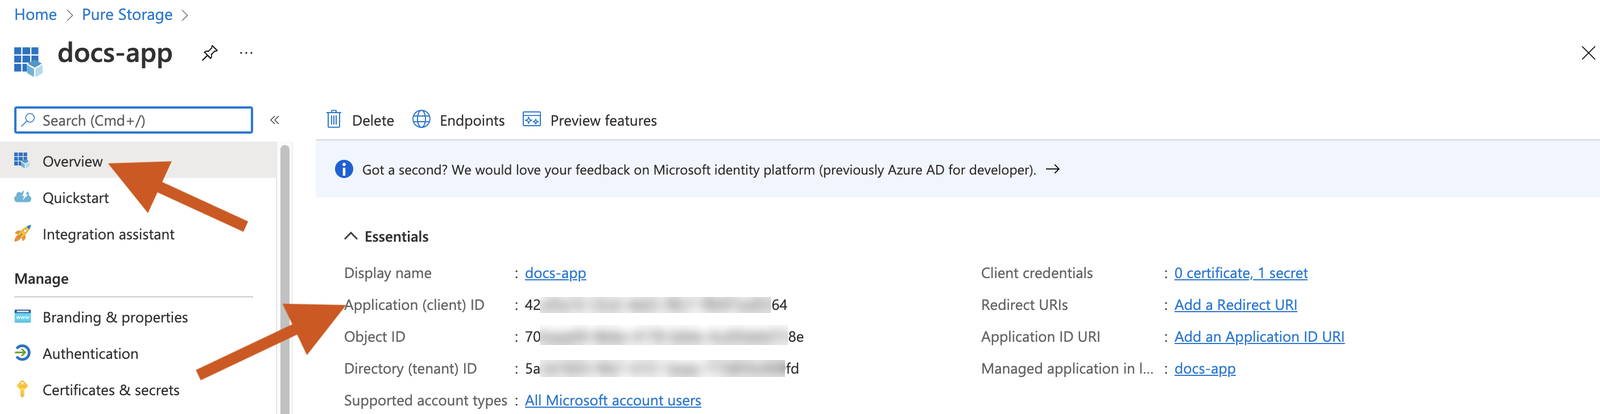
In the Entra ID page, select App registrations > Owned applications tab.
-
Select your application. The Overview page displays all details about your application. Make a note of the Application (client) ID, which you can use while generating the Portworx Backup spec.
-
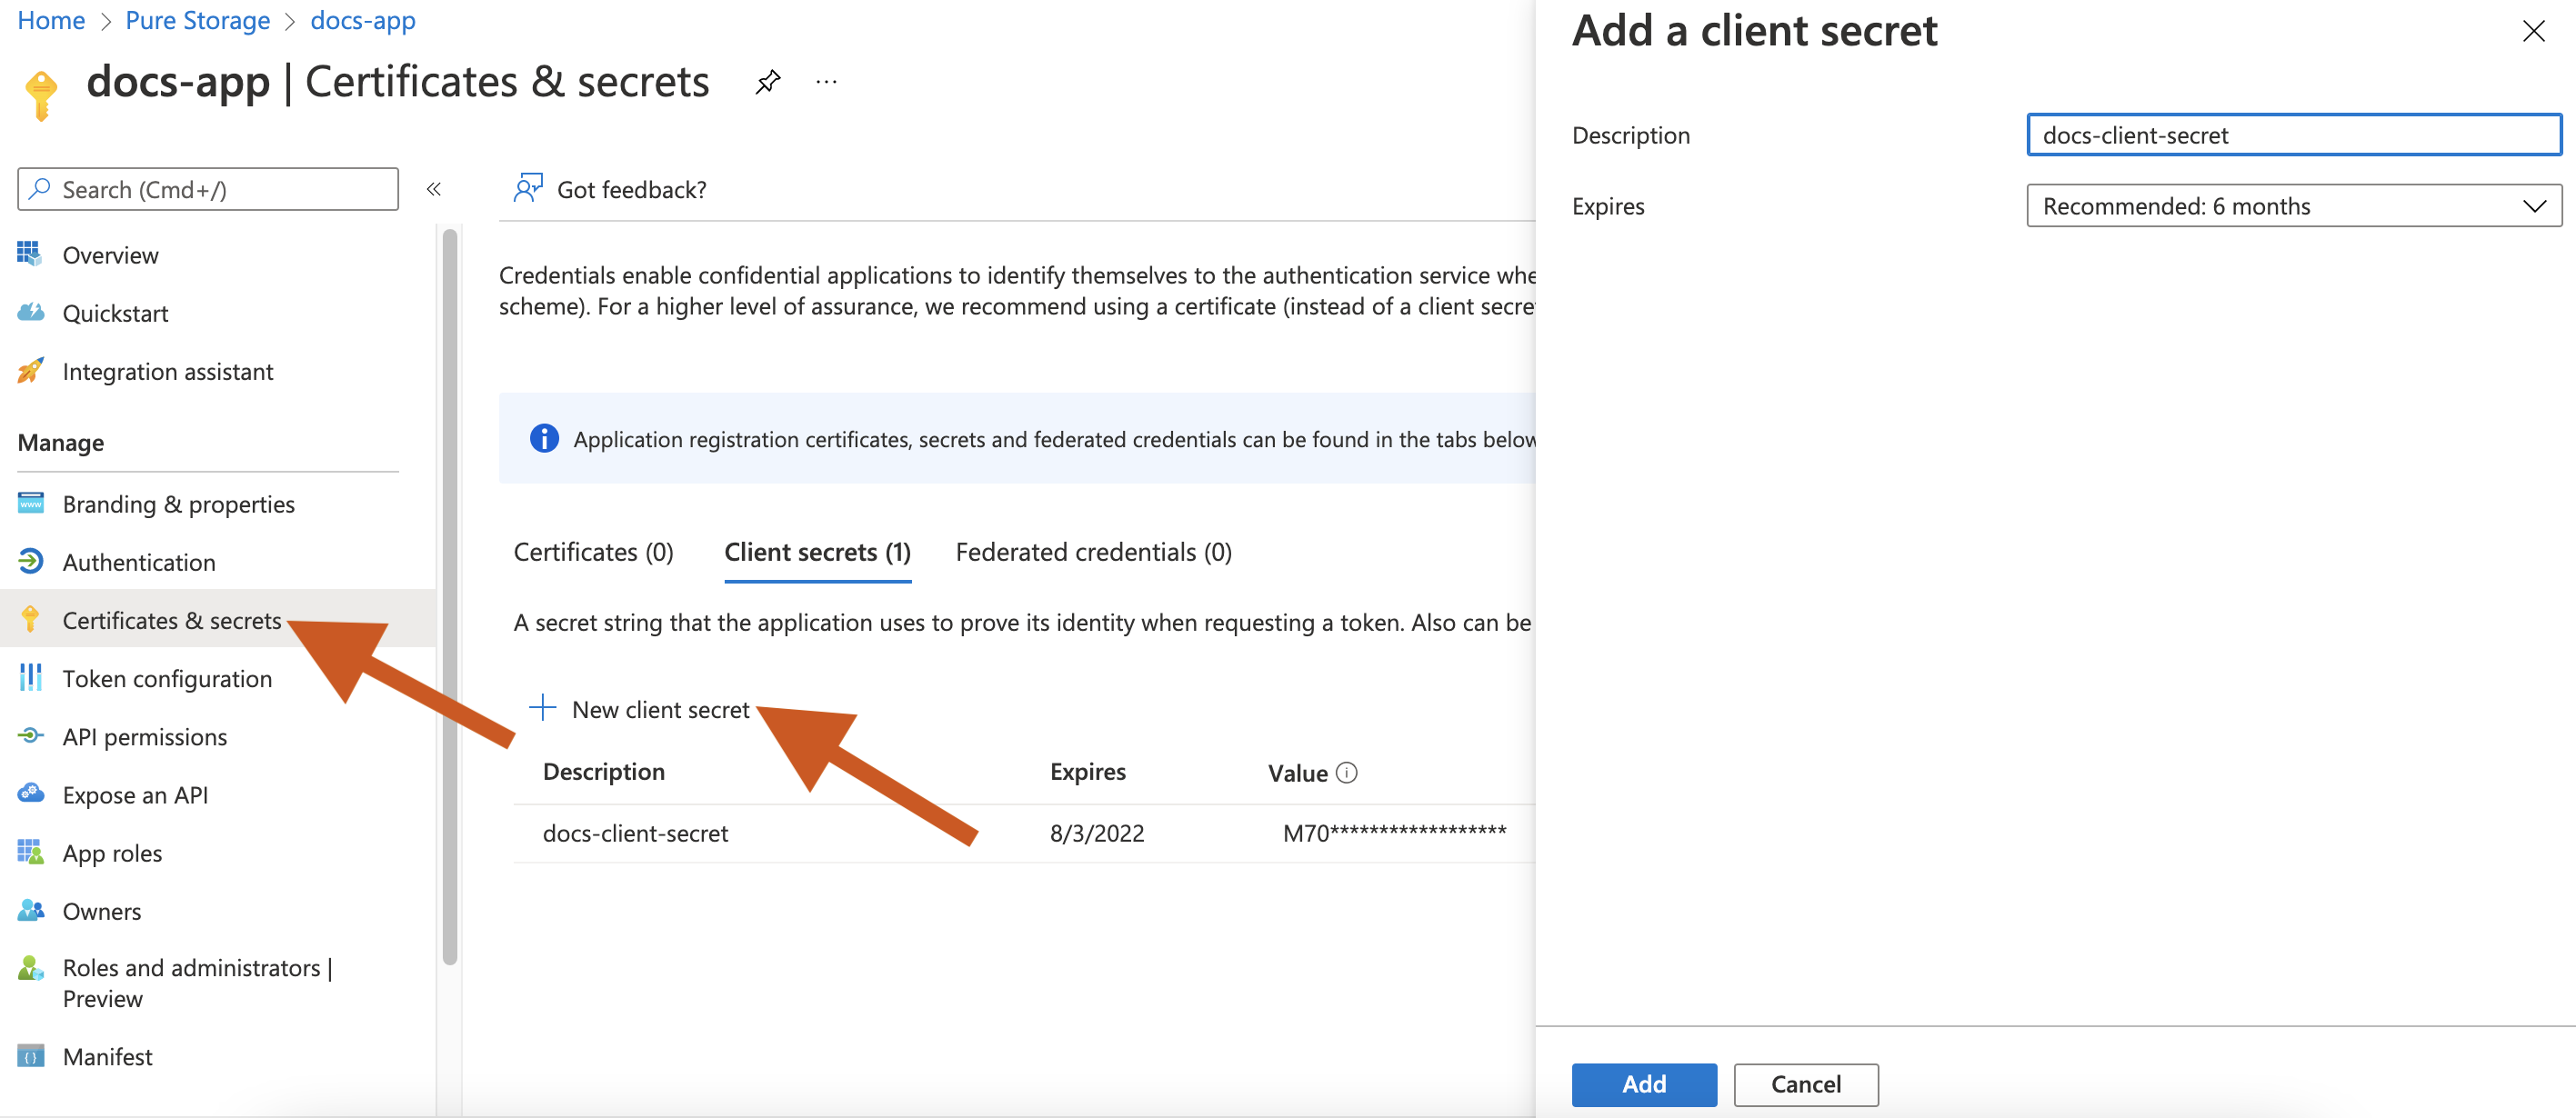
Select Certificates & secrets in the left pane > New client secret to add a client secret for the application.
-
In the Add a client secret window that appears, enter the client secret description and choose the validity of client secret from the Expires drop-down list.
-
Click Add to add a secret for your application. You can use this secret while generating the Portworx Backup spec.
-
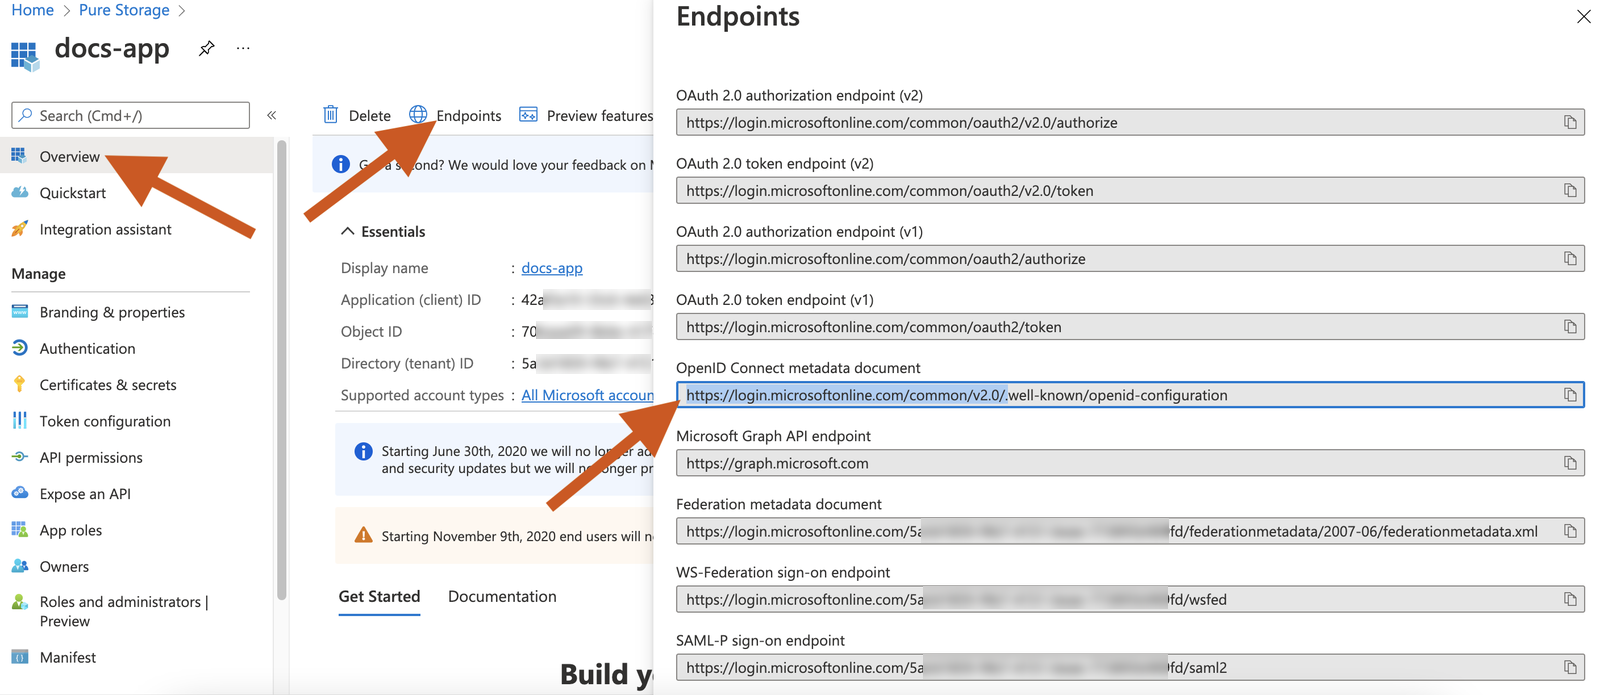
Get the OIDC endpoint by selecting the application you created > Endpoints tab. Copy the URL of the OpenID Connect metadata document.
-
Using the Portworx Central spec gen wizard, generate Portworx Backup spec and use the client ID, secret, or endpoint.
-
Install the generated spec.
Add an external OIDC provider as the identity provider in Portworx Backup
After integrating the Entra ID or an external OIDC with Portworx Backup, perform the following steps to add any external OIDC provider in Portworx Backup:
-
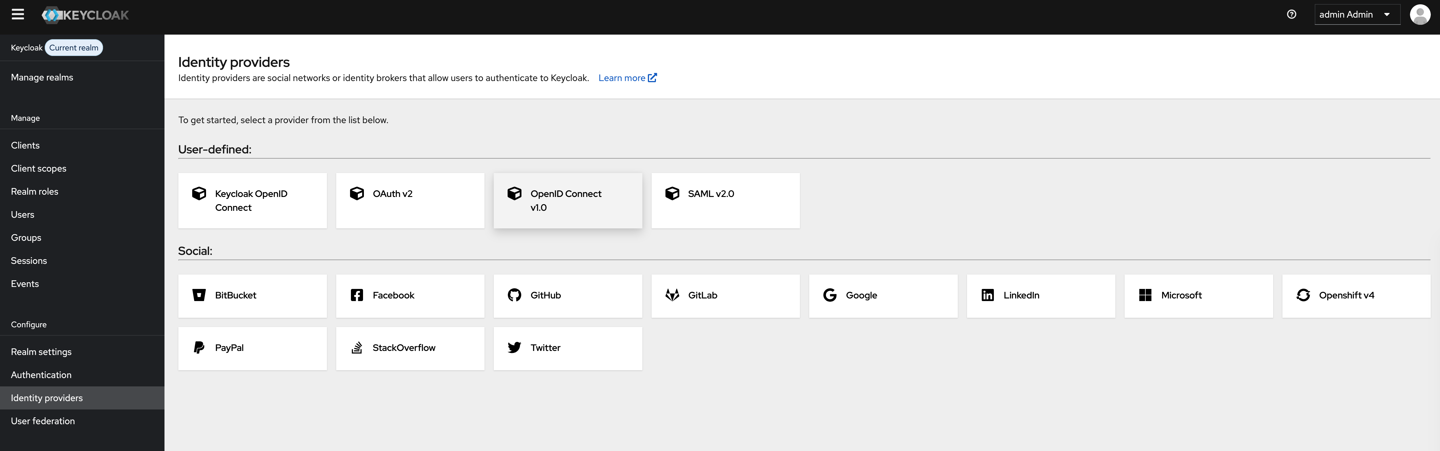
Log in to the Keycloak admin console using administrator credentials, and select Identity Provider from the left navigation pane.
Access the Keycloak admin console at
https://<px-backup-web-console-url>/admin/. For Portworx Backup 2.8.x and earlier, usehttps://<px-backup-web-console-url>/auth/admin/. For information on finding the Portworx Backup web console URL, see Configure access to web console. -
In the Identity Providers page, under User-defined section select OpenID Connect v1.0
-
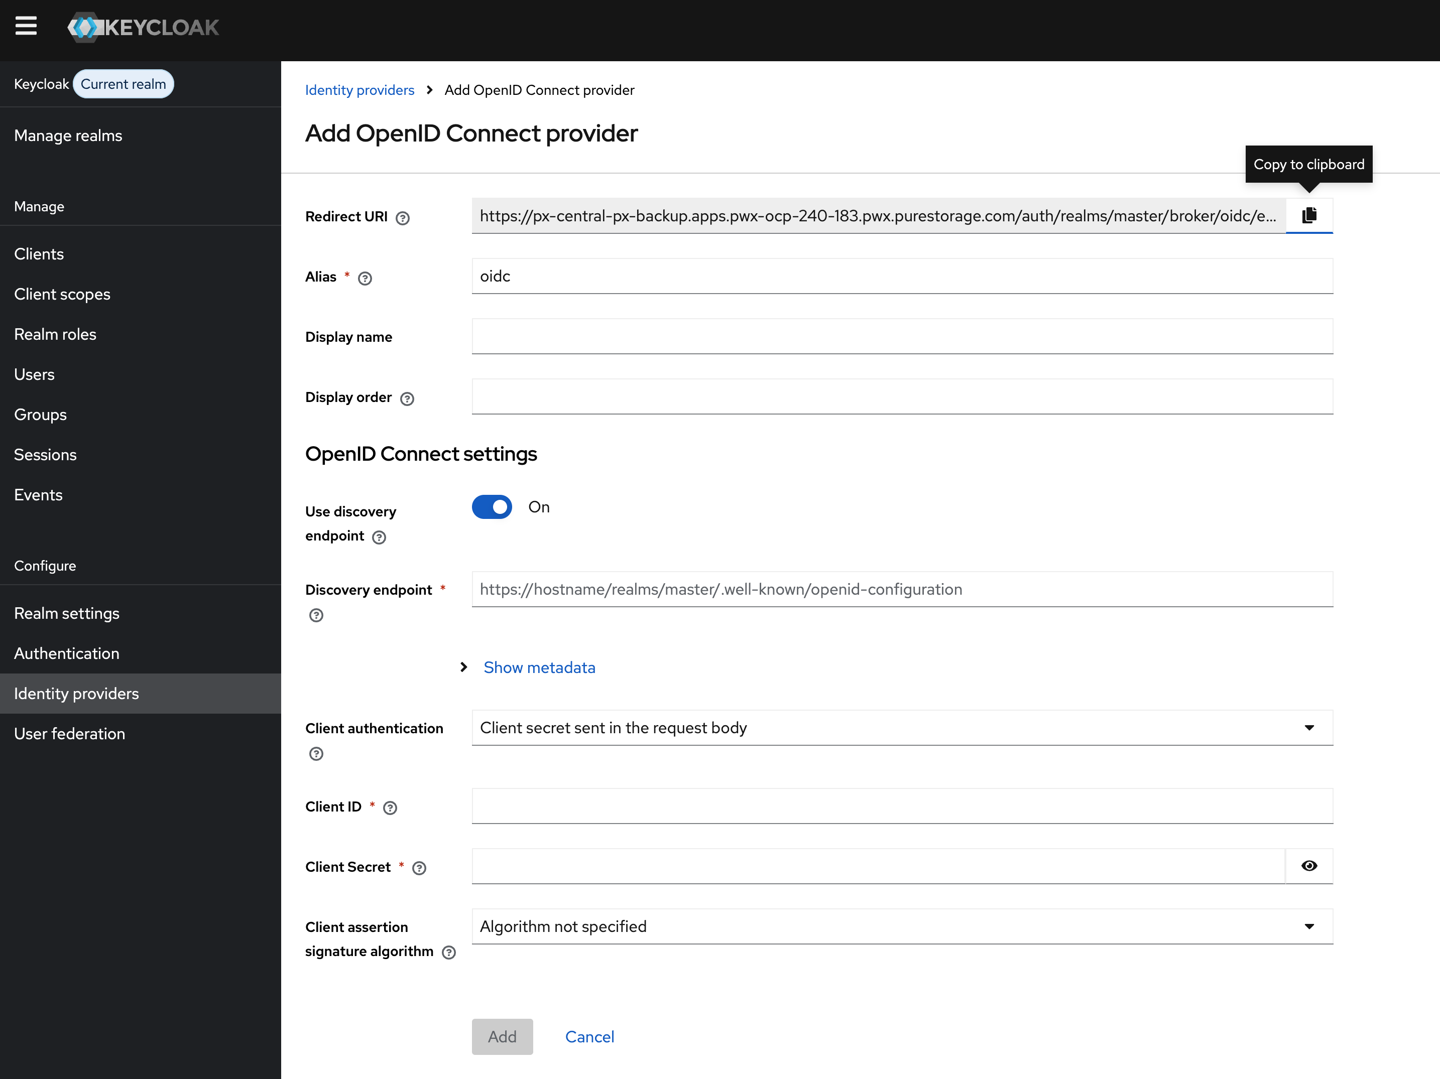
From the Add OpenID Connect provider page, copy the URI from the Redirect URI text box, and paste it in your OIDC provider.
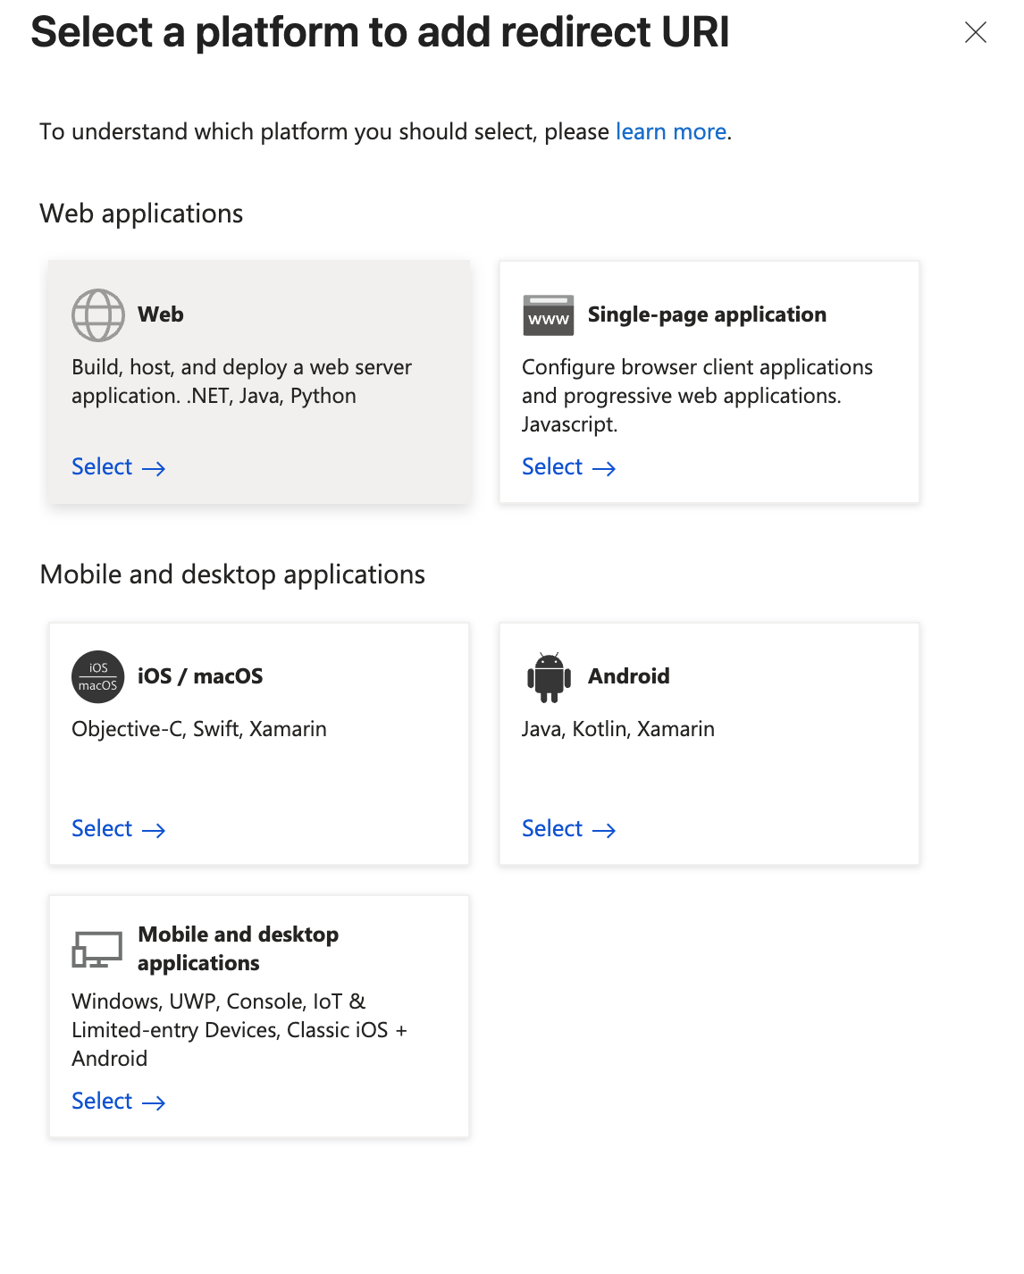
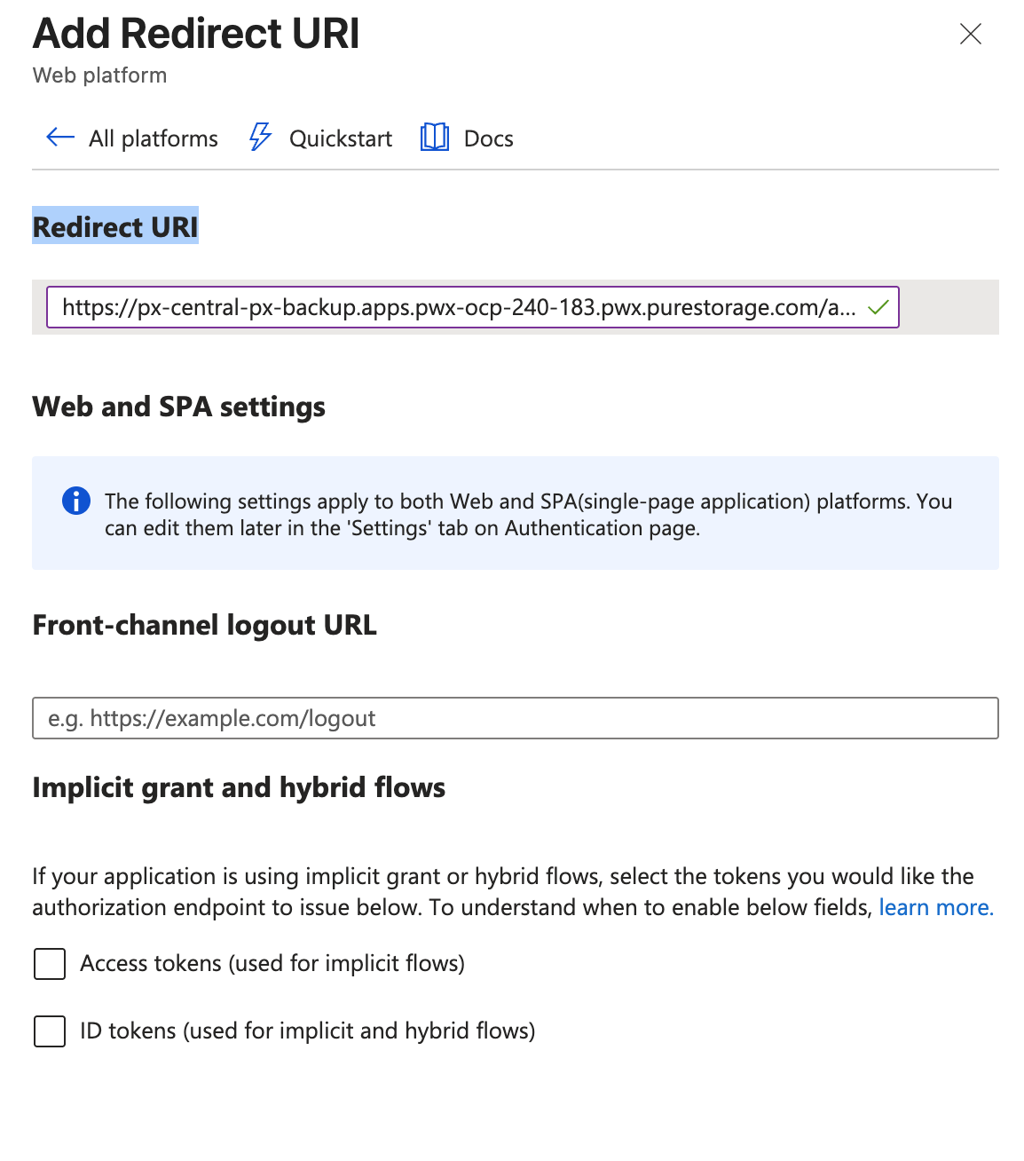
For example, in Azure AD, navigate to your application Overview page, click Add a Redirect URI in the Redirect URIs section, select Web under Select a platform to add redirect URI and paste the copied URI from Keycloak in Redirect URI field in Add Redirect URI page and click Configure.
-
Navigate to the Keycloak → Add OpenID Connect provider page, enable Use discovery endpoint, and paste the OpenID Connect metadata document URL copied from the Azure portal in the Discovery endpoint field. Enter the following additional fields:
- Client Authentication: From the dropdown list, select Client secret sent in the request body.
- Client ID: Paste the Application (client ID) that you copied from the Entra ID > your application Overview page > Essentials section.
- Client Secret: Paste the secret value that you copied from the Entra ID > your application Certificates & secrets page.

-
Click Add.
-
Logout from Keycloak window and access Portworx Backup endpoint without
/auth. Your OIDC provider link appears on the login page: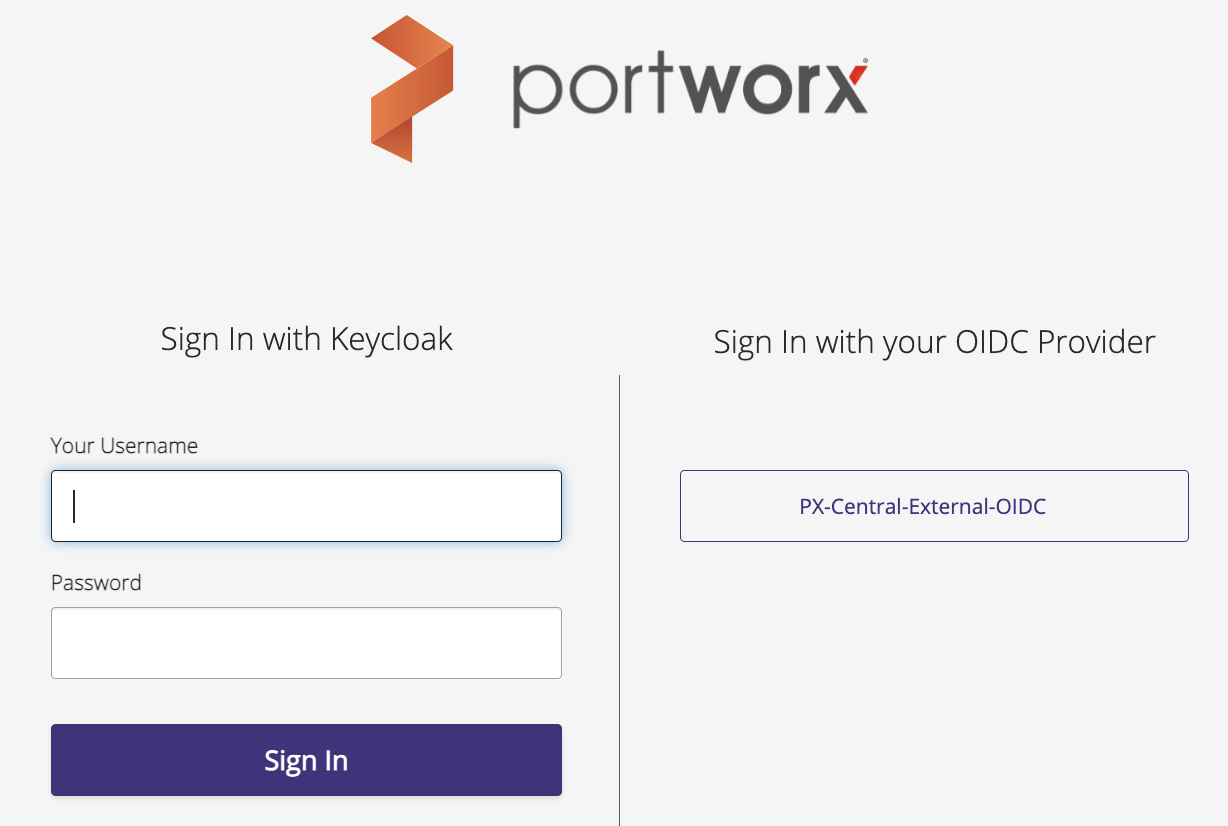
You can log in with your Keycloak user credentials.
noteAll new users who log in from external Keycloak are assigned application user role by default.