Integrate AD Users and Groups
You need the following prerequisites to integrate AD users and groups with Portworx Backup Keycloak.
- On the Windows server (which is a stand-alone host), Install Active Directory Domain Services (Level 100)
Workflow
-
Log in to the Active Directory server and ensure that the users and user groups that you want to integrate exist in the Active Directory server.
-
Integrate the user and group profiles with Portworx Backup Keycloak.
Prerequisites
-
On the Windows server (which is a stand-alone host), Install Active Directory Domain Services (Level 100).
-
Fetch the following AD configuration details to configure in the Portworx Backup Keycloak:
User Object Classes : person,organizationalPerson,userConnection URL : ldap://<AD-hostname> or ldap://<AD-IP>(Use ldaps://<AD-hostname> or ldaps://<AD-IP> if using LDAPS/TLS)Users DN : CN=Users,DC=<domain-controller-name>,DC=<domain>,DC=<tld>Bind DN : CN=<user-name>,CN=Users,DC=<domain-controller-name>,DC=<domain>,DC=<tld>Bind Credentials : <AD-password>noteReplace
DC=<domain-controller-name>,DC=<domain>,DC=<tld>with your organization's Active Directory domain components. For example, for a domaincorp.example.com, this would beDC=corp,DC=example,DC=com.noteEach field has an associated tooltip in Portworx Backup Keycloak, click on them if you need to learn more on the values you have to provide in the respective fields.
Integrate Active Directory with Portworx Backup Keycloak
The values specified below for each field serve as a reference for sample configuration. Actual parameters can vary based on your environment, requirements, and configuration.
-
Access the Portworx Backup Keycloak admin console at:
https://<px-backup-web-console-url>/admin/noteFor Portworx Backup 2.8.x and earlier, the Keycloak URL uses the
/auth/prefix:https://<px-backup-web-console-url>/auth/admin/. For information on finding the Portworx Backup web console URL, see Configure access to web console. -
Log-in with valid and active user credentials.
-
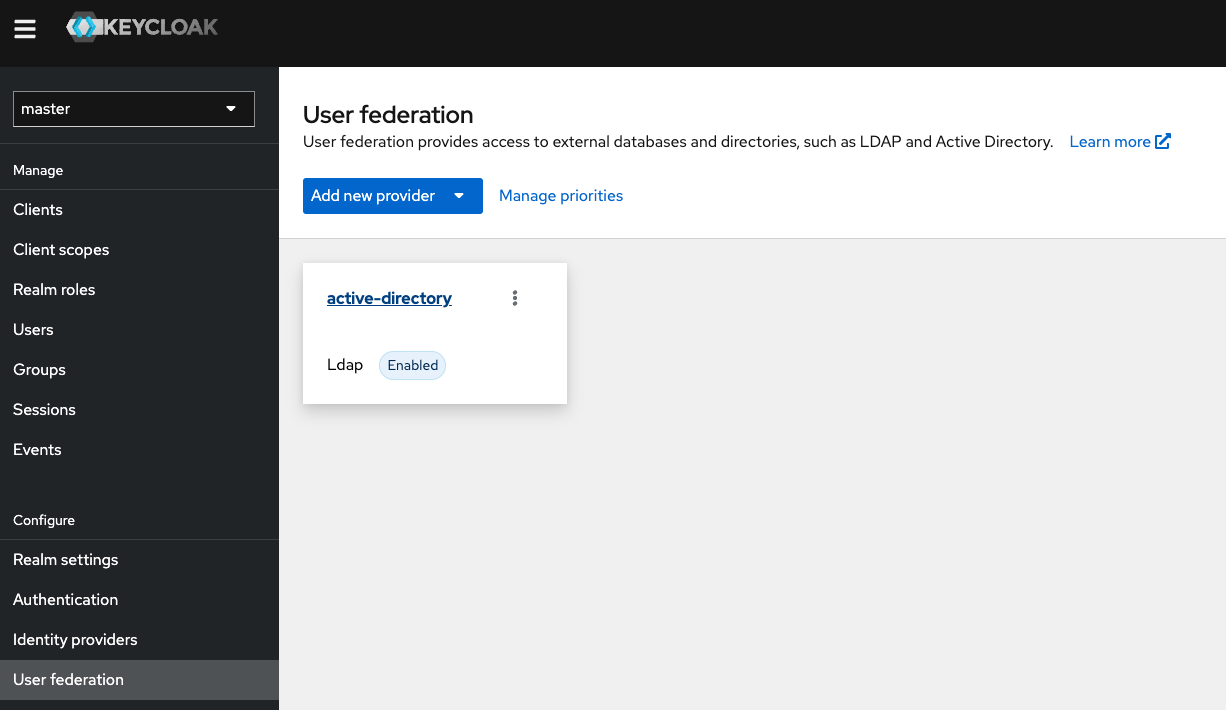
In the left navigation pane, under Configure click User Federation.
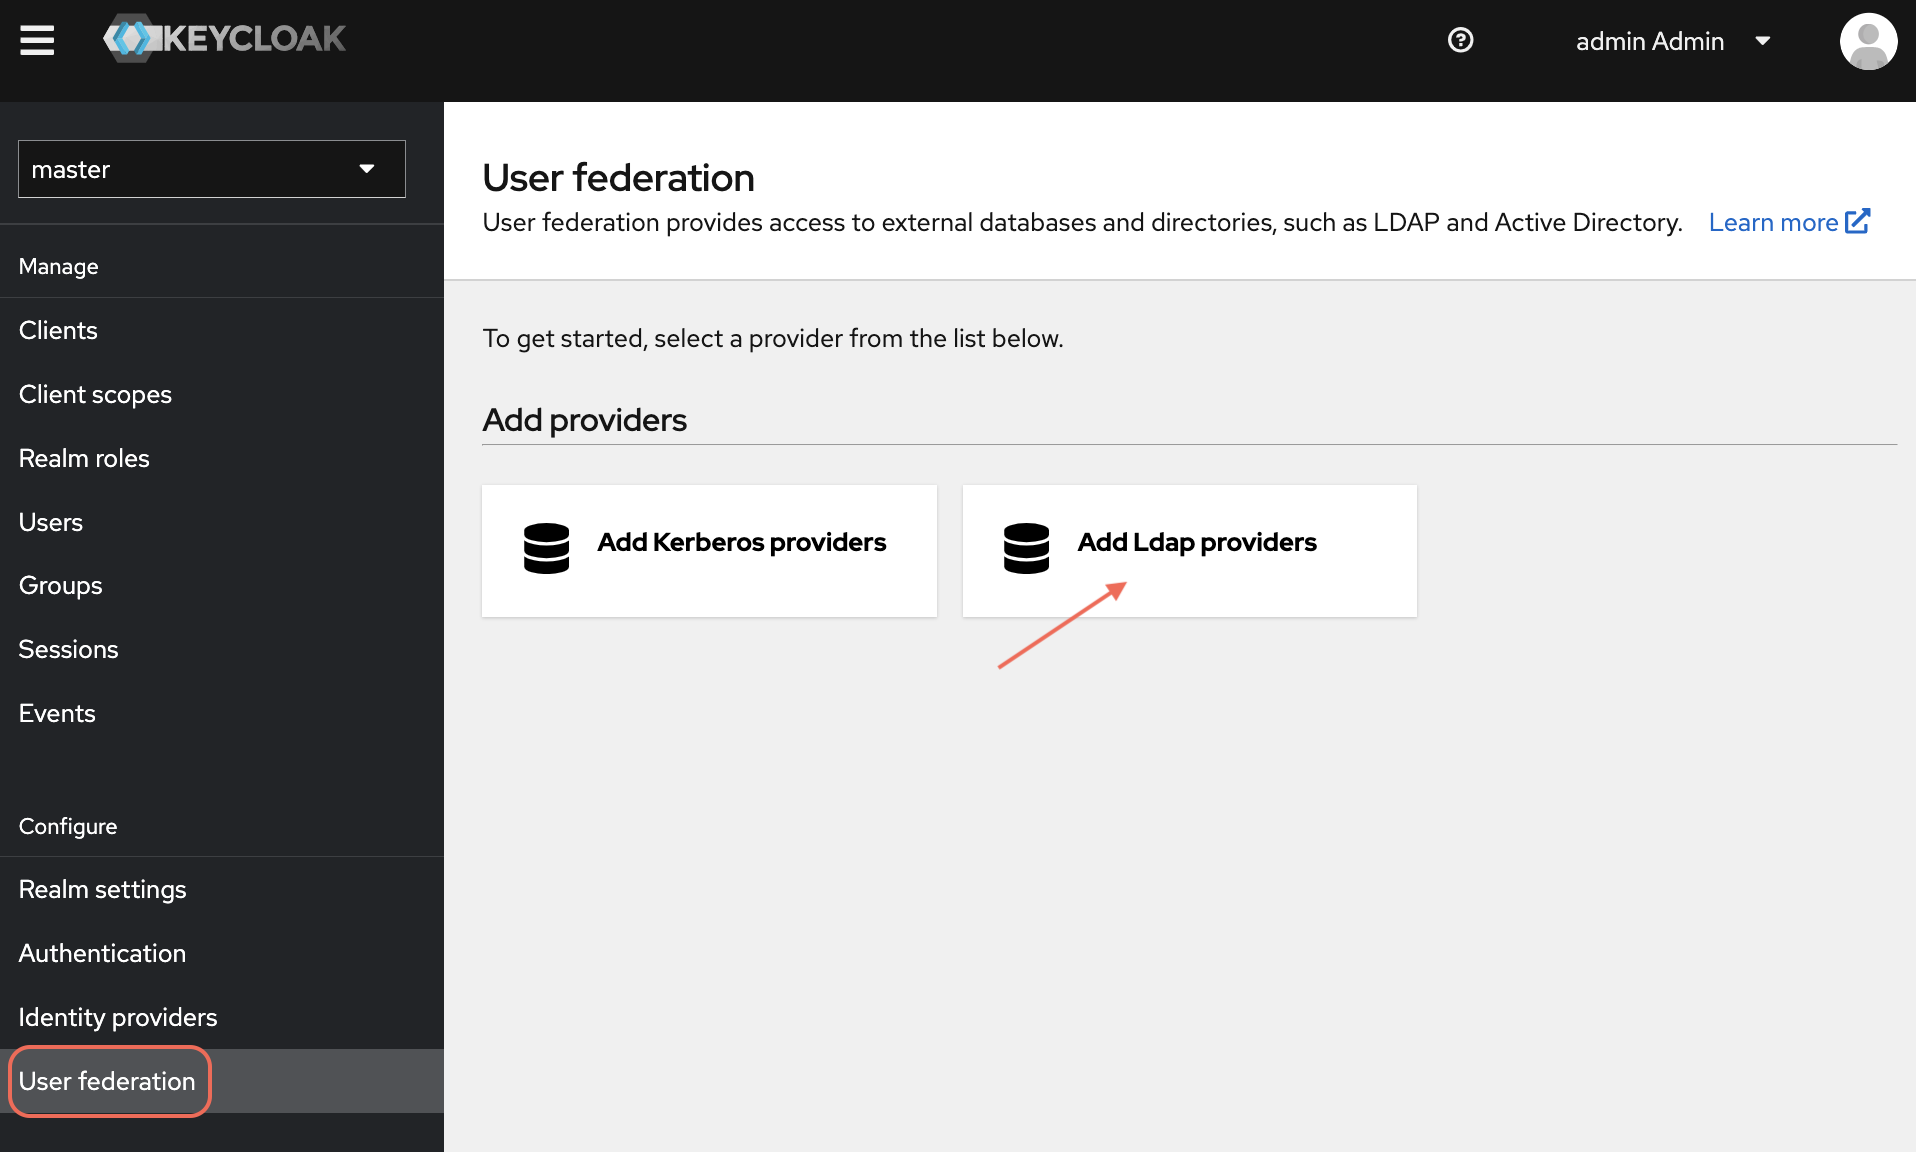
Click Learn more option if you need more information about various fields to add an LDAP provider.
-
From the User Federation page, select Add LDAP providers.
-
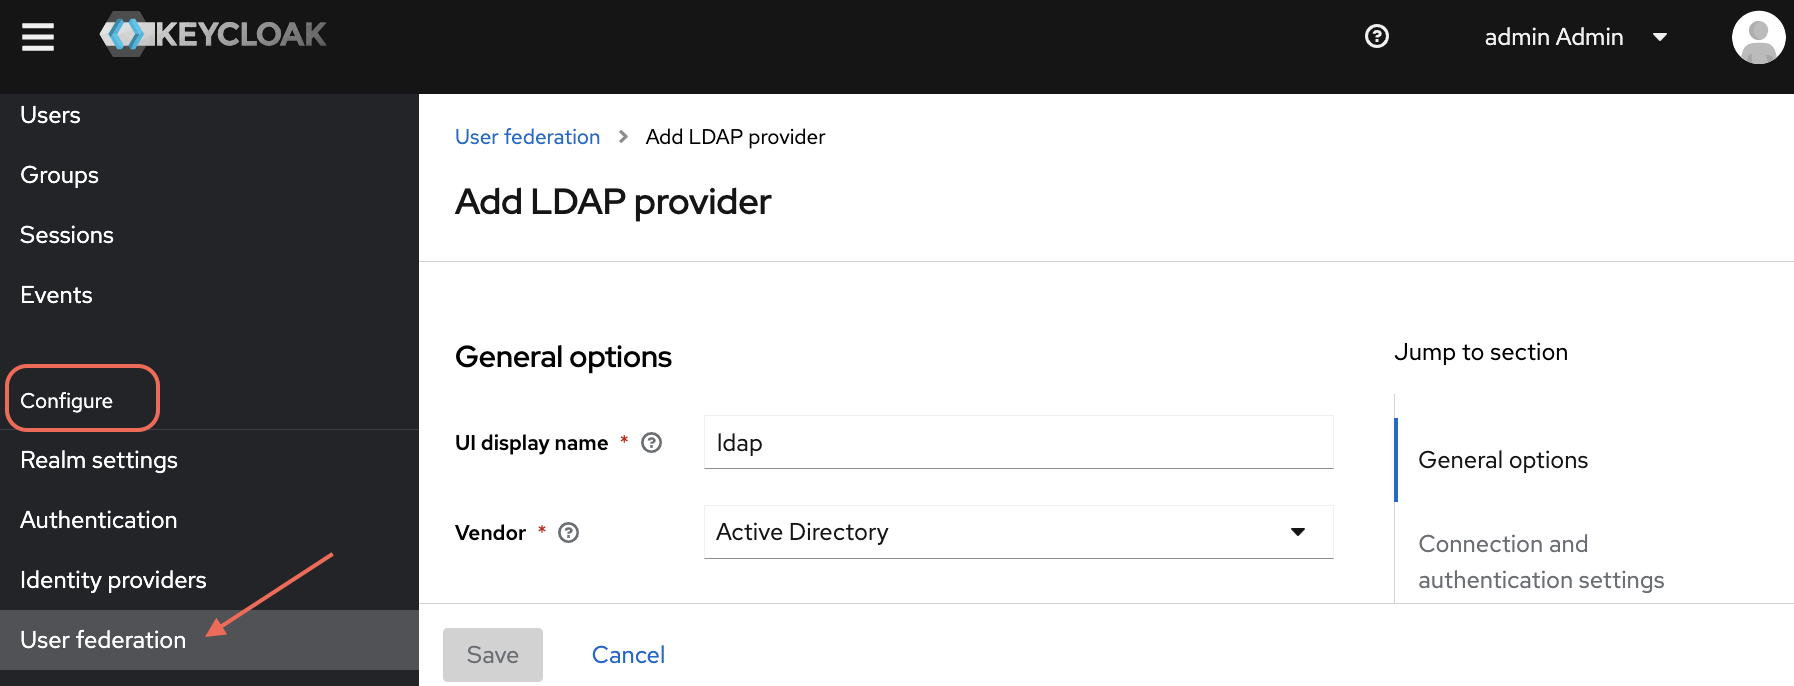
In the Add LDAP provider page, provide the required Active Directory configuration details.
- General Options
- UI display name: enter
ldap - Vendor: choose
Active Directoryfrom the drop-down
- UI display name: enter
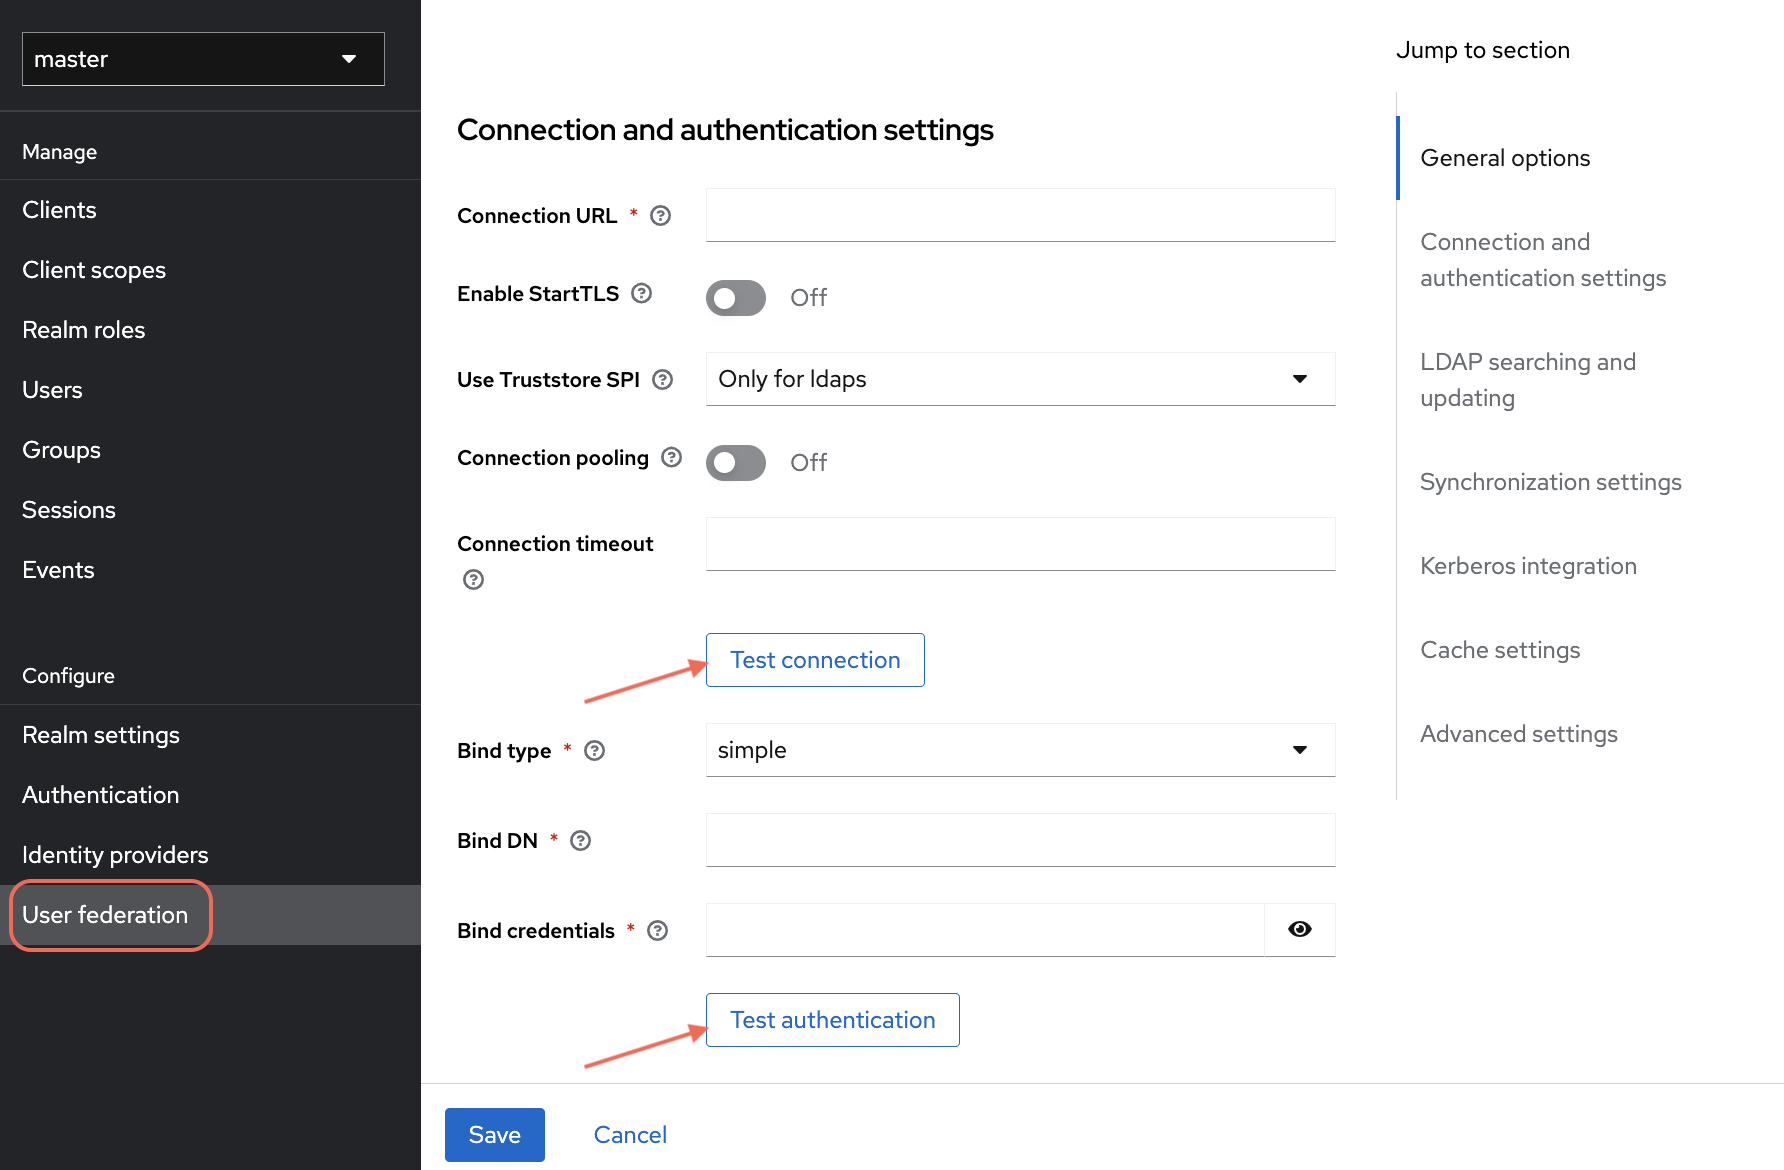
- Connection and Authentication Settings
-
Connection URL: enter the LDAP server URL (for example,
ldap://<AD-hostname>:389). To use encrypted LDAP, use theldaps://scheme (for example,ldaps://<AD-hostname>:636). -
Enable StartTLS: toggle to
Off -
Use Truststore SPI: select
Only for ldapsnoteIf using
ldaps://, you must import your Active Directory CA certificate into Keycloak's truststore before testing the connection. To do this:-
In the Keycloak admin console, navigate to Realm Settings > Keys tab > Providers.
-
Add a provider of type truststore and upload your AD CA certificate (
.pemor.crtformat). -
Save the configuration, then return to this step and test the connection.
Without the CA certificate in the truststore, the
ldaps://connection will fail with a certificate validation error. -
-
Connection pooling: toggle to
Off -
Connection timeout: enter a suitable timeout value (in seconds)
-
- General Options
-
Click Test connection to verify the connection settings.
- Additional Authentication Settings
- Bind type: select
simple - Bind DN: enter the distinguished name (DN) for the LDAP bind
- Bind credentials: enter the bind credentials (password)
- Bind type: select
- Additional Authentication Settings
-
Click Test authentication to verify the bind credentials.
-
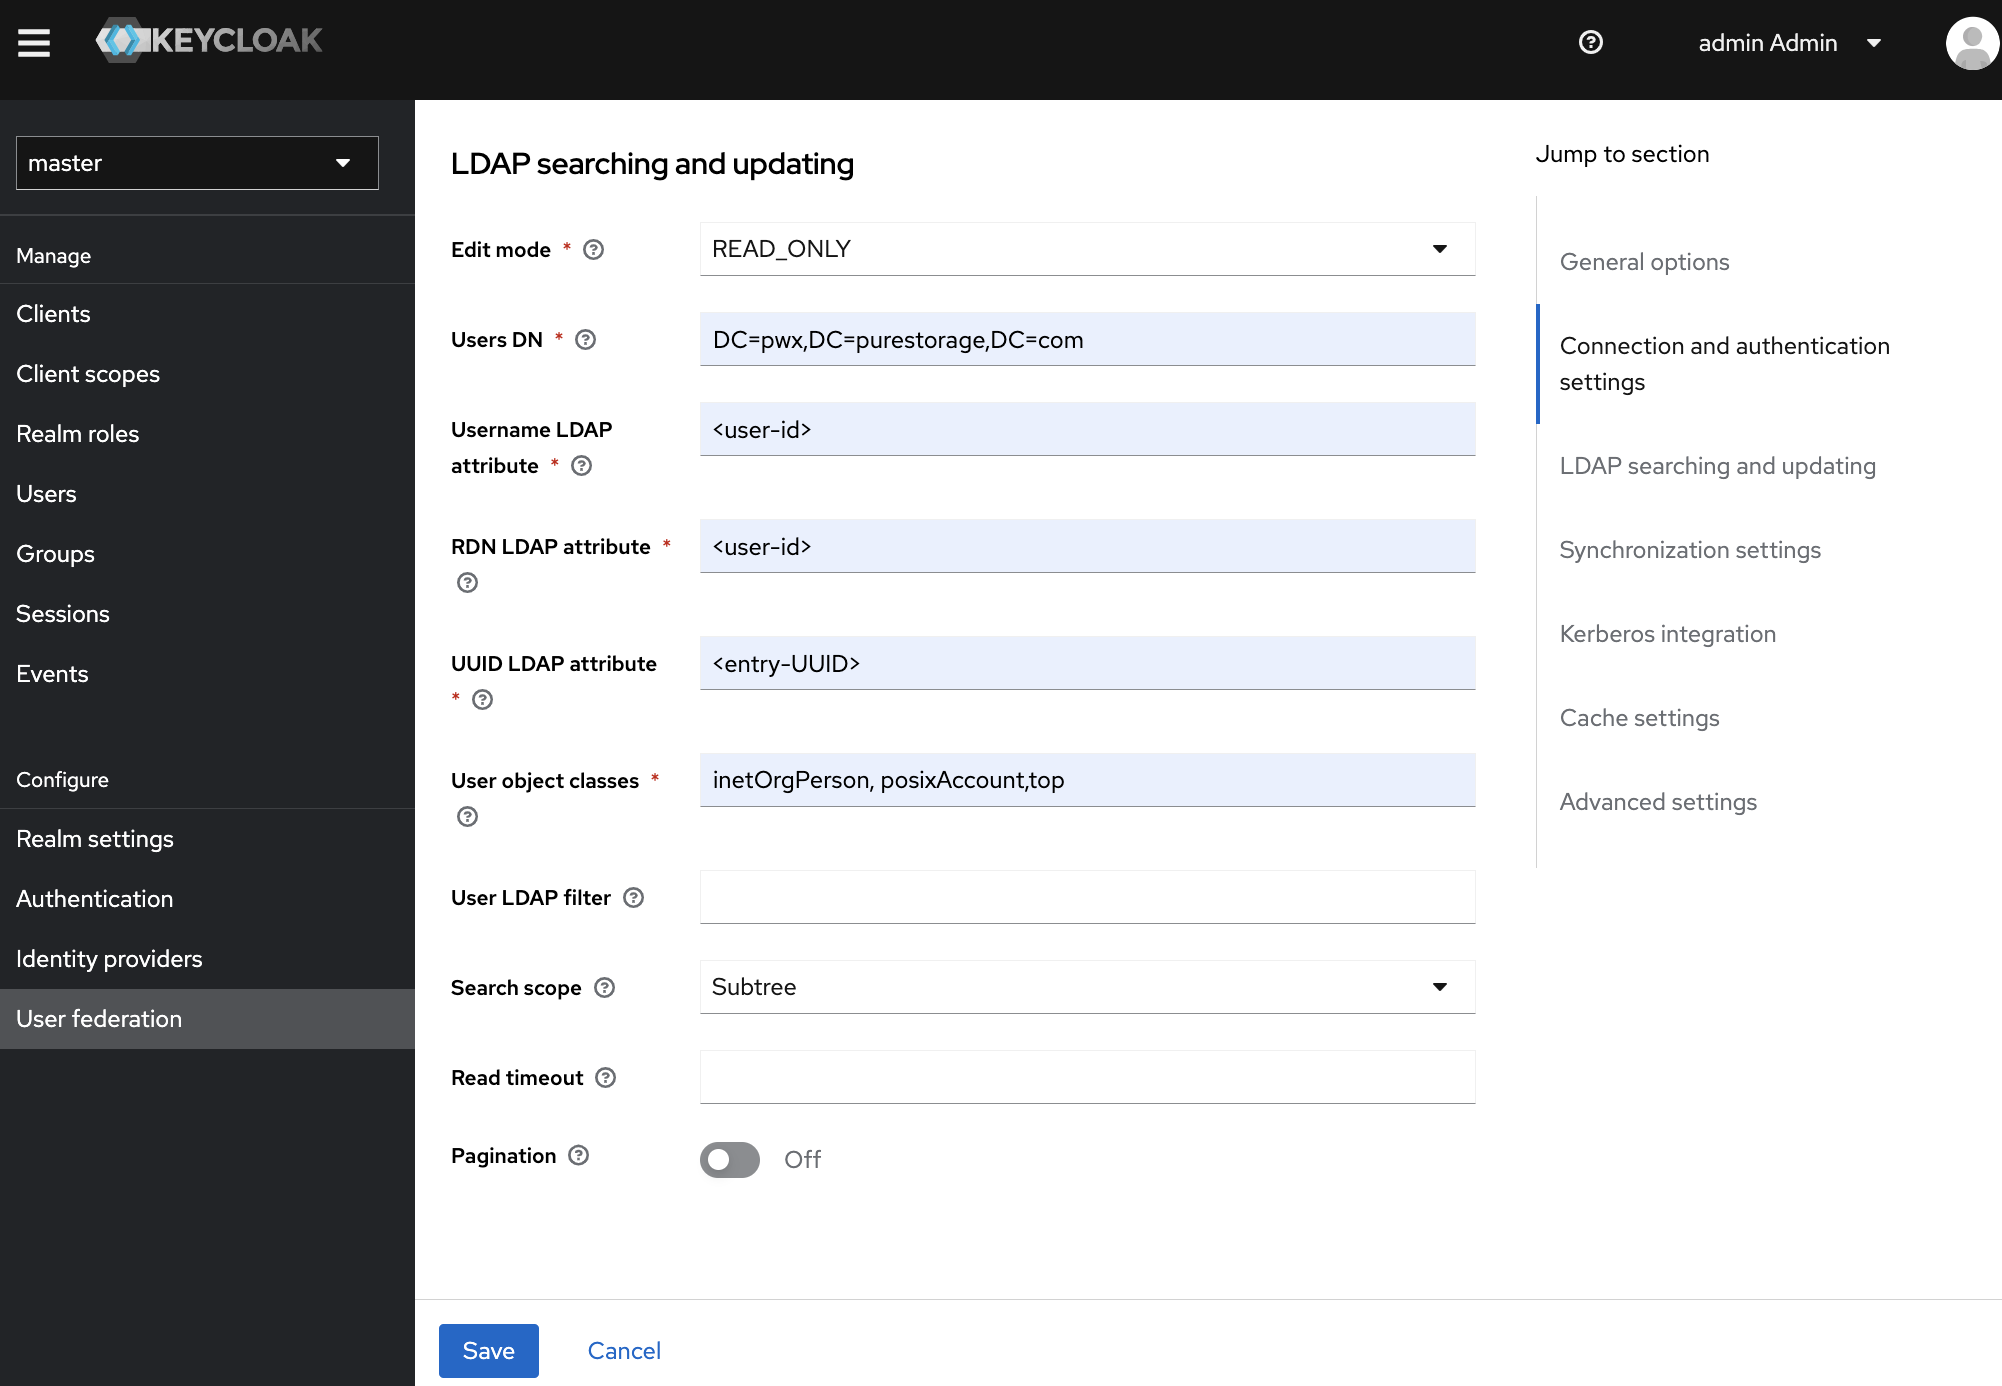
LDAP Searching and Updating
- Edit mode: select the desired edit mode from the drop-down
- Users DN: enter the DN for the users
- Username LDAP attribute: enter
cn - RDN LDAP attribute: enter
cn - UUID LDAP attribute: enter
objectGUID - User object classes: enter
person, organizationalPerson, user - User LDAP filter: enter any specific filter if required
- Search scope: select
One Level - Read timeout: enter a suitable timeout value (in seconds)
- Pagination: toggle to
Off
-
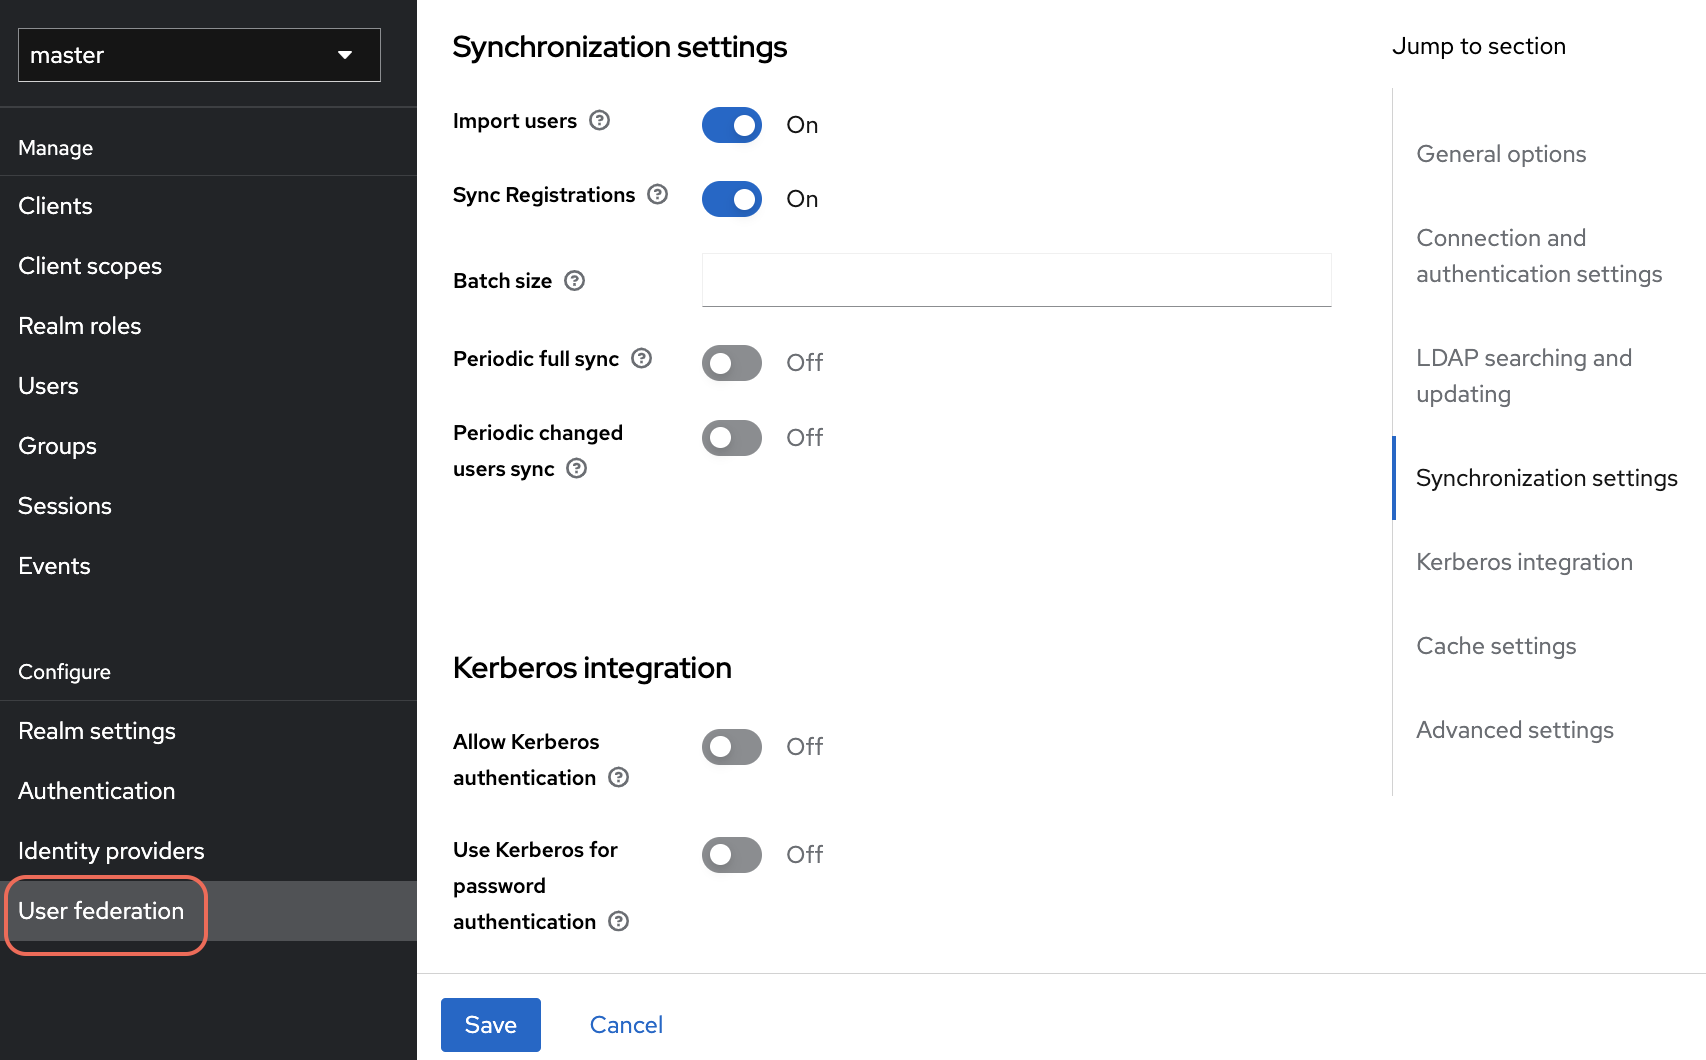
Synchronization Settings
- Import users: toggle to
On - Sync Registrations: toggle to
On - Batch size: enter the batch size for synchronization
- Periodic full sync: toggle to
Off(if not needed) - Periodic changed users sync: toggle to
Off(if not required)
- Import users: toggle to
-
Kerberos Integration:
- Allow Kerberos authentication: toggle to
Off - Use Kerberos for password authentication: toggle to
Off
- Allow Kerberos authentication: toggle to
-
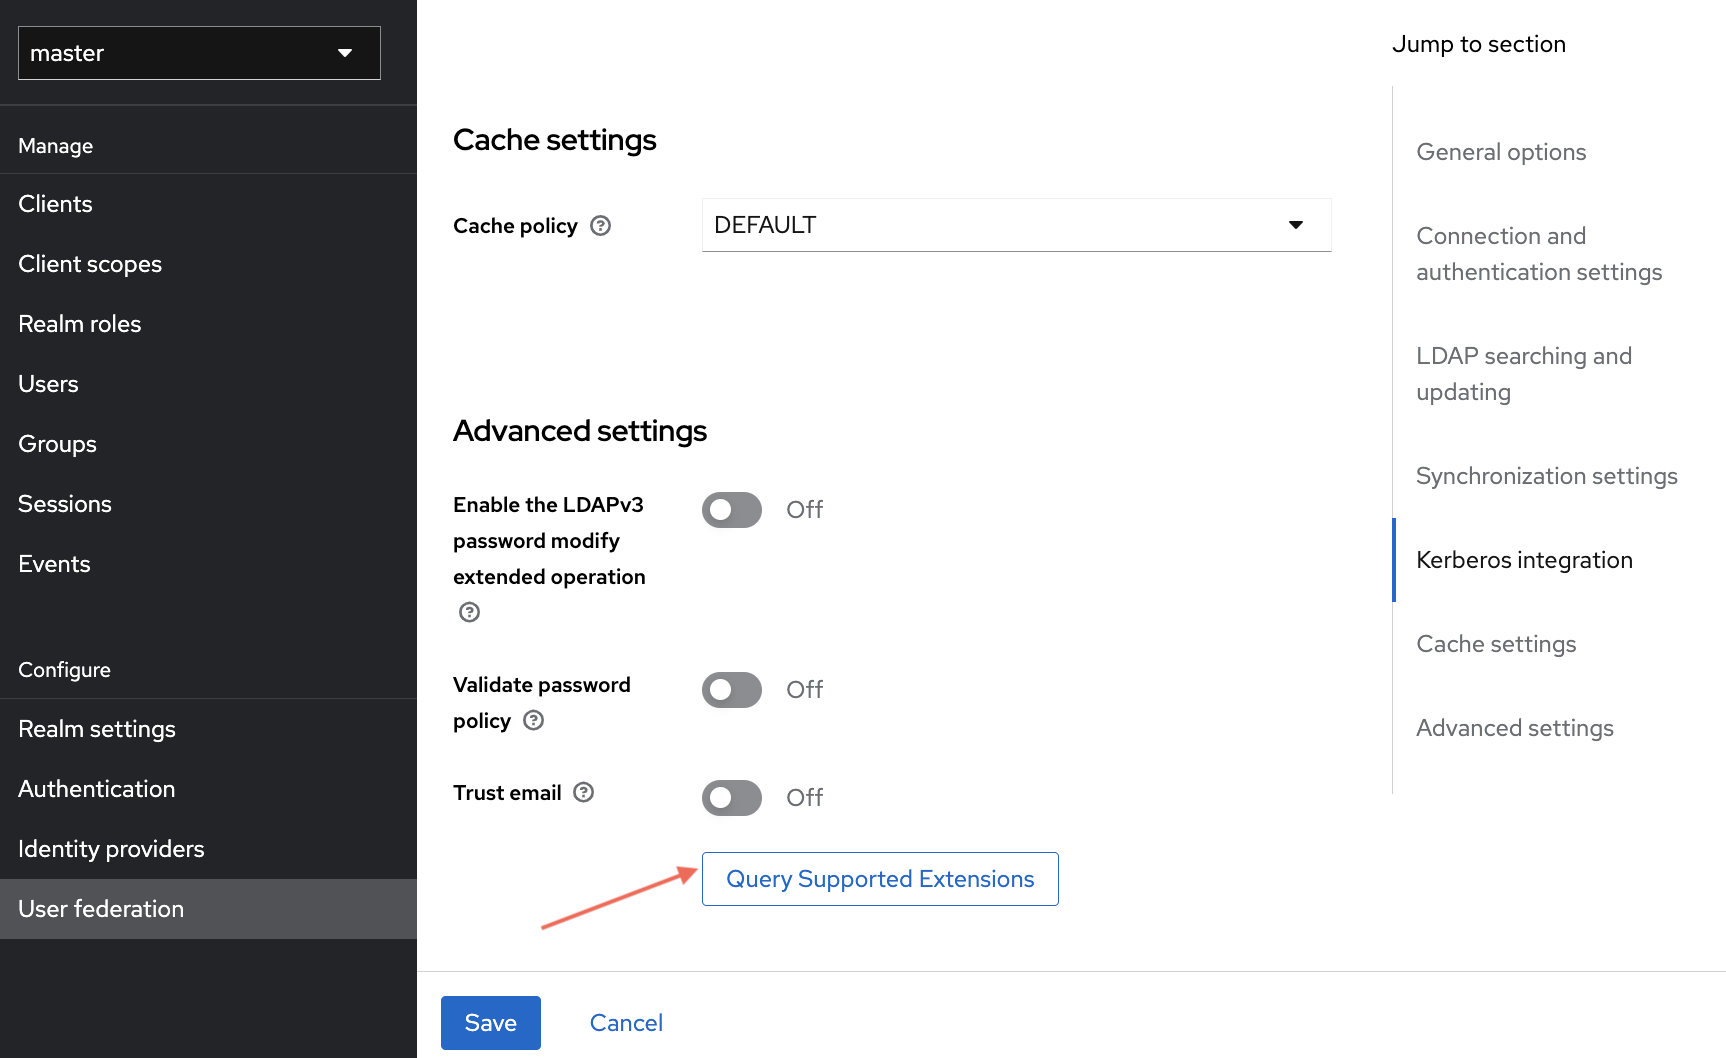
Cache Settings:
- Cache policy: select
DEFAULT
- Cache policy: select
-
Advanced Settings
- Enable the LDAPv3 password modify extended operation: toggle to
Off - Validate password policy: toggle to
Off - Trust email: toggle to
Off
- Enable the LDAPv3 password modify extended operation: toggle to
-
-
Now click Query Supported Extensions to retrieve any supported LDAP extensions.
-
Finally, click Save to integrate your Active Directory users with Portworx Backup Keycloak.
This step successfully integrates Active Directory with Keycloak, establishing a connection between Active Directory and Portworx Backup Keycloak.
Sync the AD users
To sync the Active Directory users with Portworx Backup Keycloak:
-
Navigate back to left navigation pane of Portworx Backup Keycloak, under Configure click User Federation.
-
Under the Actions, click on Sync all users to import users from Active Directory to Portworx Backup Keycloak.
-
Navigate to the users to view the synced users from AD.

After the users get synced with Keycloak, you can view all the users created in Active Directory in the Portworx Backup Keycloak web console.
Sync the AD groups
-
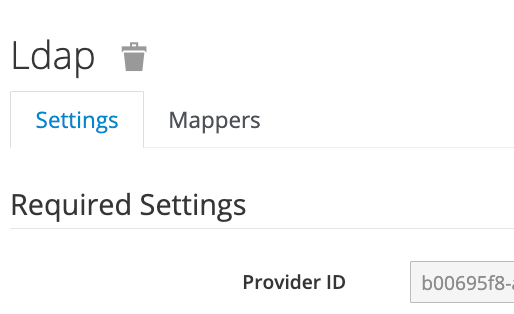
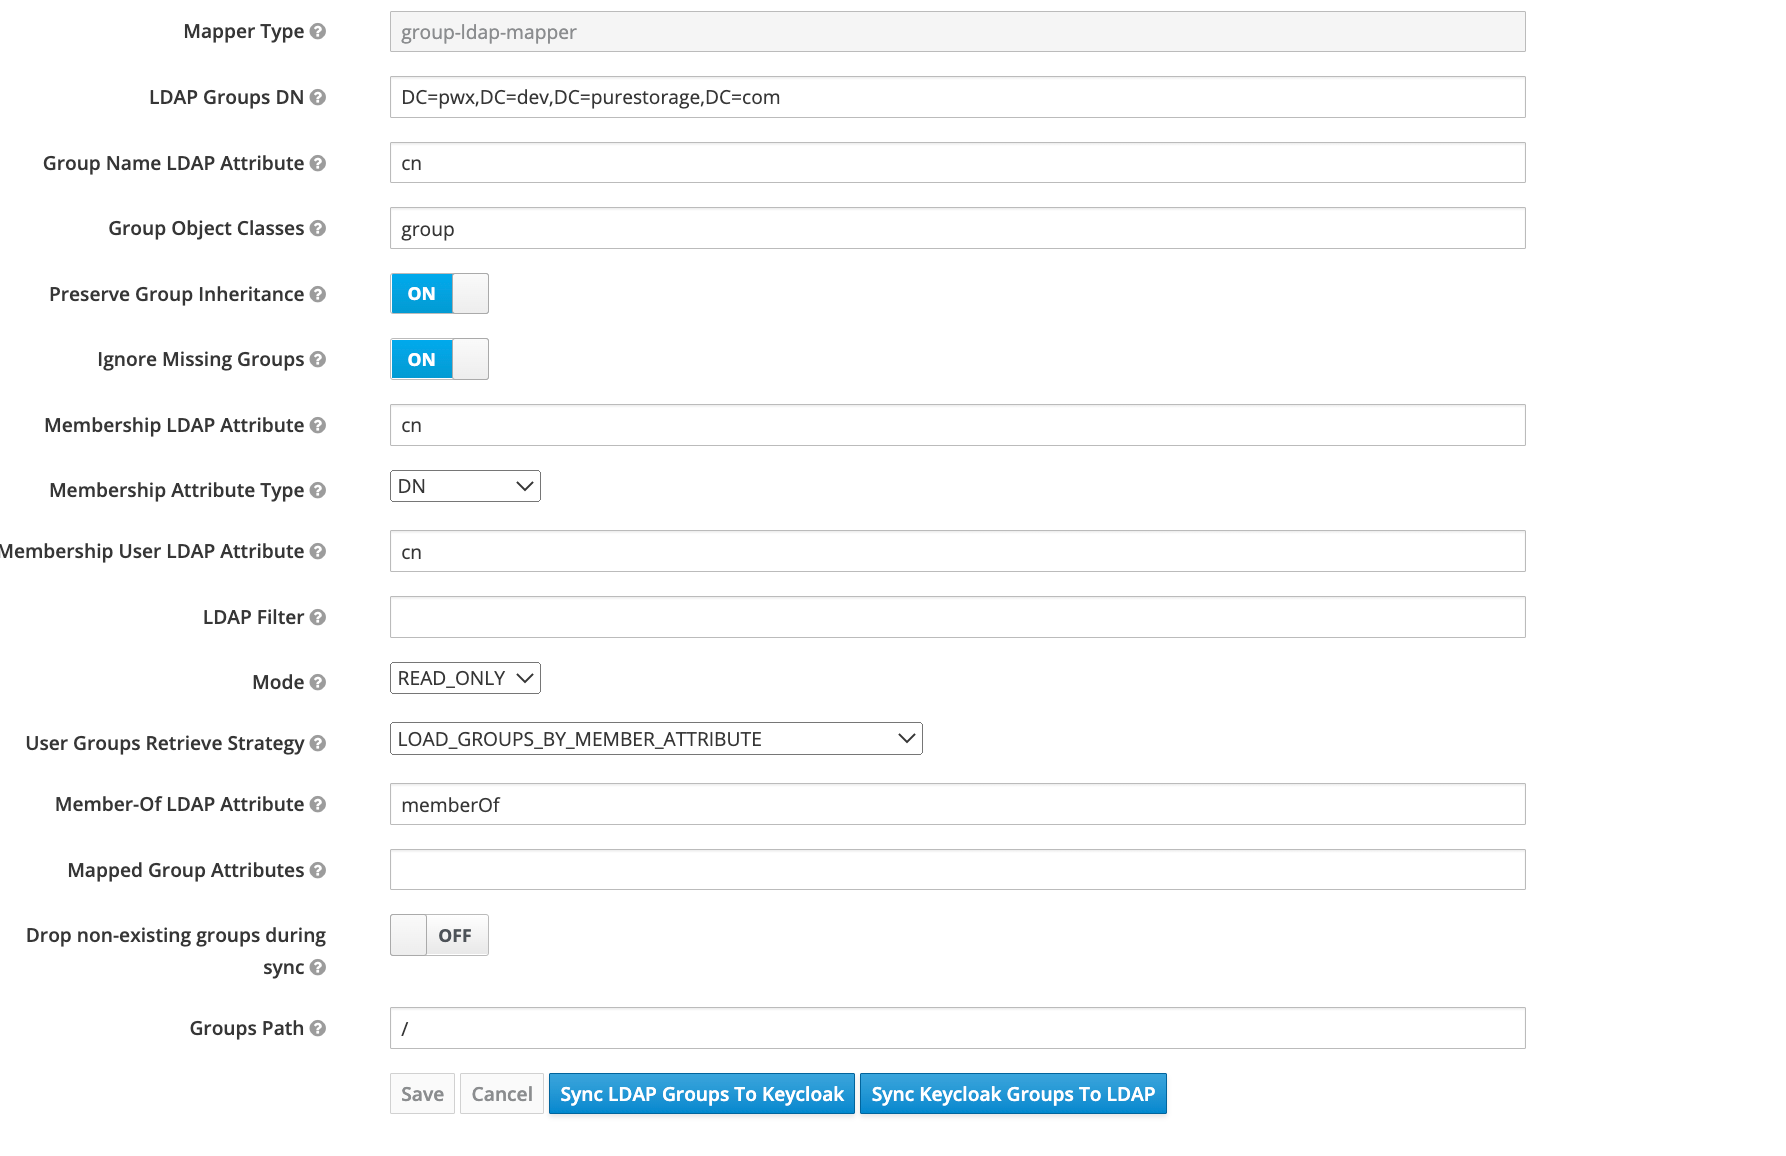
Click the LDAP that you just created. At the top, you can see the mapper.
-
Name: any name of your choice
-
Mapper Type: group_ldap_mapper
-
LDAP Groups DN: tree top where all the groups are listed. This can be obtained from the properties of the Domain name and inside Attribute Editor
note- The LDAP Groups DN is the top-level path in Active Directory where your groups are listed. For example, if your AD domain is
corp.example.com, the Groups DN would beDC=corp,DC=example,DC=com. Obtain the exact value from the Attribute Editor in your AD server. - Create groups directly in the root path (for example, under
corp.example.com) rather than under the Users organizational unit for proper group synchronization.
- The LDAP Groups DN is the top-level path in Active Directory where your groups are listed. For example, if your AD domain is
-
-
Provide other details and sync all groups.
After the user groups get synced with Keycloak, you can view all the user groups created in Active Directory in the Portworx Backup Keycloak web console.