Integrate External Keycloak
Prerequisites
-
Administrator privileges for Portworx Backup Keycloak web console
-
External Keycloak (Portworx Backup Keycloak is referred to as internal Keycloak here) deployment on any Kubernetes server or on a standalone VM
Workflow
Configure Portworx Backup Keycloak
-
Access Portworx Backup Keycloak web console with the following URL:
http://NODE_IP:NODE_PORT/auth/Refer Configure access to web console topic for more information.
-
Log-in with valid and active user credentials.
-
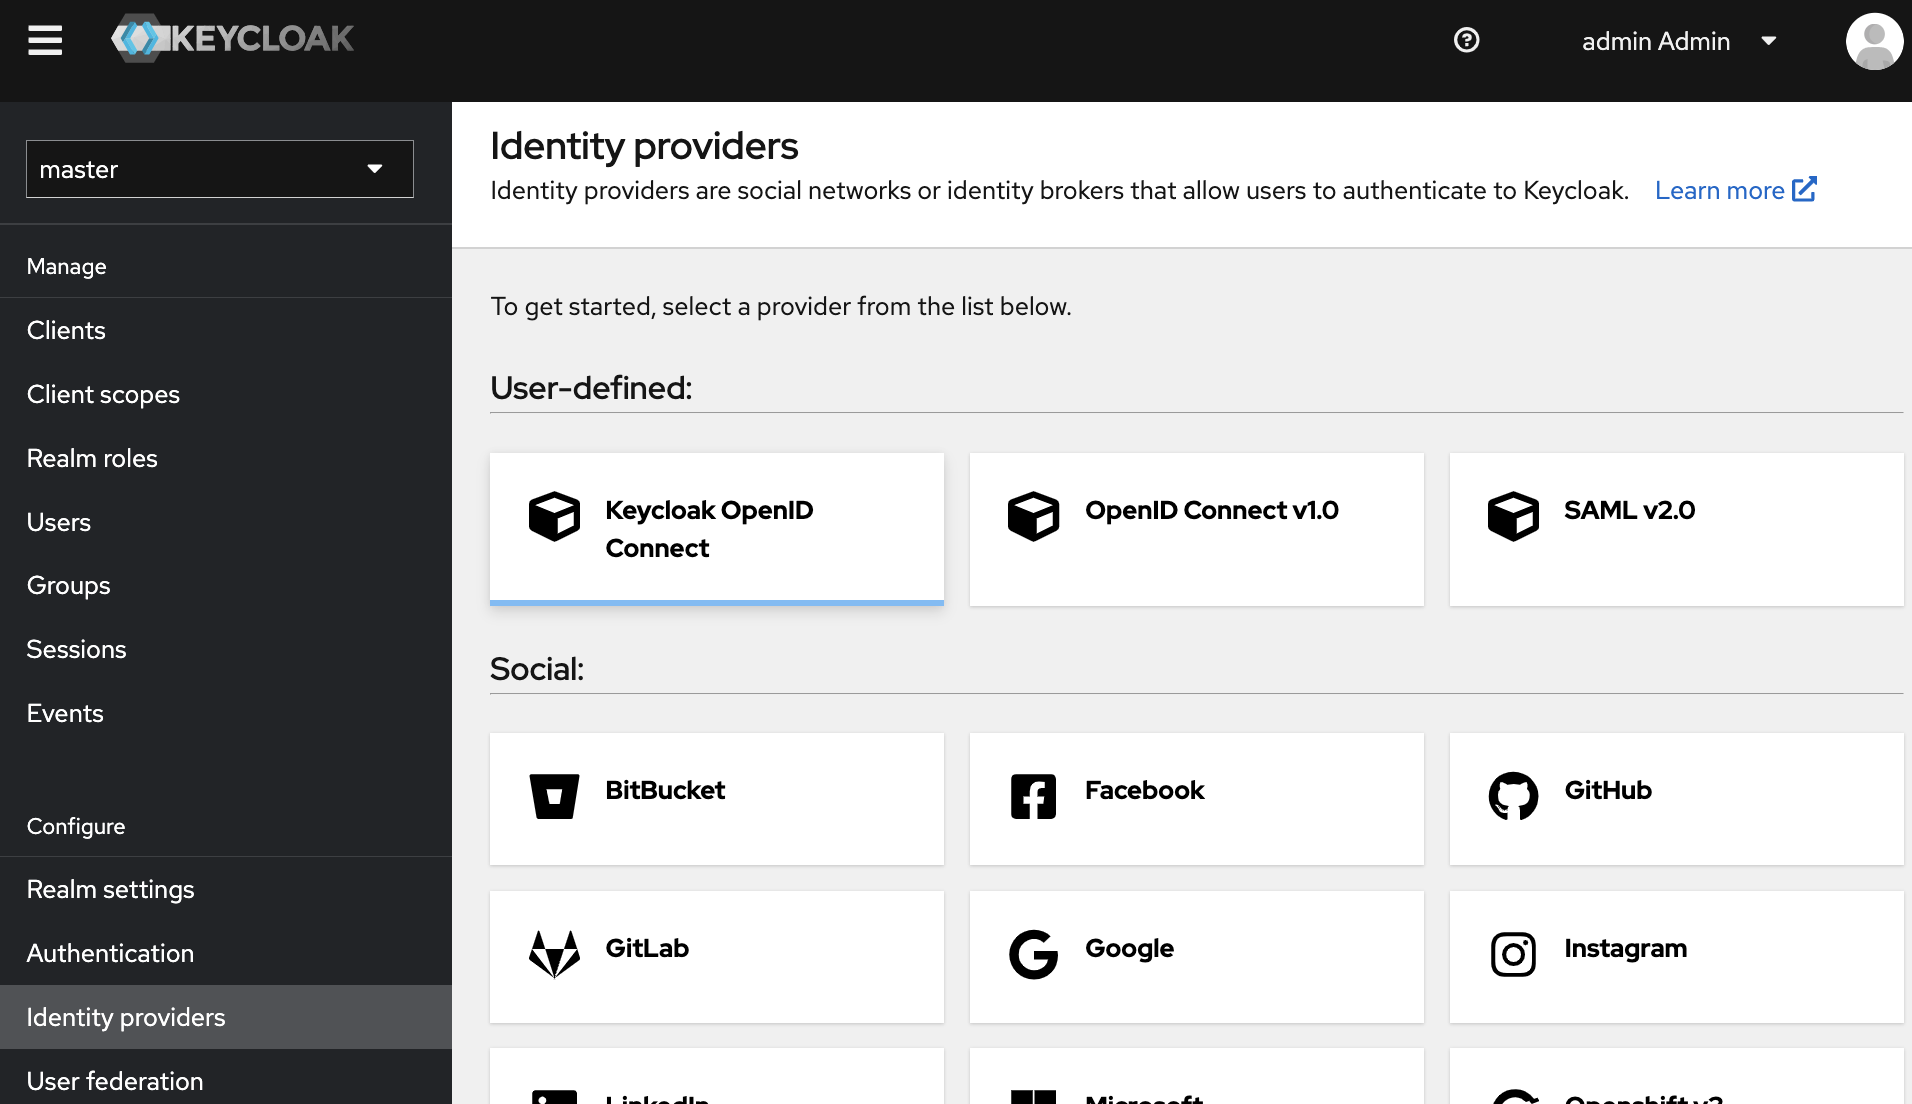
In the left navigation pane of home page, under Configure click Identity Providers and then select Keycloak OpenID Connect under User-defined:.

-
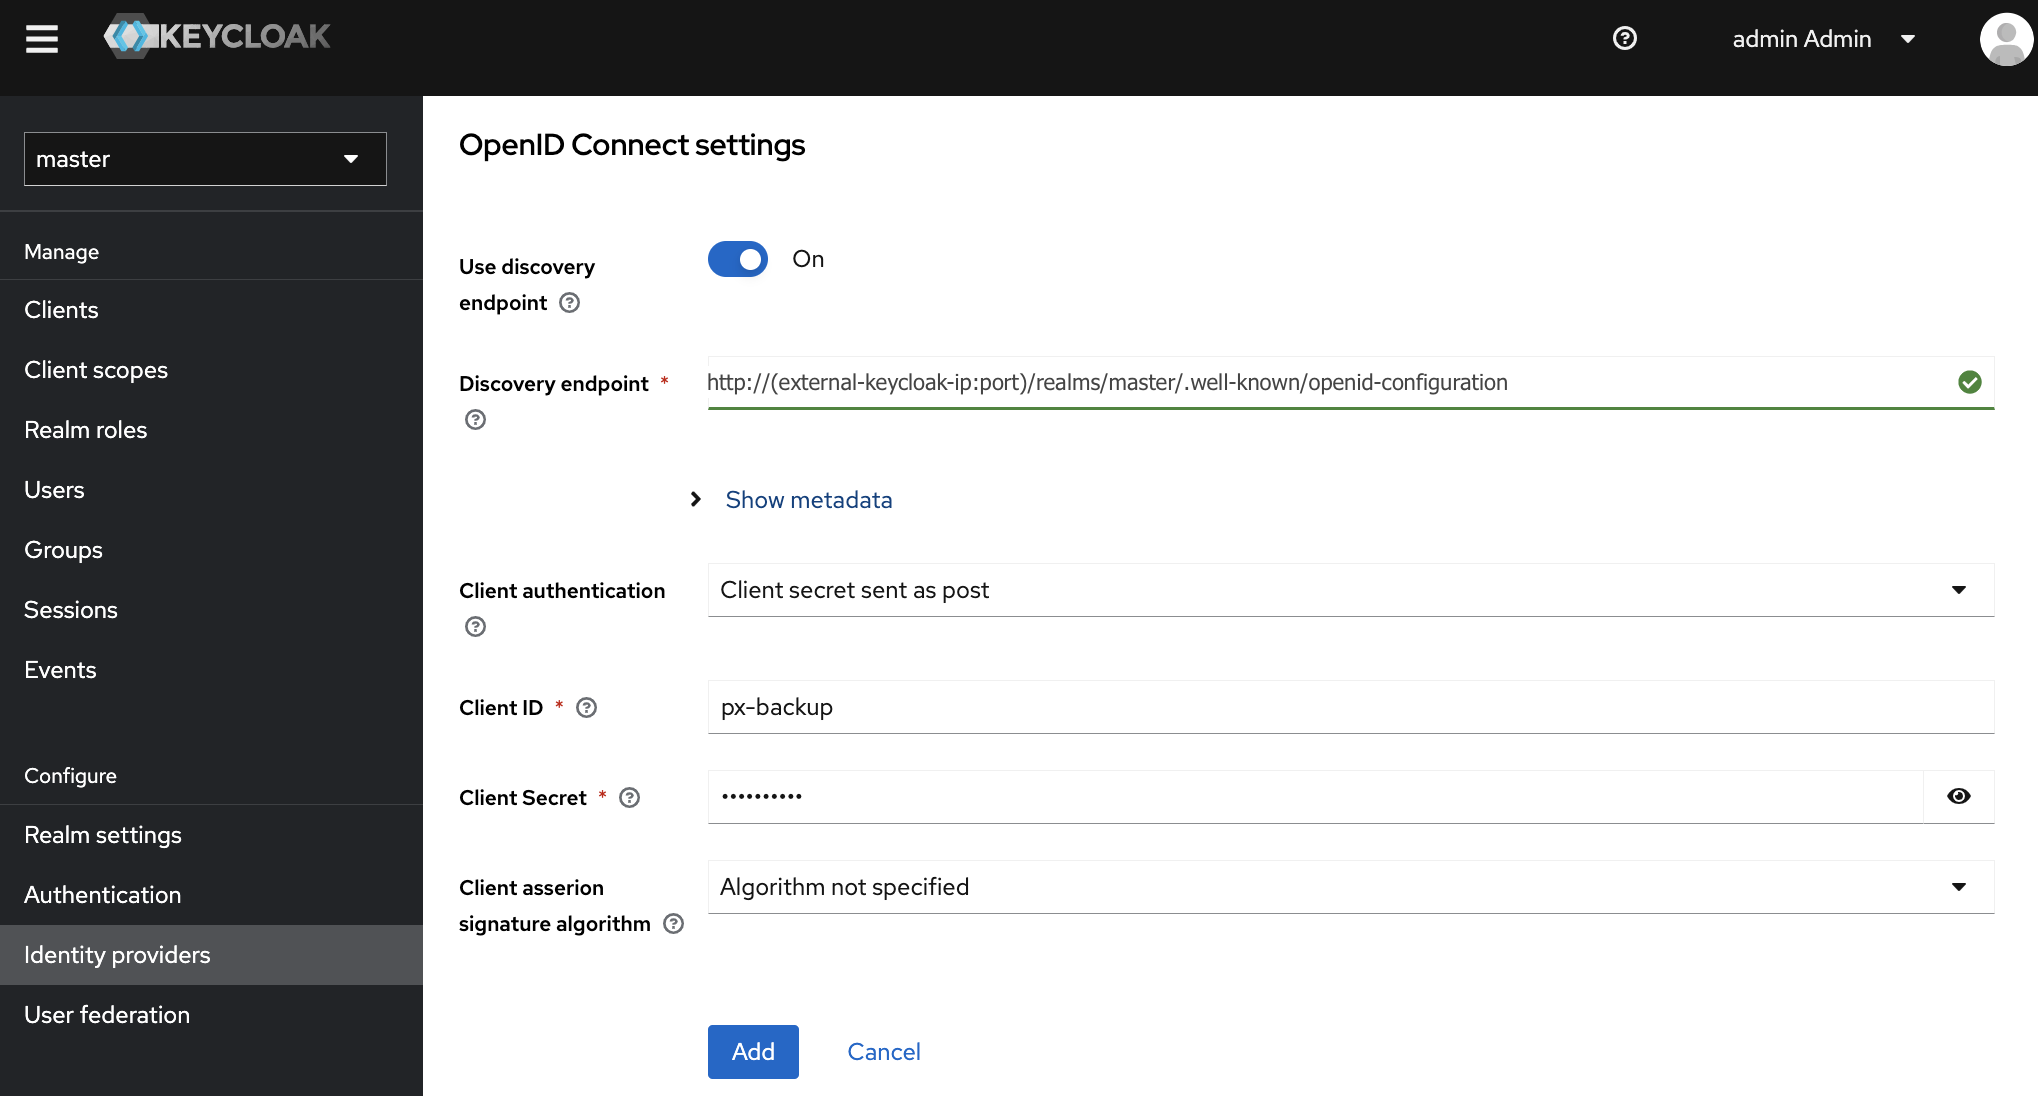
In the Add Keycloak OpenID Connect to Identity Providers page, provide the required information for the following fields:.


-
Update the below info and then click Add.
- Alias: name of your choice
- Discovery endpoint:
http://(external-keycloak-ip:port)/realms/master/.well-known/openid-configurationIf you have configured external Keycloak as one of your Portworx Backup cluster’s Keycloak, the Discovery endpoint will be of the following format:http://(external-keycloak-ip:port)/auth/realms/master/.well-known/openid-configuration - Client ID: provide the name which you have given in the external Keycloak
- Client Secret: paste the secret which you have copied from the external Keycloak
- Client ID: px-backup
- Client Secret: enter alpha-numeric client secret
-
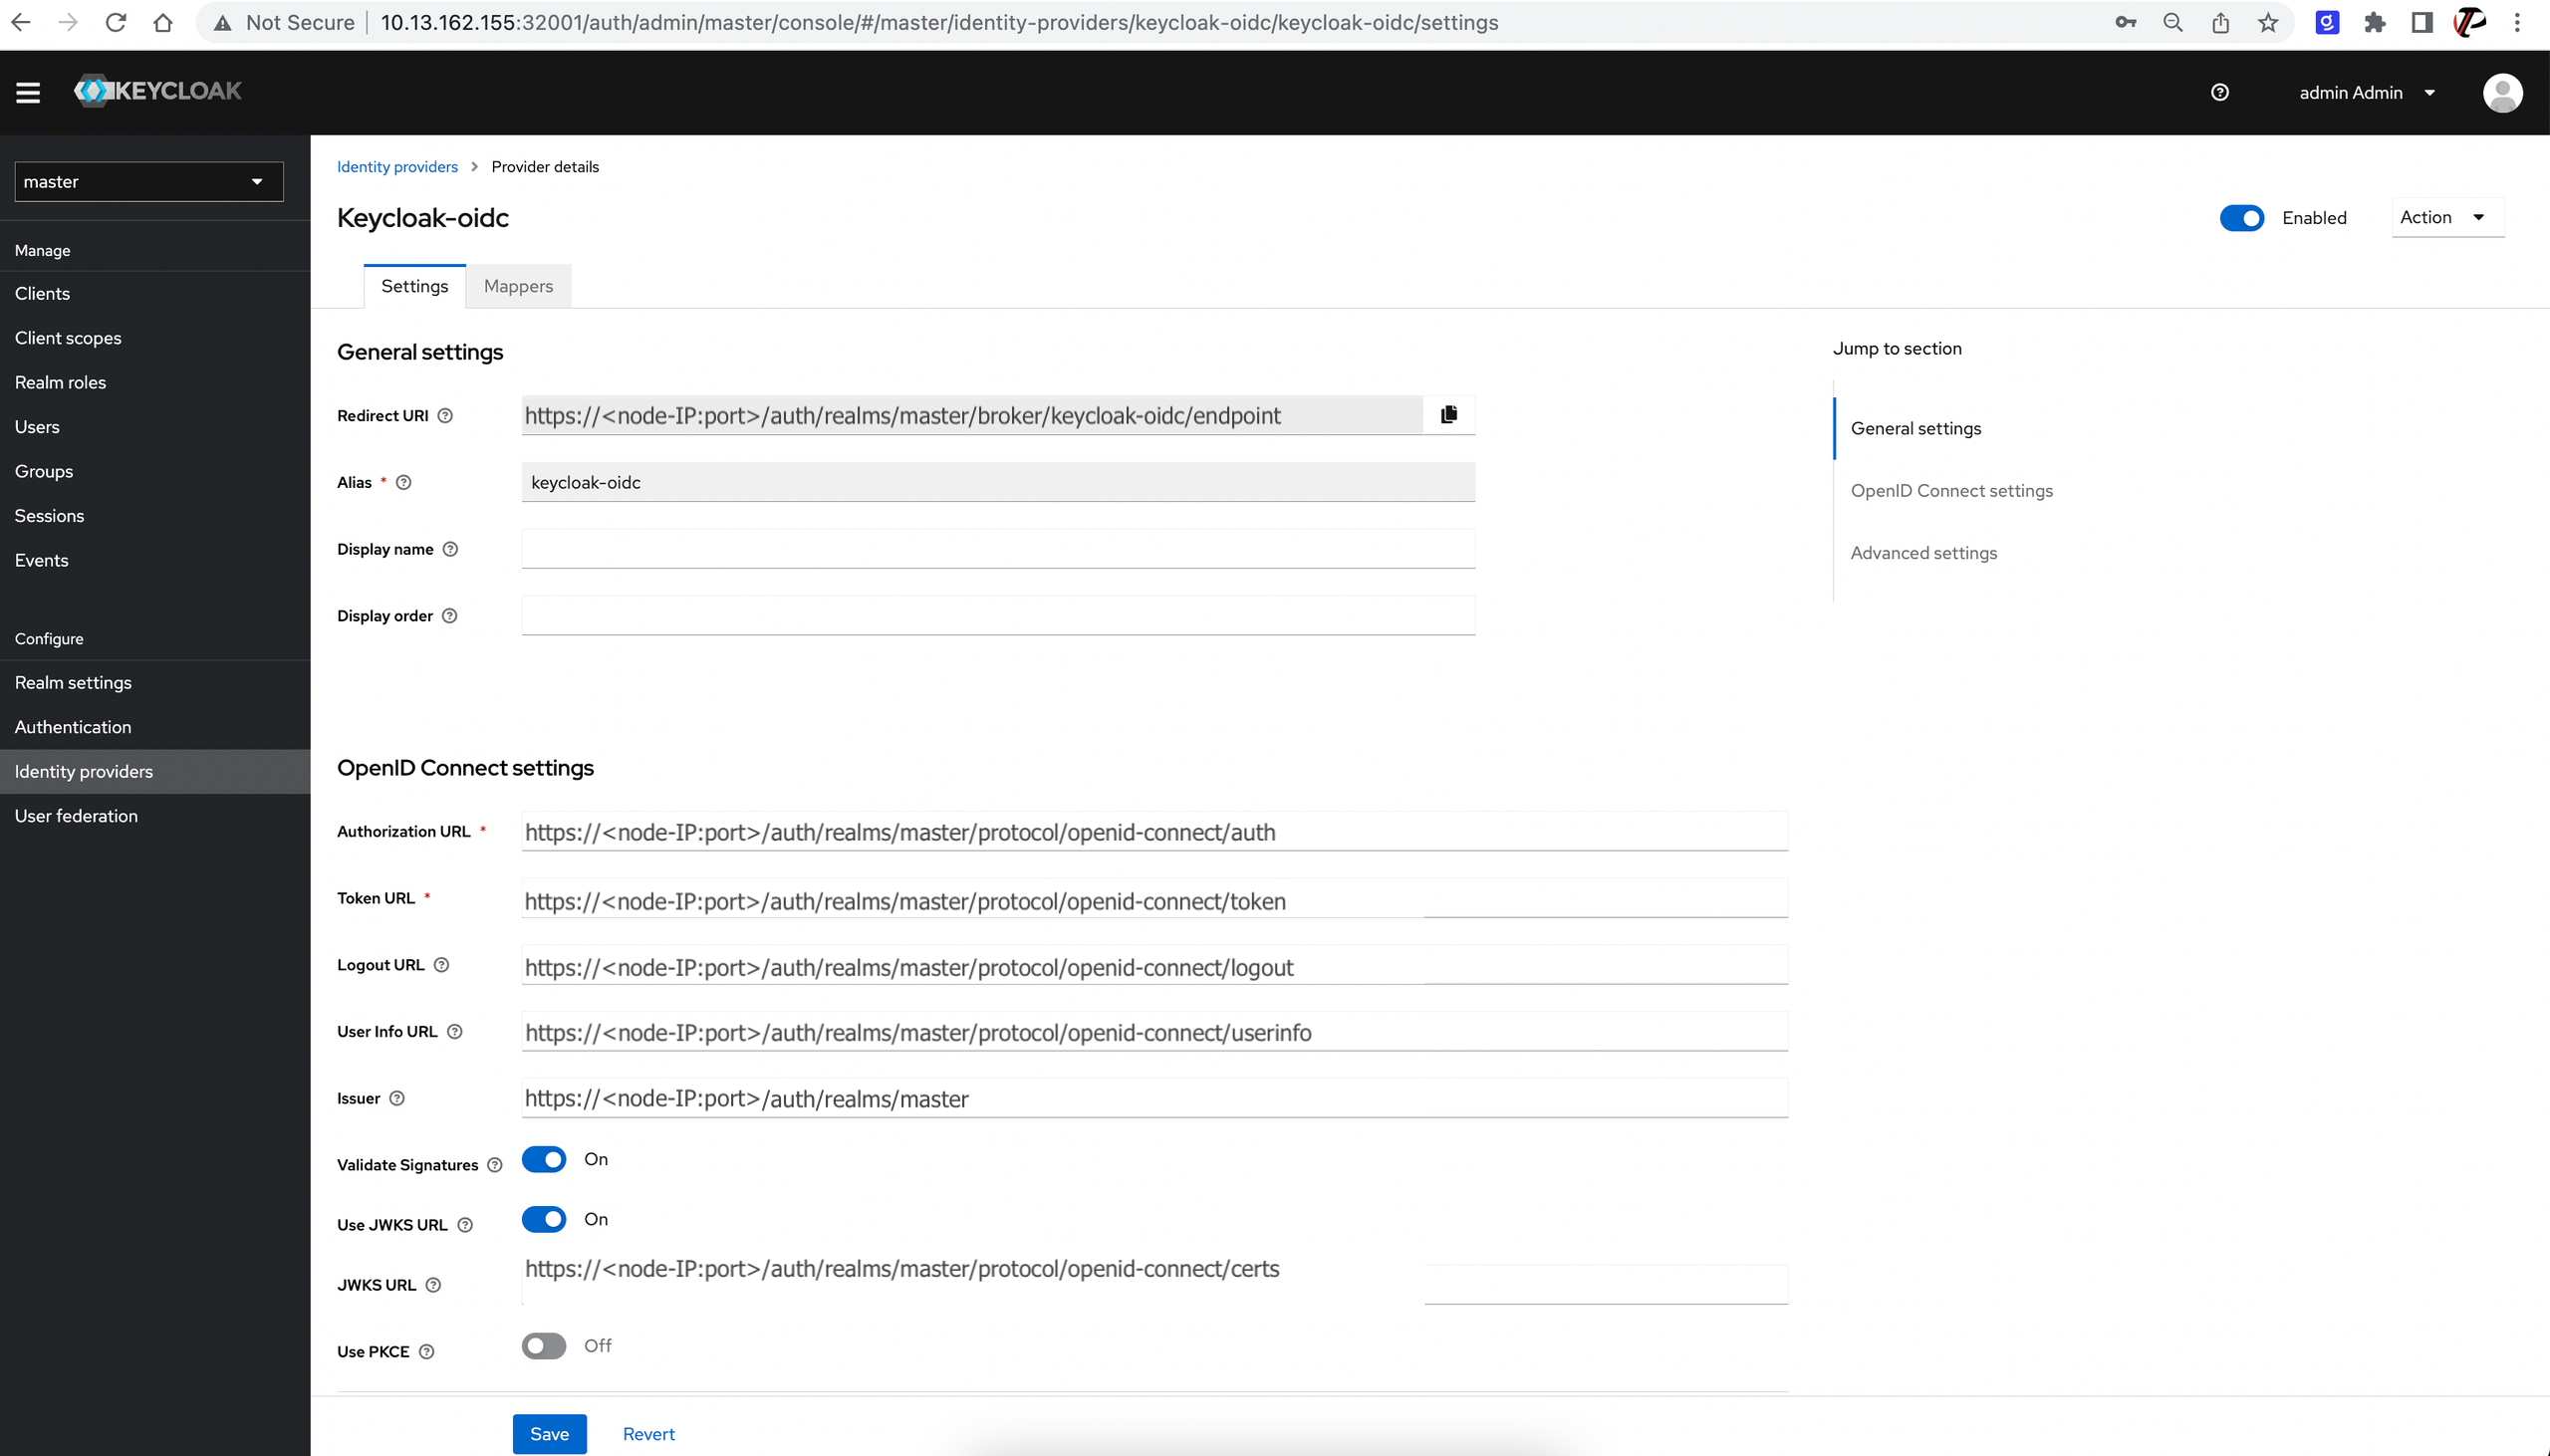
Configure Keycloak OIDC as shown in the following illustration:

-
Now access Portworx Backup web console from a different window and click keycloak-oidc under Sign in with your OIDC Provider.
Log-in page redirects you to external Keycloak server and then log-in with the user credentials that you created in external Keycloak server.
-
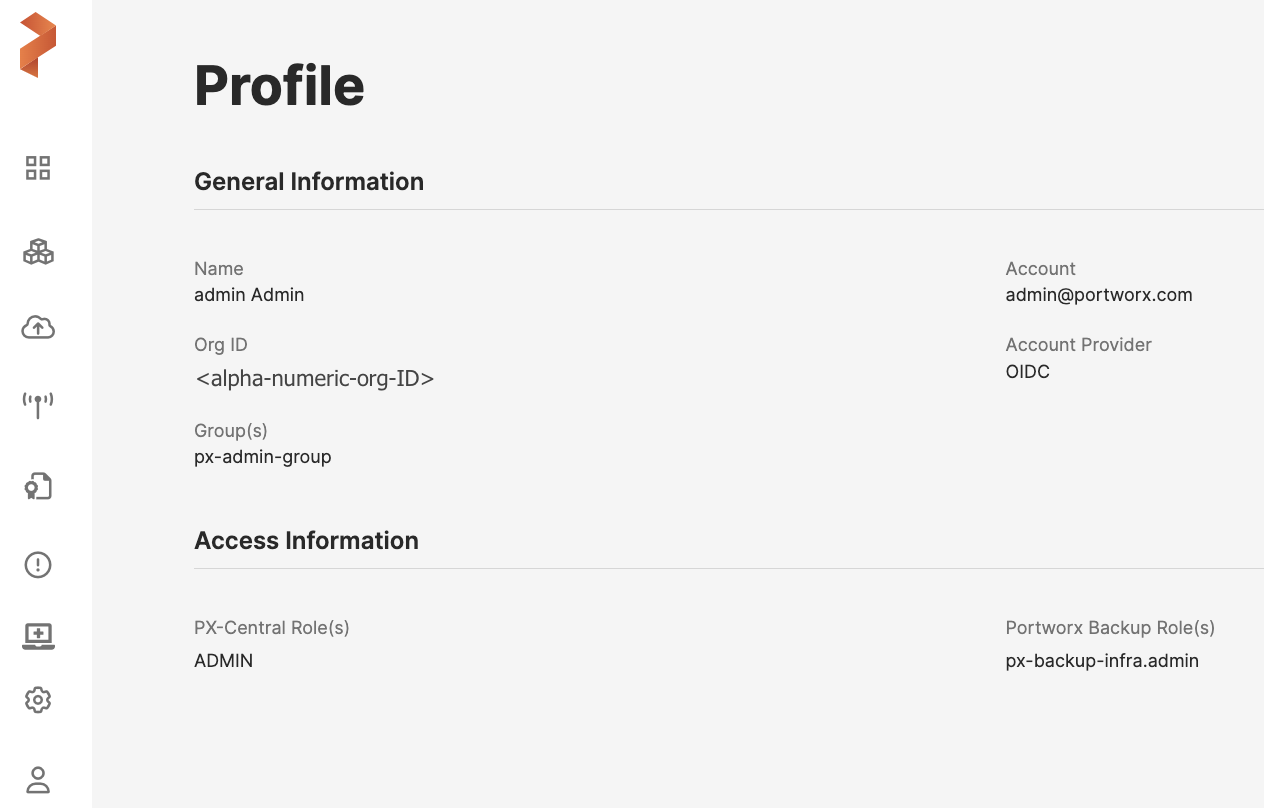
Log in to Portworx Backup web console and verify that the profile section carries accurate information.
