Back up Elasticsearch on Kubernetes
You can use the instructions on this page to create pre and post backup rules with Portworx Backup to take application-consistent backups for Elasticsearch on Kubernetes in production.
The Elasticsearch data directory is used to prevent permanent data loss and is typically located at /user/share/elasticsearch/data inside the Kubernetes Pod. This also enables Portworx Backup to back up and restore the data stored in this location.
Before using this guide, make sure you configure PVCs for elasticsearch-data. Use the following file as an example:
apiVersion: elasticsearch.k8s.elastic.co/v1
kind: Elasticsearch
metadata:
  name: elasticsearch
spec:
  version: 7.7.0
  nodeSets:
  - name: default
    count: 3
    podTemplate:
      metadata:
        labels:
          appname: "elastisearch-app"
      spec:
        containers:
          - name: elasticsearch
            volumeMounts:
            - name: elasticsearch-backups
              mountPath: /usr/share/elasticsearch/backups
        volumes:
        - name: elasticsearch-backups
          persistentVolumeClaim:
            claimName: elasticsearch-backups
    volumeClaimTemplates:
    - metadata:
        name: elasticsearch-data
      spec:
        accessModes:
        - ReadWriteOnce
        resources:
          requests:
            storage: 5Gi
        storageClassName: elastic-pwx-storage-class
    config:
      node.master: true
      node.data: true
      node.ingest: true
      node.store.allow_mmap: false
      path.repo: ["/usr/share/elasticsearch/backups"]
Elasticsearch can also create a snapshot repository to store index snapshots produced by the internal snapshot and restore API. For this, the above template uses a Portworx shared volume named elasticsearch-backups to create a shared file system across all Elasticsearch nodes to store the index snapshots.
Installation
Prerequisites
-
The template above cannot be used alone. Follow the prerequisites from the Elastic on Kubernetes operations guide.
-
The rules below use a username
elasticand a password specific to the environment. You need to modify the rule to use your username and password for your environment. -
You should mount a PVC to the Elasticsearch data directory. This is typically located at
/user/share/elasticsearch/data.
If your Elasticsearch version is 7.7 and lower, you need to create pre-exec and post-exec rules to back up Elasticsearch data.
Create rules for Elasticsearch
Create rules for Elasticsearch that run both before and after the backup operation runs:
Create a pre-exec backup rule for Elasticsearch
For the pre-backup rule, create a rule that performs multiple actions.
- Freeze the index
- Flush all indexes in Elasticsearch
- Create an Elasticsearch index snapshot of all indexes
Create the rule
-
From the home page, navigate to Settings > Rules >Add New.
-
In the Add Rule window, provide the following details:
-
Rule name: add a name for your backup rule
-
Pod Selector: add the following app label
appname=elasticsearch-app -
Container: This field is mandatory if you're using mTLS with the Linkerd service mesh, provide the container name. Otherwise, leave this field blank.
-
Action: add the following action
curl -X POST -u "elastic:<password>" -k "https://elasticsearch-es-http:9200/customer/_freeze&pretty"-
Add the following additional action:
curl -X PUT -u "elastic:<password>" -k "https://elasticsearch-es-http:9200/all/_flush&pretty" -
Add the following additional action:
curl -X PUT -u "elastic:<password>" -k "https://elasticsearch-es-http:9200/_snapshot/es_backups/%3Csnapshot-$(uuidgen)-%7Bnow%2Fd%7D%3E?wait_for_completion=true&pretty"
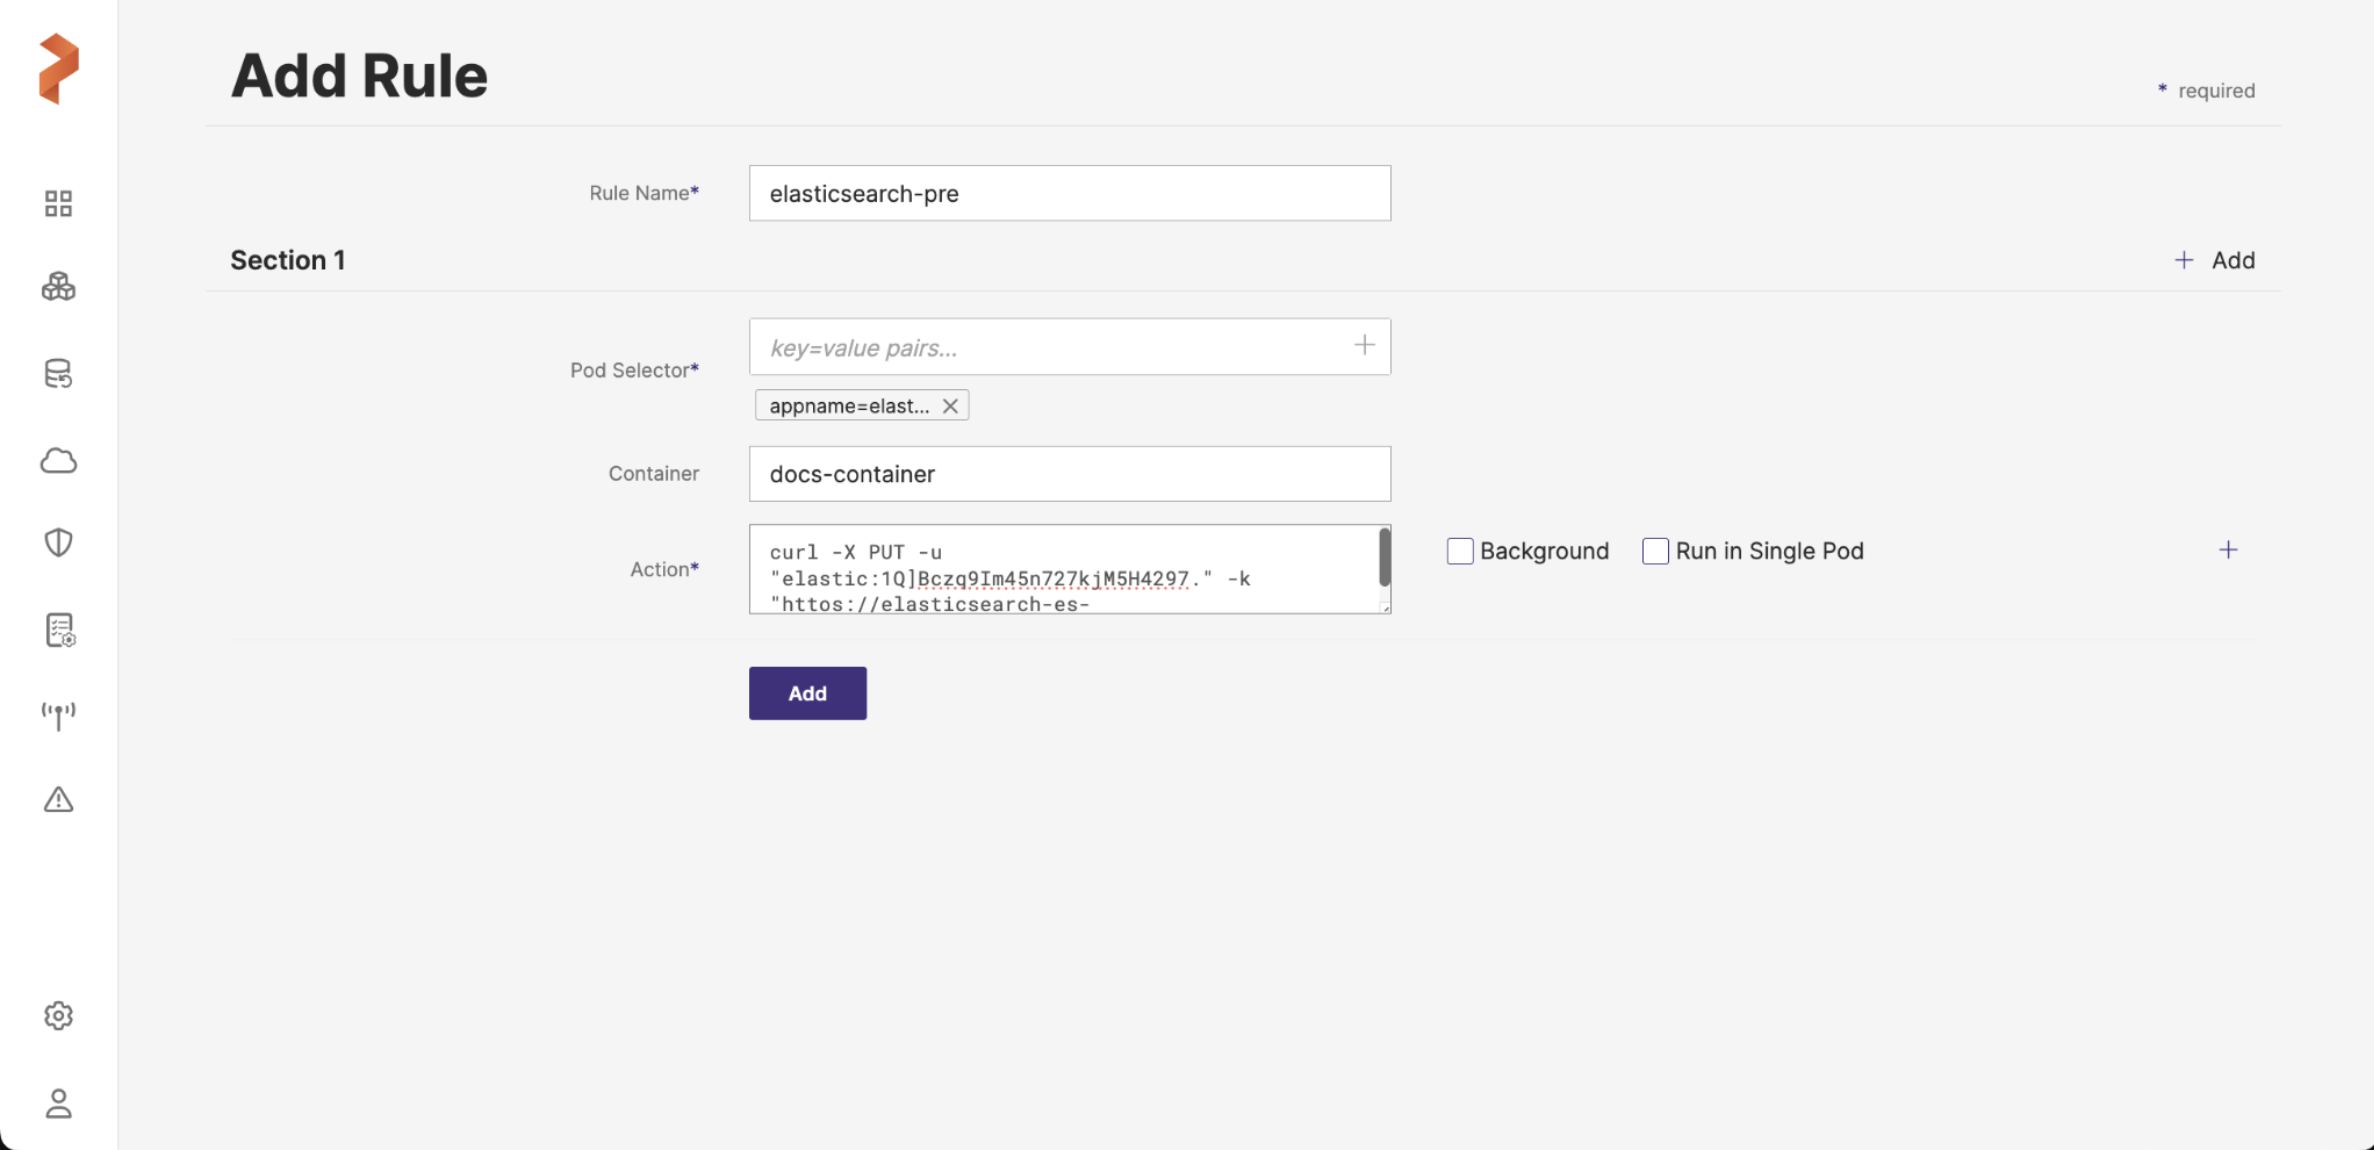
-
-
Click Add.
Create a post-exec backup rule for Elasticsearch
Performing the _freeze and _flush operations on your index before calling the snapshot API ensures flexible and accurate restores by making sure the database isn't currently being written into.
Since you performed a _freeze operation when you created a backup, you must create a post-exec rule to perform the _unfreeze operation. The steps below create a post-exec rule that runs _unfreeze on the customer index:
-
From the home page, navigate to Settings >Rules > Add New.
-
In the Add Rule window, provide the following details:
-
Rule name: add a name for your backup rule
-
Pod Selector: add the following app label
appname=elasticsearch-app -
Container: This field is mandatory if you're using mTLS with the Linkerd service mesh, provide the container name. Otherwise, leave this field blank.
-
Action: add the following action
curl -X POST -u "elastic:<password>" -k "https://elasticsearch-es-http:9200/customer/_unfreeze&pretty"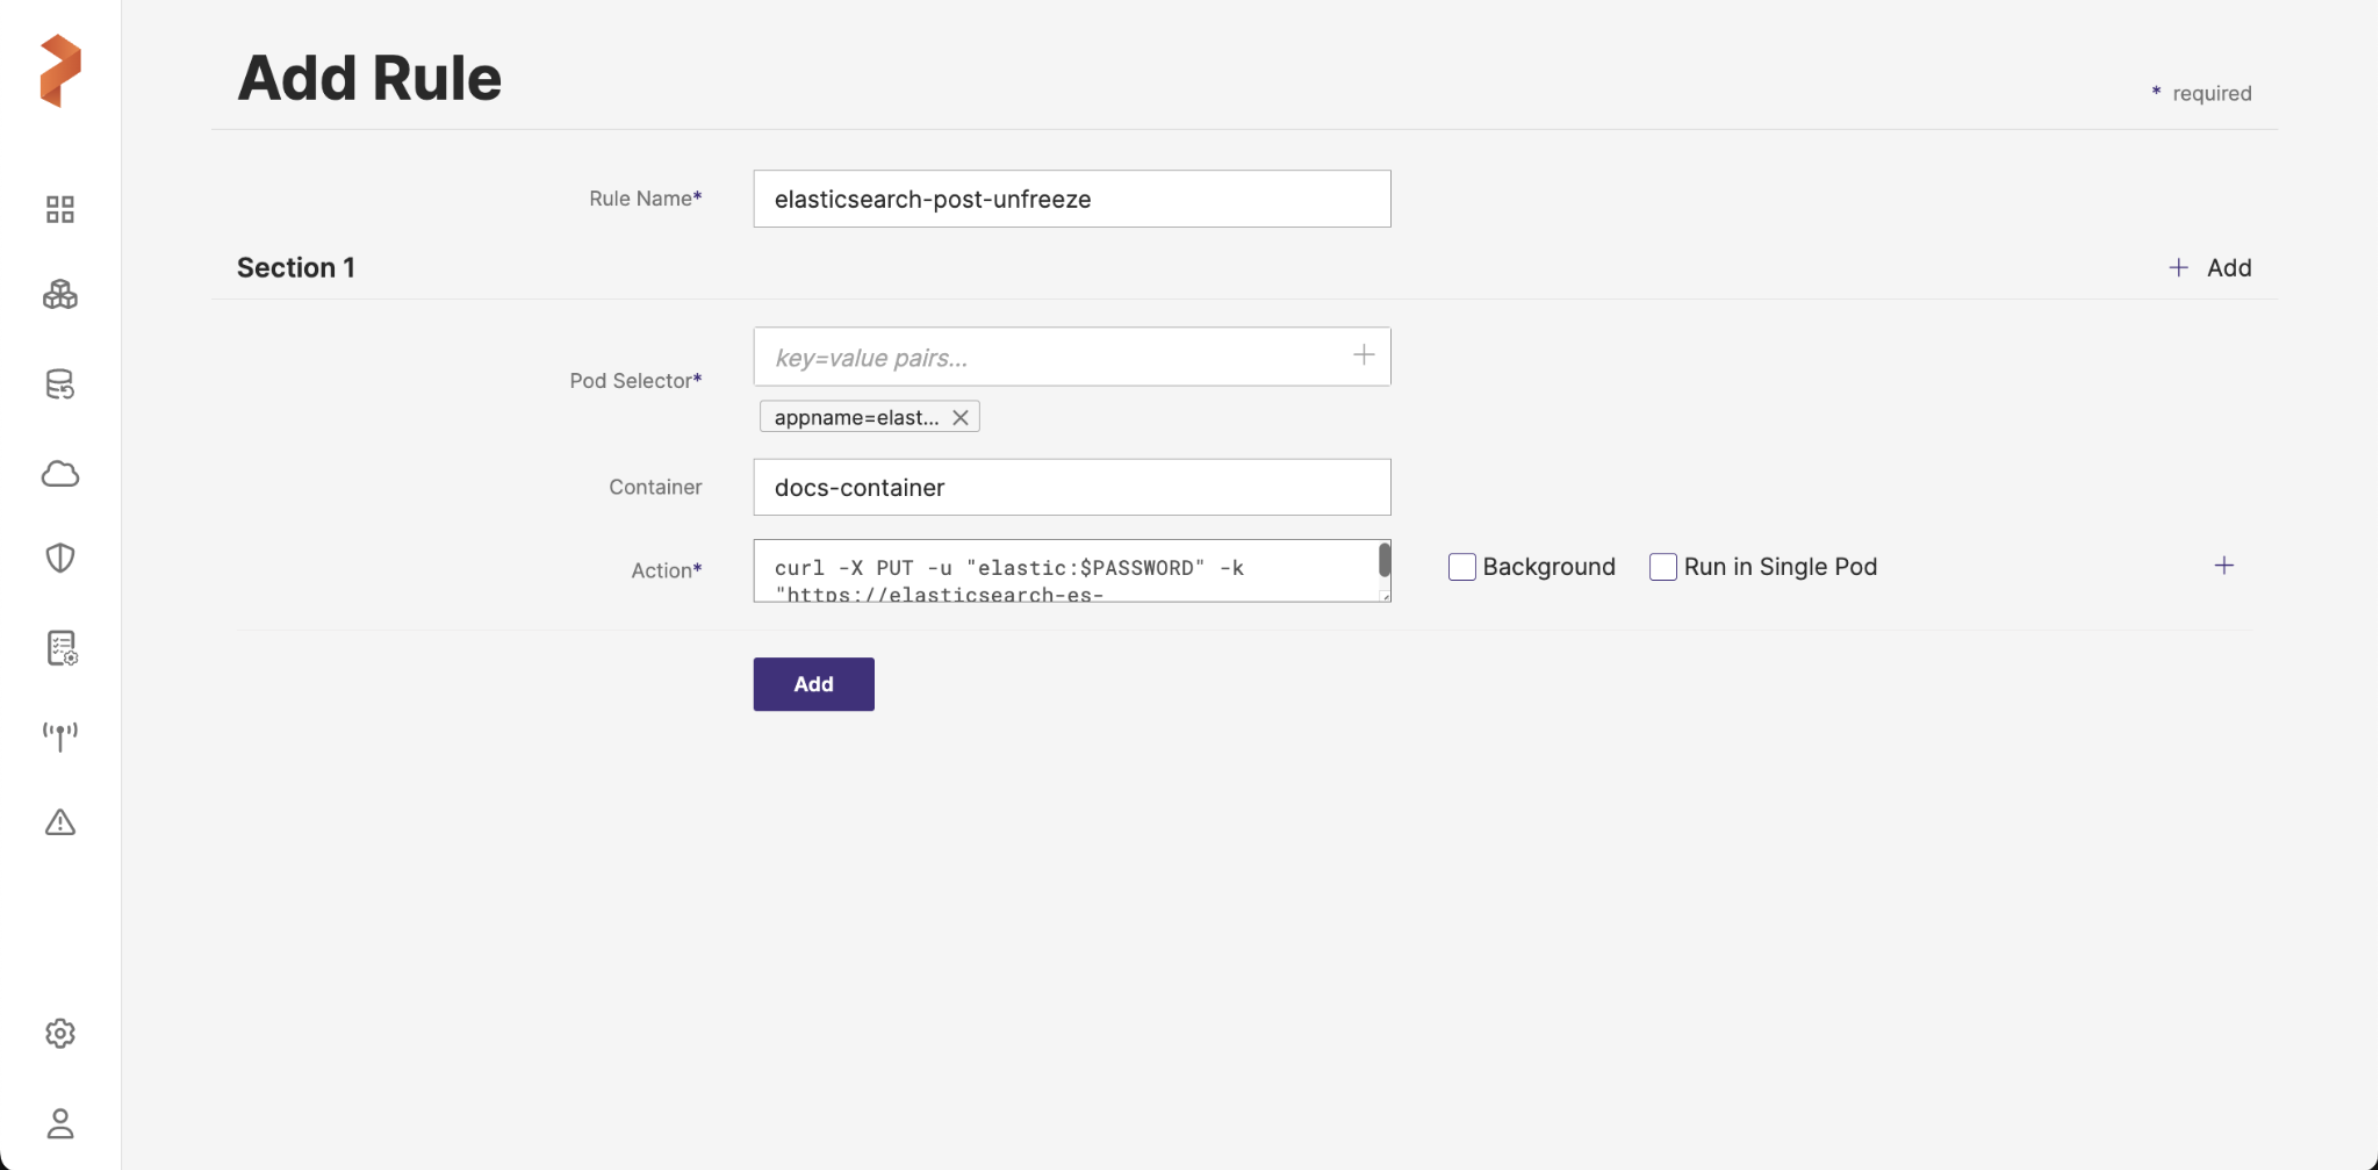
-
-
Click Add.
If you deployed Elastic Stack using the elastic operator, ensure that you installed the CRDs and the required operator for Elastic Stack on the destination cluster as well. Also, when you back up and restore, ensure that you back up the elastic operator along with the elastic Namespace.
Associate the pre-exec and post-exec rules with the Elasticsearch backup
-
Create a backup for your Elasticsearch application.
-
Select the rules you created in the steps above from the pre-exec and post-exec dropdown list:
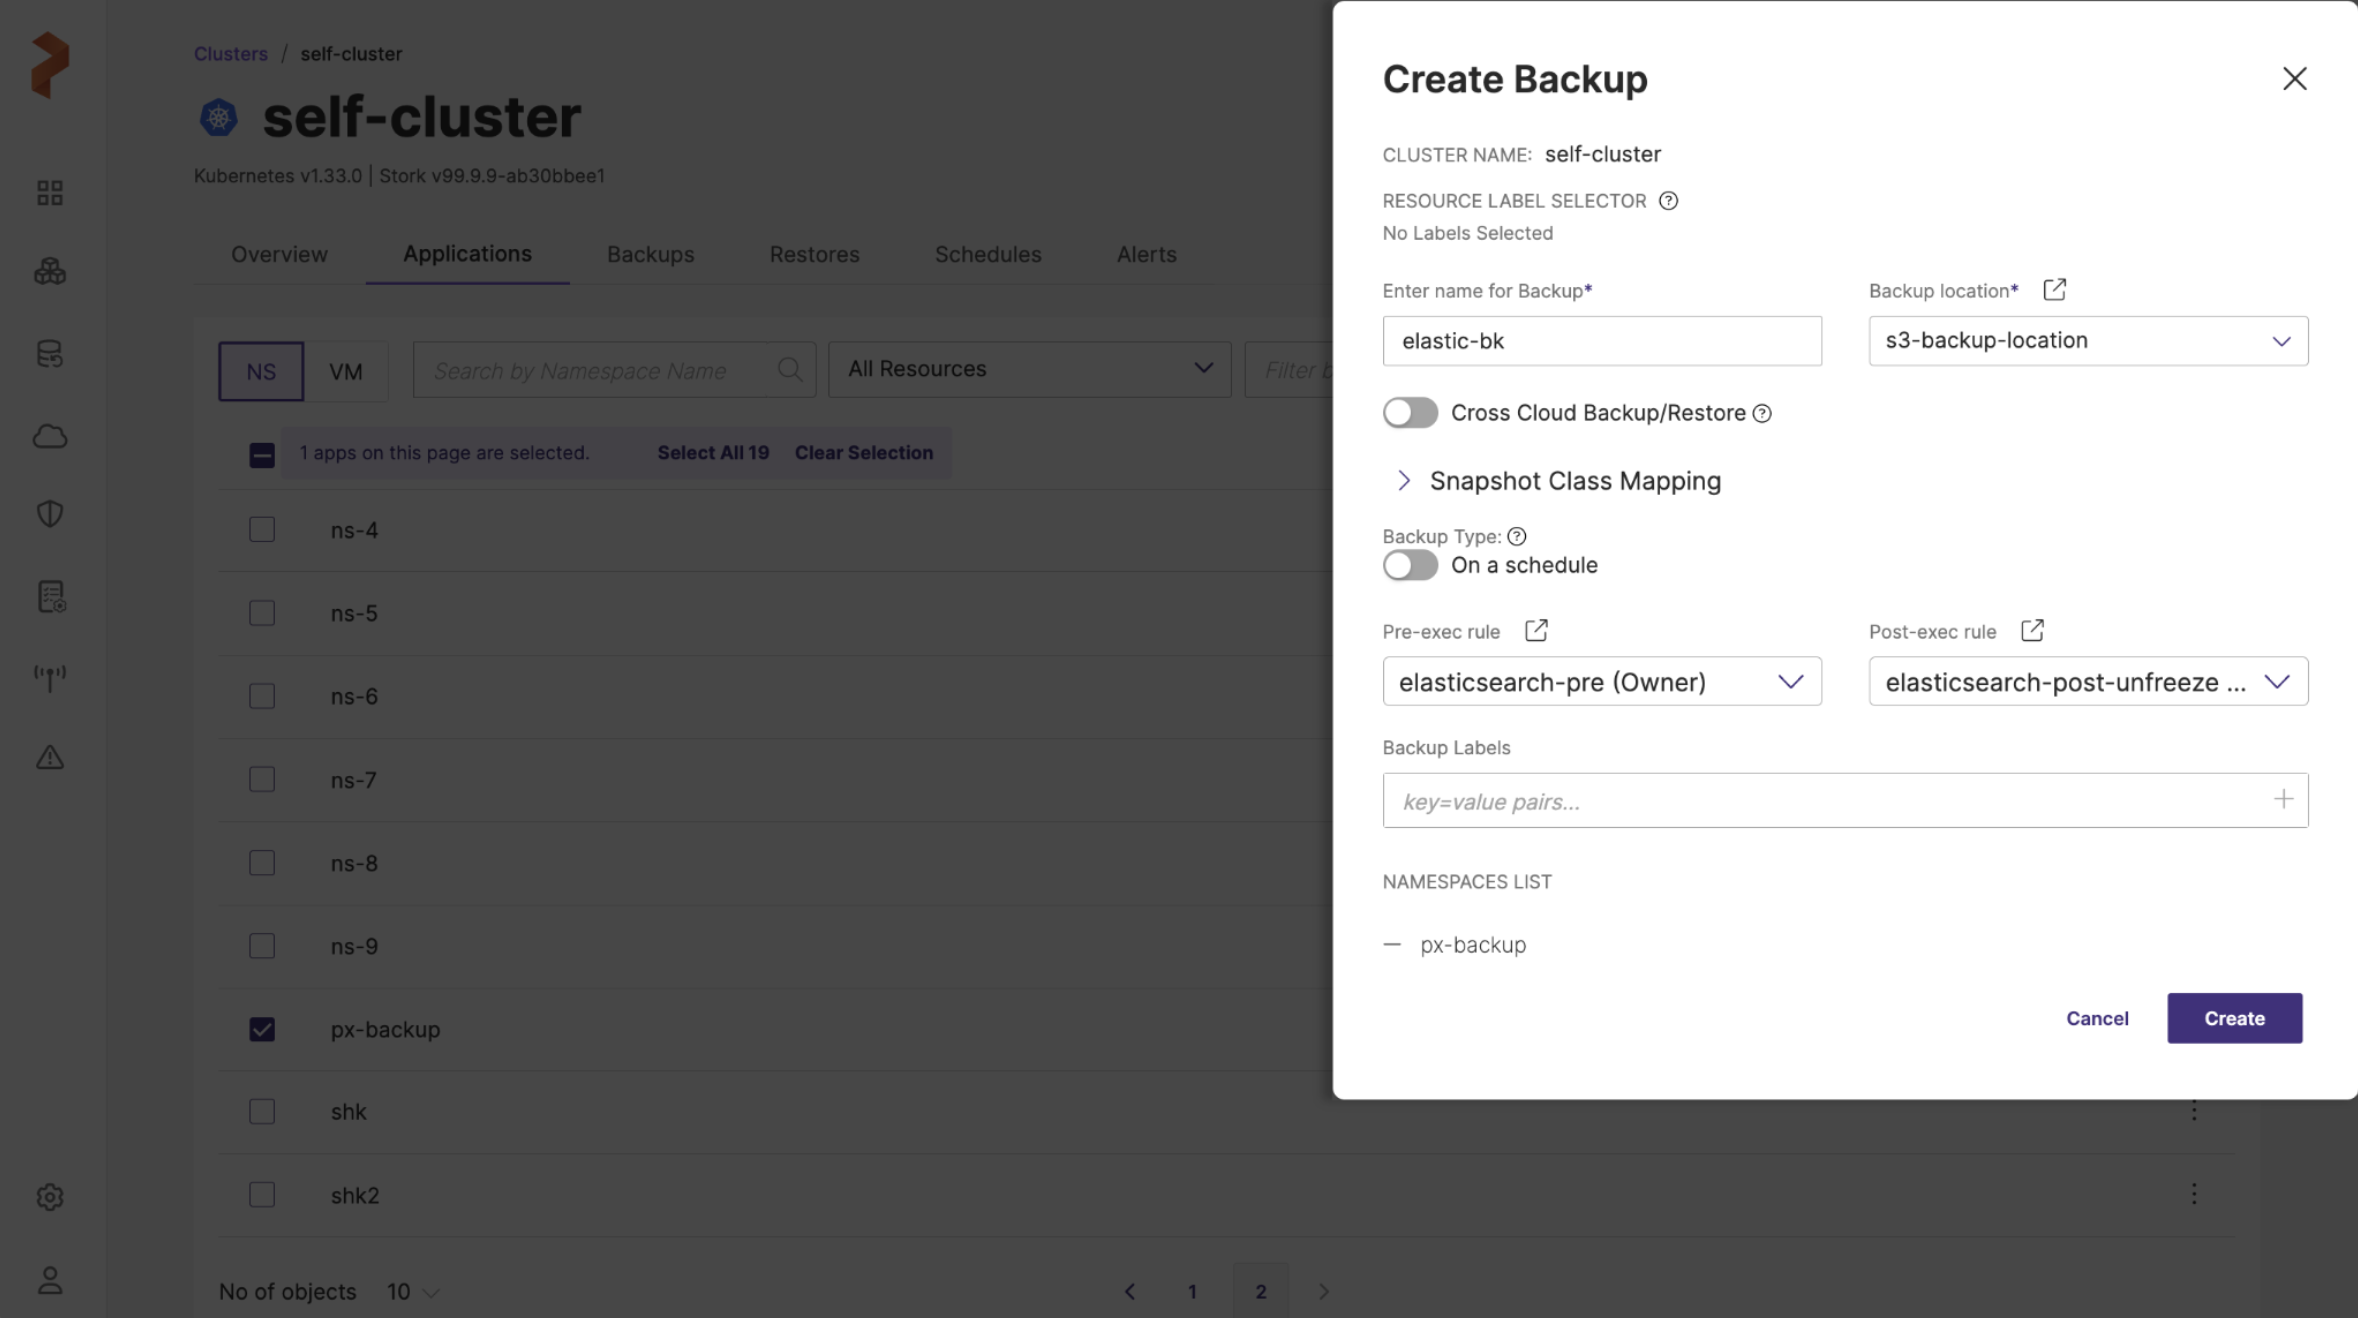
- After you populate all the fields of the Create Backup window, click Create.
If your Elasticsearch version is 7.8 and above, pre-exec or post-exec rules are not required to create a backup of your application data. You can simply back up your data without associating any exec rules.