Back up on NFS Shares
NFS backup is not available in Federated mode. Federated mode supports object store backup locations only.
Portworx Backup allows you to add Network File System (NFS) shares as a backup target. This feature lets you leverage your existing NFS storage infrastructure to back up and restore your application data. Portworx Backup supports NFS backup locations based on NFSv4.
NFS server prerequisites
- Ensure that read and write permissions are enabled for the required NFS shares for Portworx Backup to reach those shares.
- Make sure that TCP port 2049 is open for Portworx Backup to communicate with the NFS server. NFSv4 (which Portworx Backup uses) requires only TCP port 2049 and does not need the ancillary
rpcbind,mountd, andstatdports that NFSv3 requires. If your environment also serves NFSv3, ensure those additional ports are open as well. - Ensure that the NFS backup location is already added and configured in Portworx Backup before you create a backup. For instructions, see NFS Backup Locations.
Configure the NFS server
On NFS share for granting access to non-root user:
-
Create a non-root user in the NFS server if the user does not exist.
-
Update
/etc/exportsconfiguration file on the NFS server:<export path> <allowed_host(s)>(<comma separated mount options>)Example:
/mnt/nfsshare xx.xx.xx.xx(all_squash,anonuid=1001,anongid=1001,rw,sync)Where
1001is the user ID of the non-root user created in step 1. -
Provide the ownership to the non-root user:
chown -R <UID>:<GID> <NFS share/mount_path>Example:
chown -R 1001:1001 /mnt/nfsshare -
Export the directories defined in
/etc/exportsto NFS clients, then restart the NFS server so the changes take effect:sudo exportfs -rasudo systemctl restart <daemon_name>Where:
sudo exportfs -rare-exports all directories listed in/etc/exports, applying the configuration you added in the previous steps.sudo systemctl restart <daemon_name>restarts the NFS server so the updated exports are served.
The NFS server service name (
<daemon_name>) varies by distribution:Distribution Service name RHEL, CentOS, Rocky Linux, Fedora nfs-serverDebian, Ubuntu nfs-kernel-serverTo confirm the exact service name on your system, run
systemctl list-units | grep nfs.
Create NFS backup
To create a backup on NFS share as the backup location:
-
Log in to the Portworx Backup web console.
-
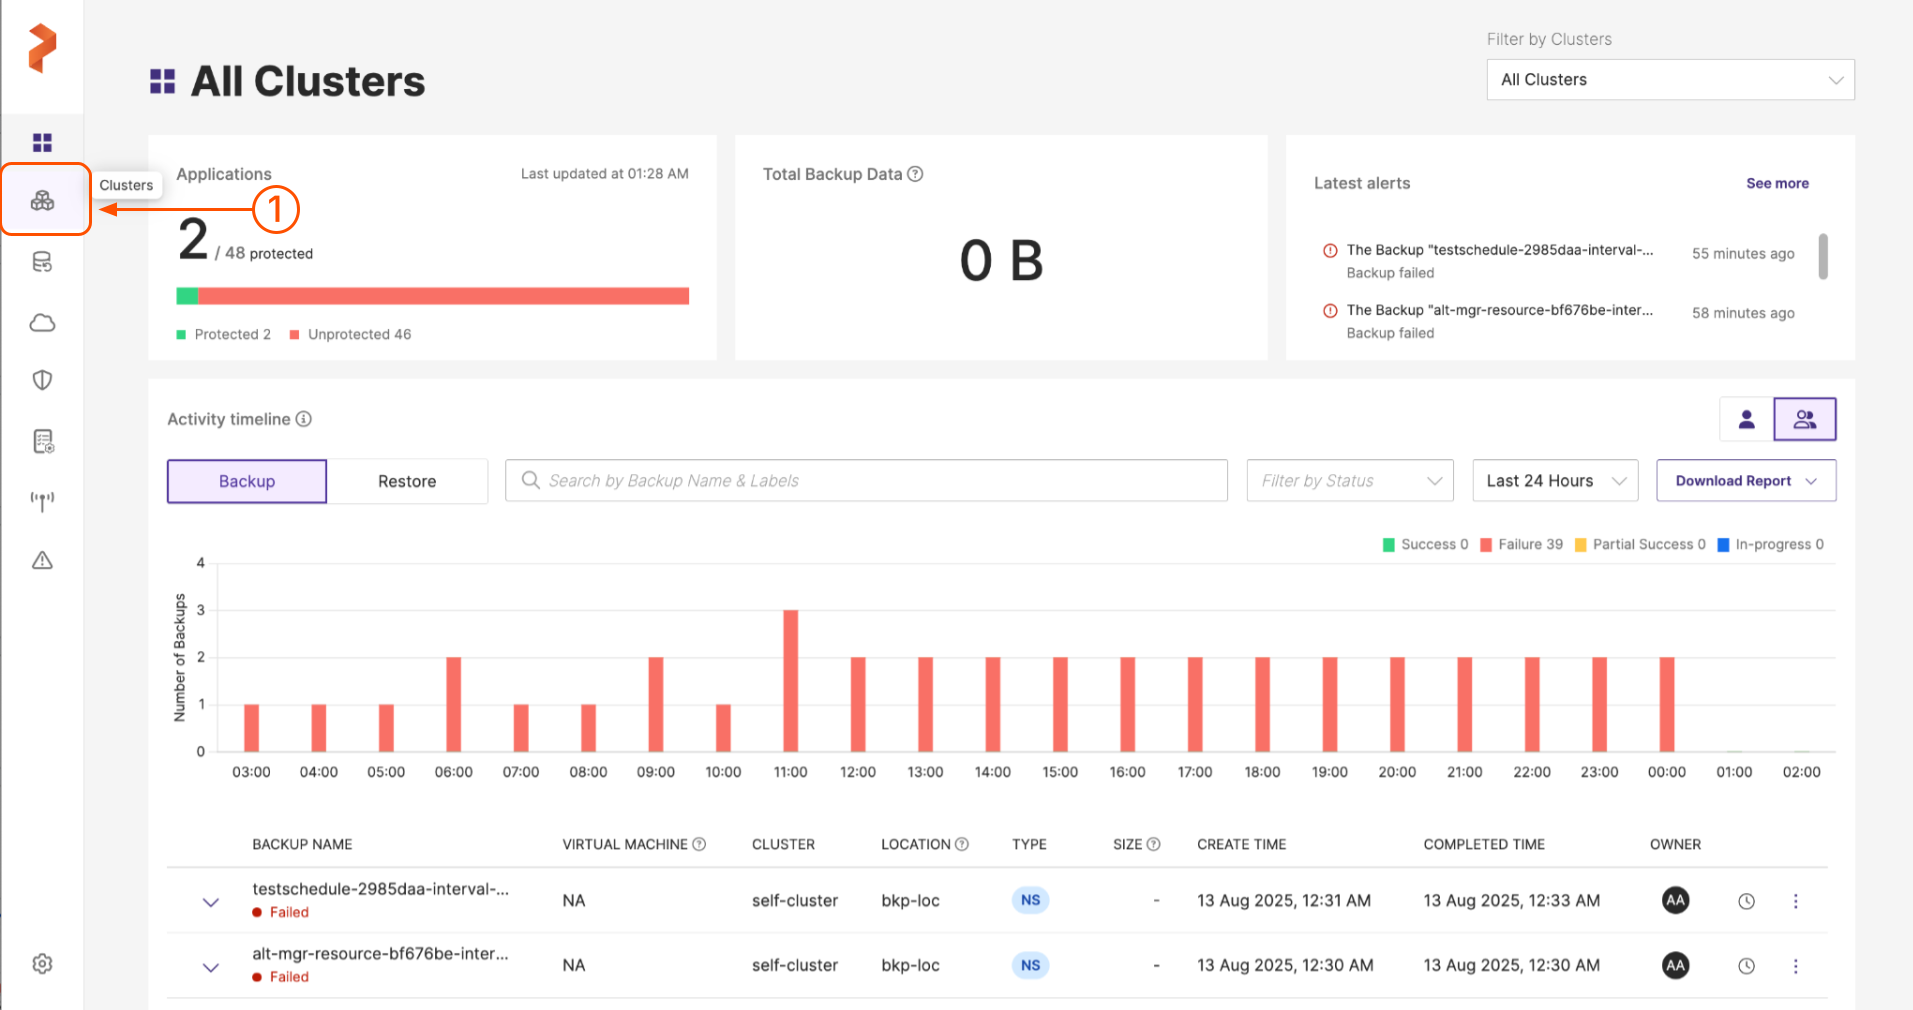
From the home page, click the Clusters icon in the left navigation bar.
-
Navigate to the application cluster to create a backup of the required application(s).
-
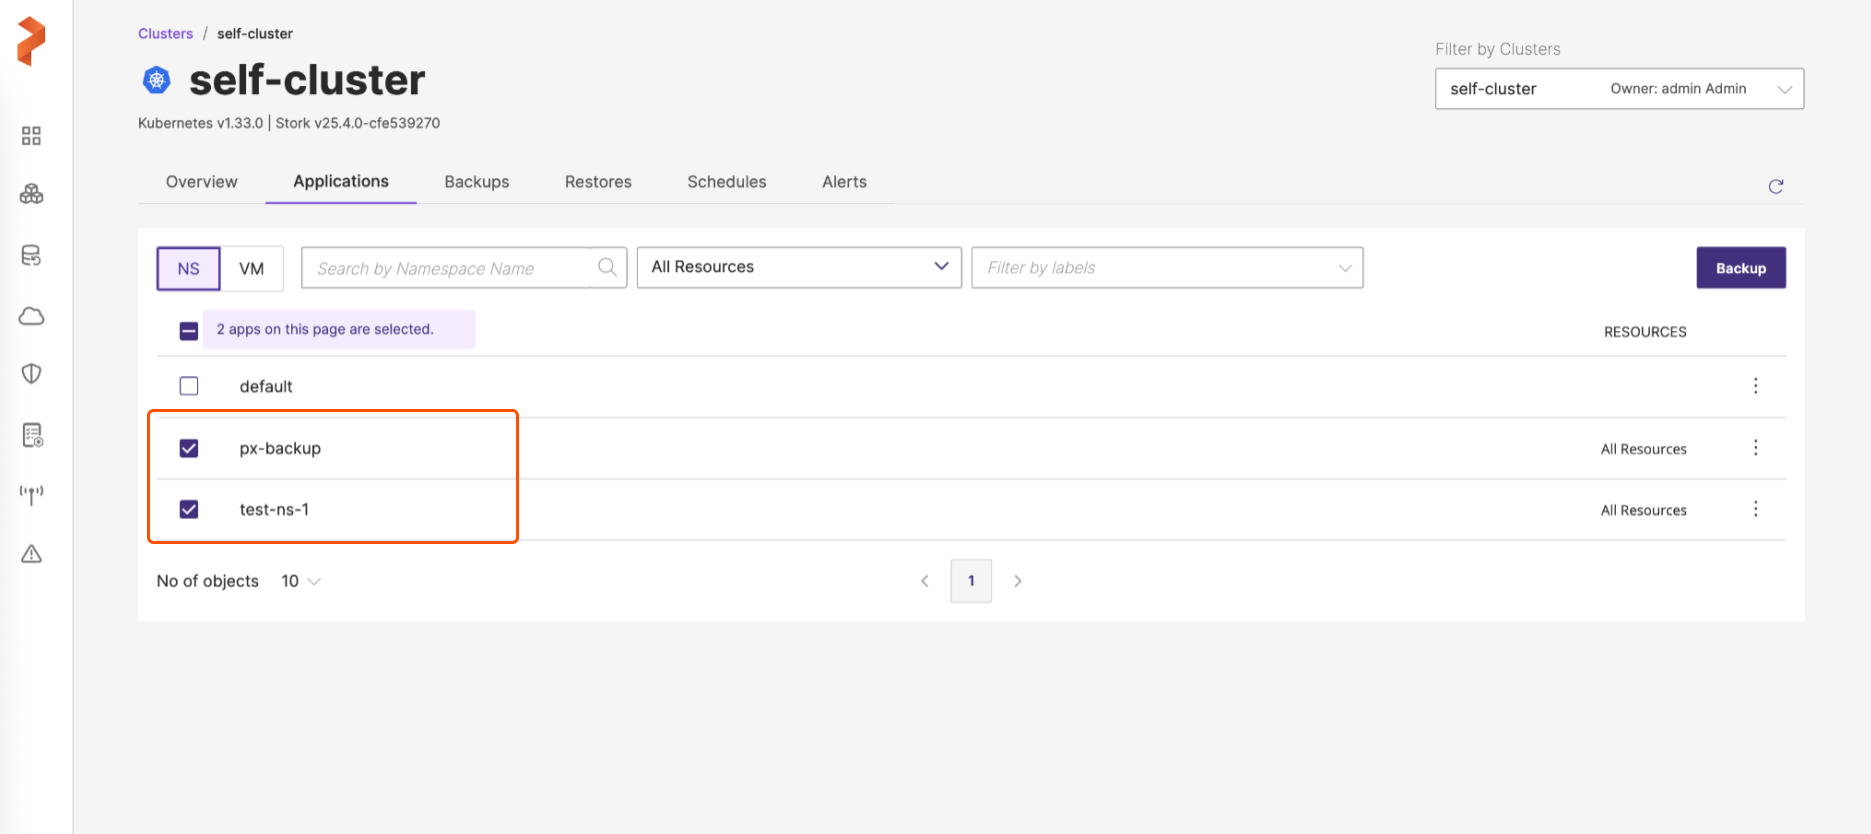
In the cluster’s Applications tab, select the application(s) you want to back up and then click Backup:
-
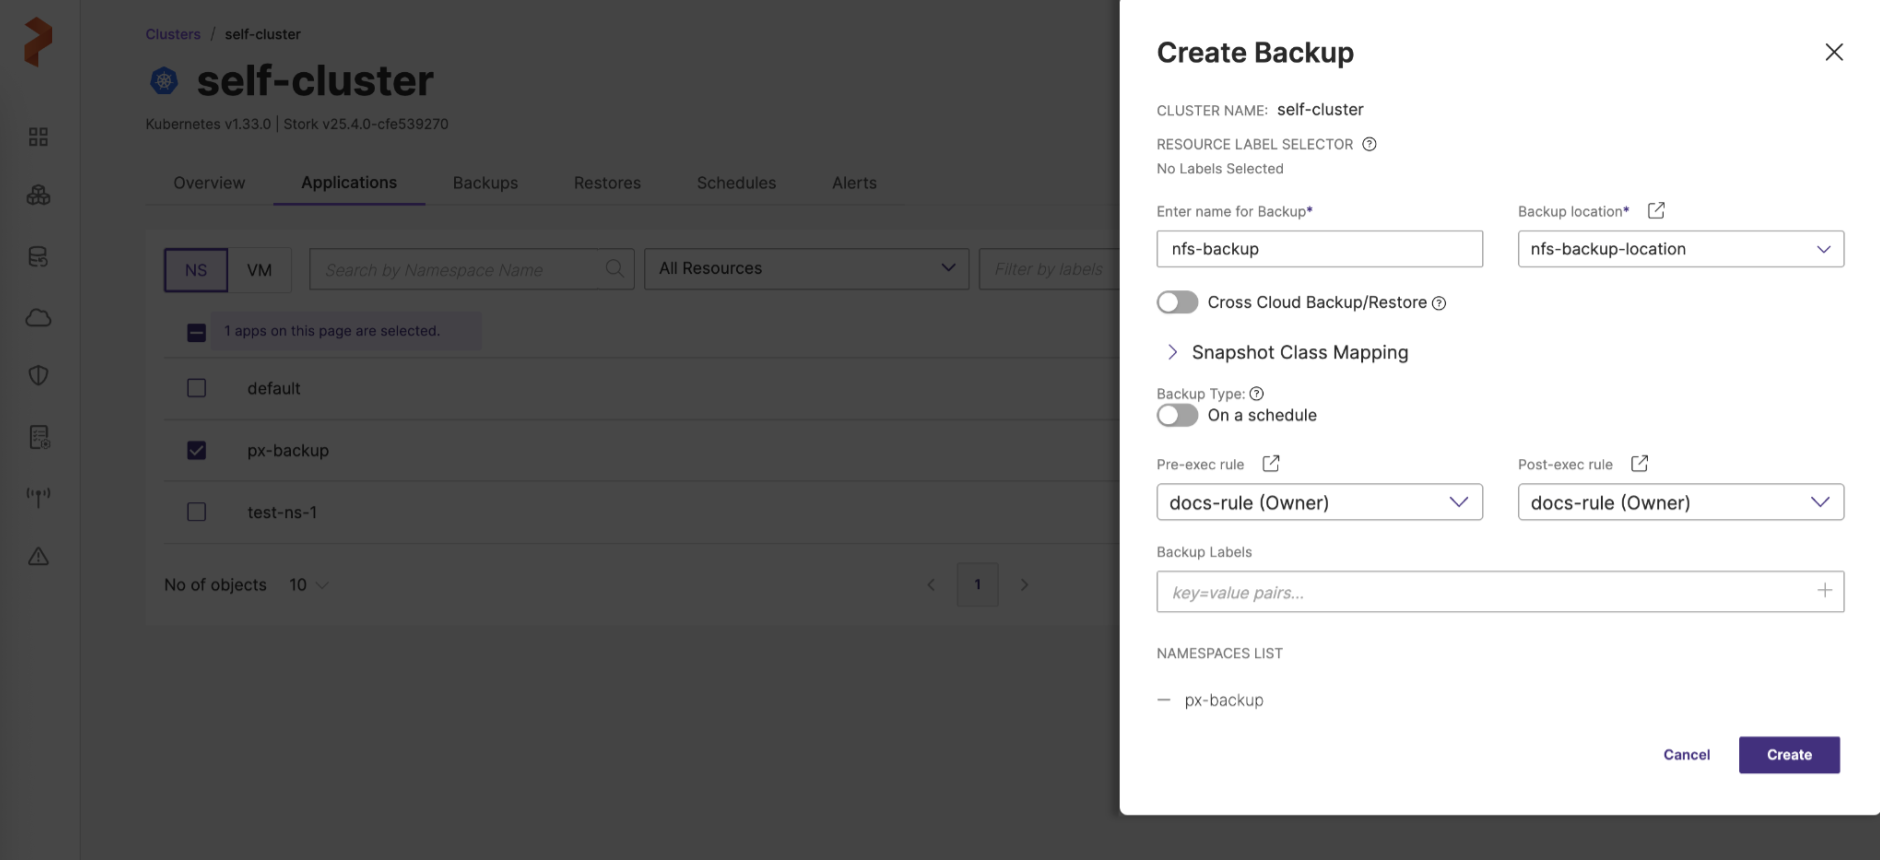
In the Create Backup window, specify the required fields.
In the Backup location field, search for and select the NFS share backup location, then click Create.
 note
noteThe Backup location field displays only successfully validated NFS backup locations. Enter a keyword to filter the list by name.
noteNFS-based backup location supports generic, manual, and scheduled backups.
-
Verify that the backup completed successfully:
After you click Create, the new backup appears in the Backups tab of the application cluster page. Monitor the backup's status in this tab until it reaches Success. The procedure is complete only after the status is confirmed as Success. If the status shows Failed, review the backup details to troubleshoot the issue.
For more information on creating a backup, see Create a Backup.