Manage Backup Schedules
Backup schedules define when and how often data backups occur. They are essential for automating data protection and ensuring that recovery points are regularly created without manual intervention.
The bulk update/delete support for backup schedules feature enables users to efficiently suspend, resume, or delete multiple backup schedules in one go via the Portworx Backup web console or through API. This feature enhances operational scalability by reducing the number of gRPC calls needed for large-scale backup schedule management.
With this feature you can:
-
Suspend, resume or delete all the schedules associated with your backups in both namespace and VM tabs.
-
Search the schedules by a search string and then suspend/resume/delete the schedules that match your search string or phrase or keyword.
-
Search the schedules with the combination of search and filters (status, owner, backup location, schedule policy, and VRO policy) and then suspend/resume/delete the schedules subset you obtain.
-
Suspend, resume, or delete schedules across multiple clusters from the Backup schedules page. For more information, see Manage schedules across clusters.
These bulk schedule management capabilities apply to both Kubernetes namespace and virtual machine (VM) backups. This ensures consistency and simplifies administrative tasks across different types of workloads and environments.
Backups that are currently in progress created by these schedules will complete their operations, while suspensions will apply only to future scheduled backups.
Manage all schedules
To suspend/resume/delete all the schedules of a cluster in a single operation:
-
In the home page, from the left navigation pane, click Clusters.
-
Select the cluster that holds the schedules you want to perform bulk operations on.
-
In the cluster page, navigate to Schedules tab.
-
Choose NS or VM tab based on your environment.
-
Choose the check-box before SCHEDULE NAME to select all the schedules on the current page. If the schedules span more than one page, click Select all in the toolbar that appears to select all the schedules across all pages. Then click:
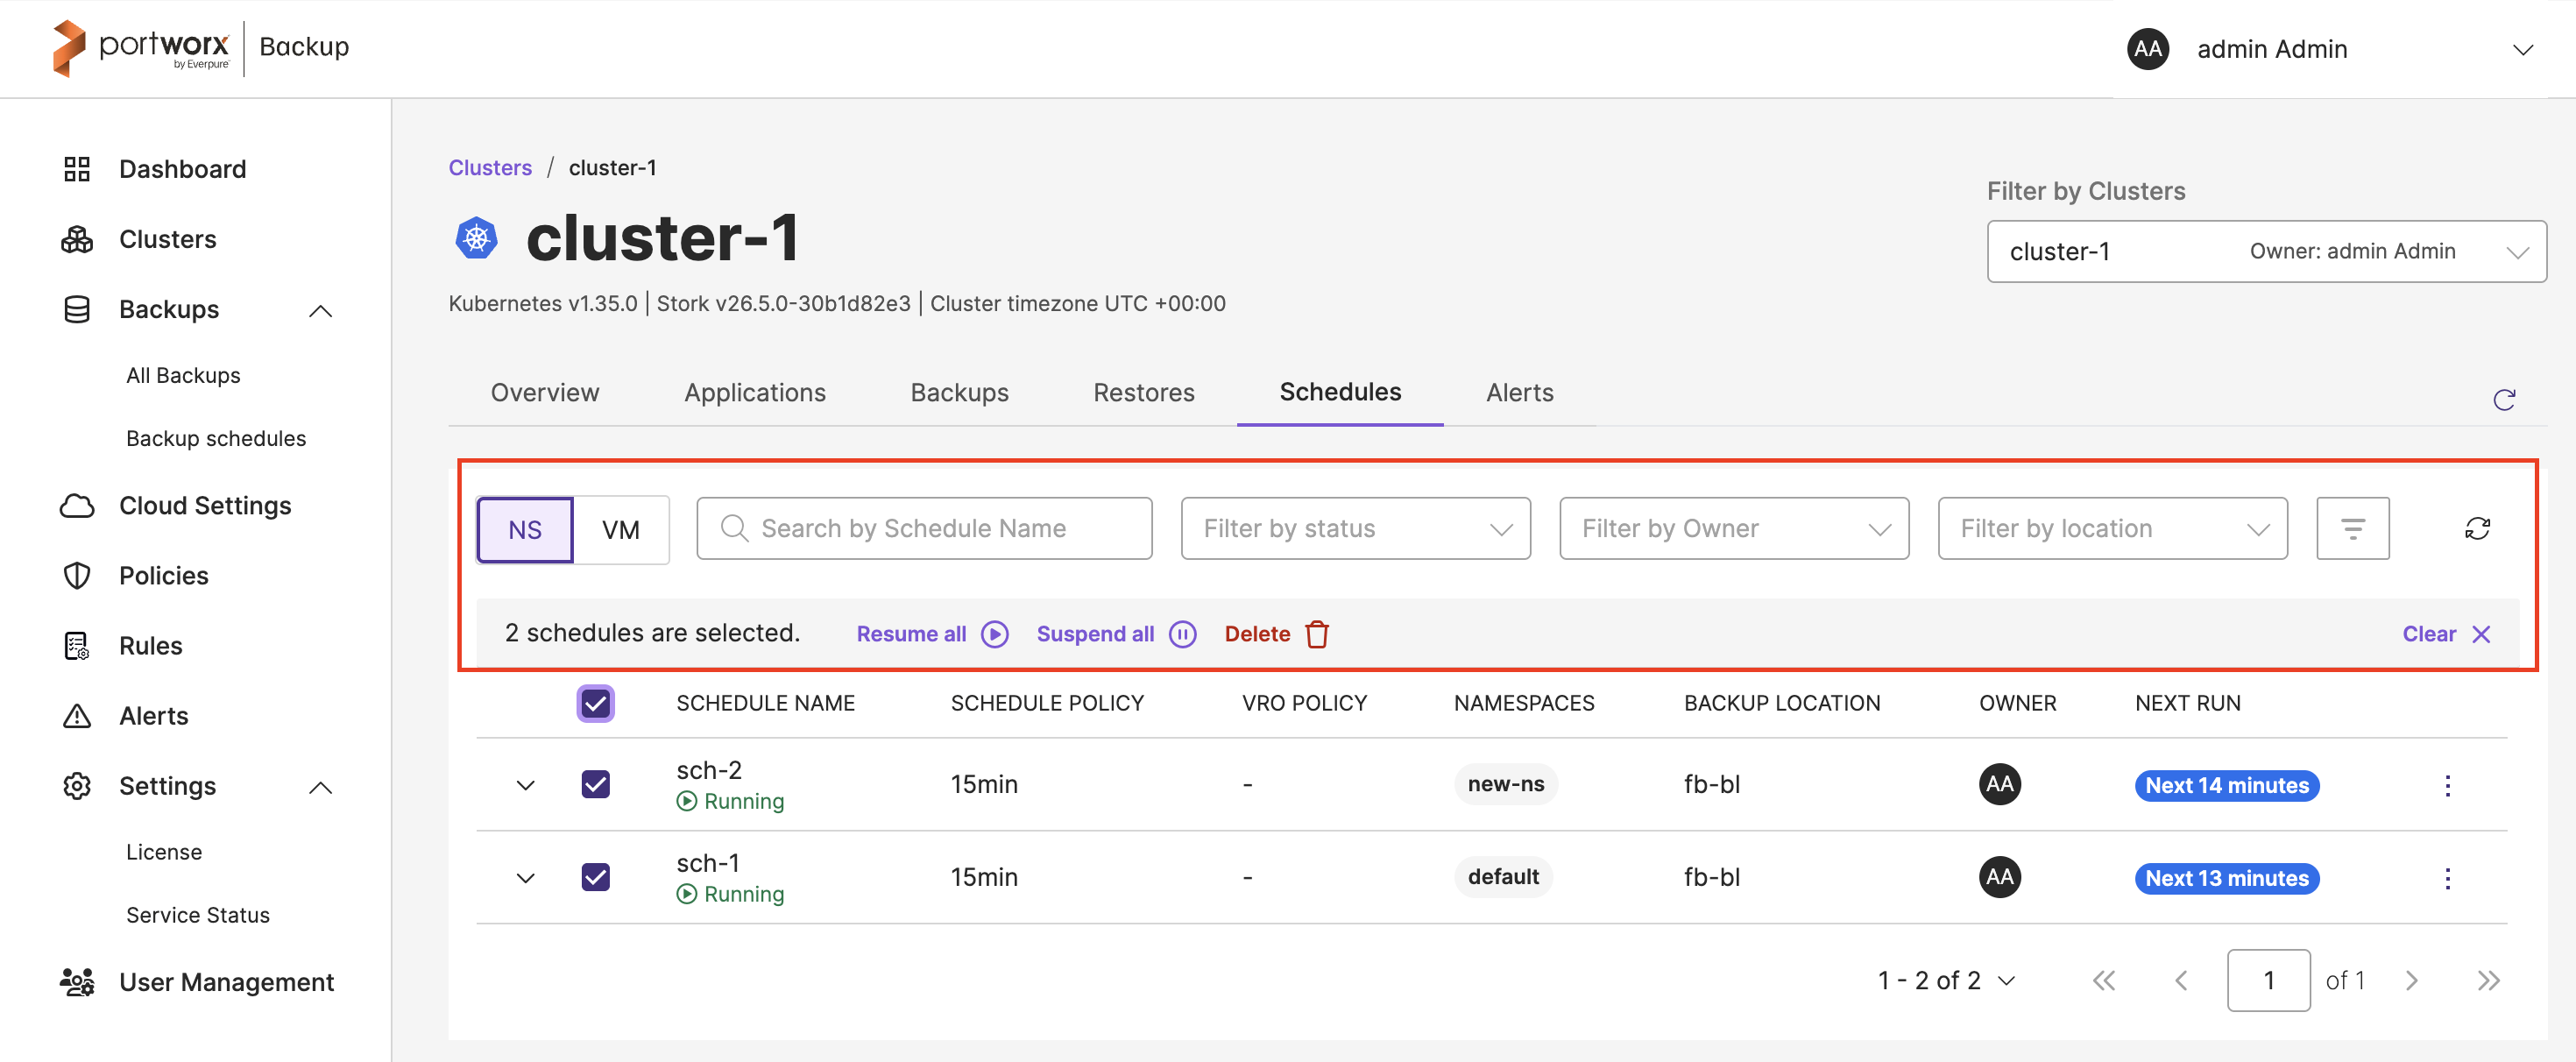
- Resume all: to resume the selected schedules.
OR - Suspend all: to suspend the selected schedules.
OR - Delete: to delete the selected schedules.
- Resume all: to resume the selected schedules.
-
If you want to choose few from this list, select the checkboxes that appear before the SCHEDULE NAME and click the required option.
Manage schedules by search
If you want to suspend/resume/delete only those schedules that match your search criterion:
-
In the home page, from the left navigation pane, click Clusters.
-
Select the cluster that holds the schedules you want to perform bulk operations on.
-
In the cluster page, navigate to Schedules tab.
-
Choose NS or VM tab based on your environment.
-
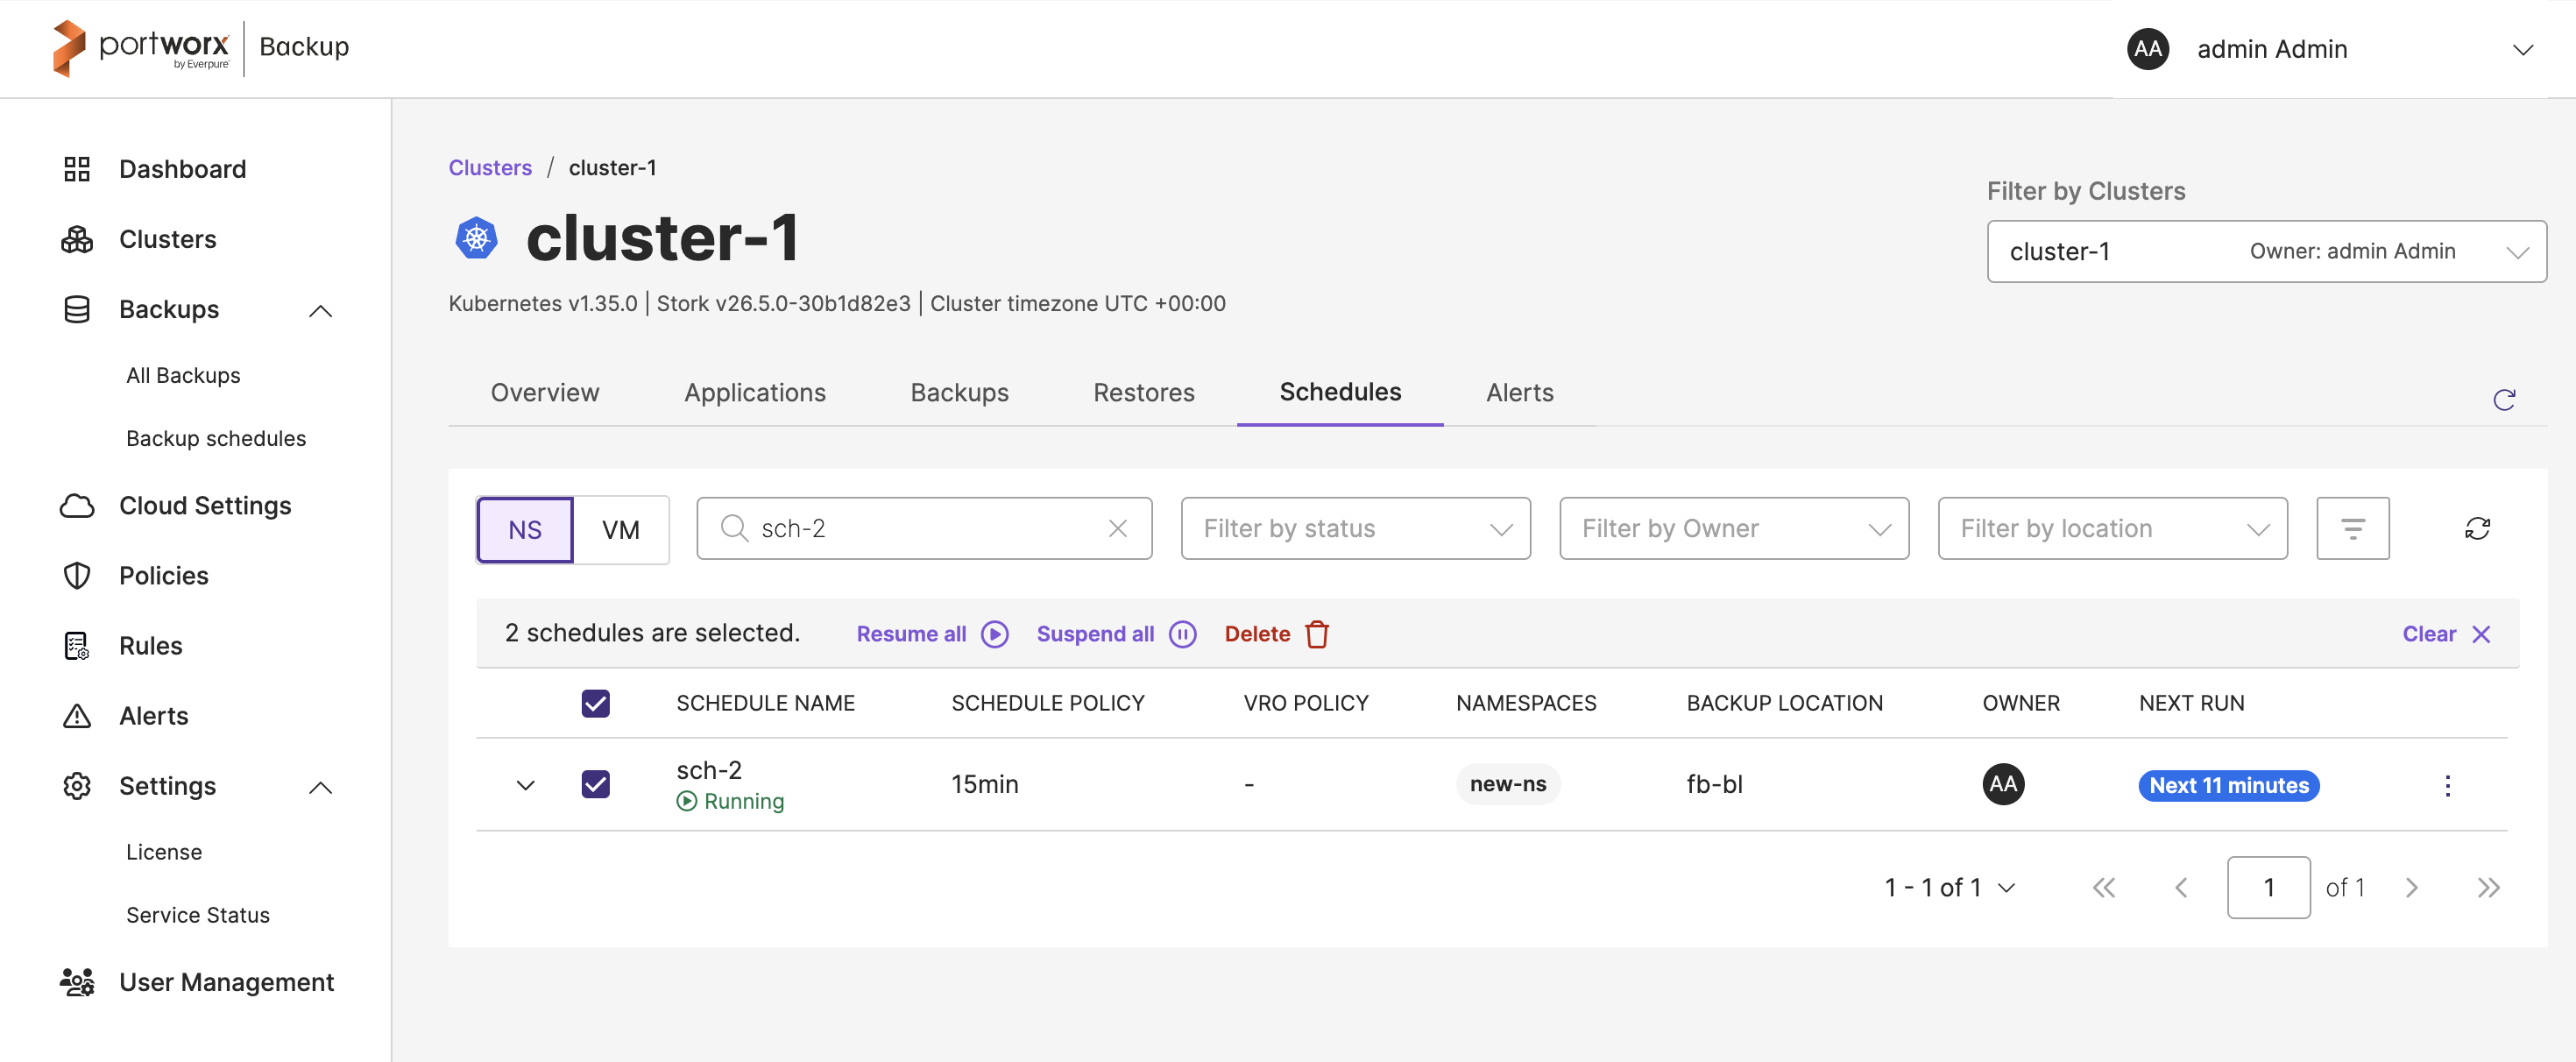
Enter the search string in the Search by Schedule Name and hit Enter.
The Schedules page displays only the schedules that match your search phrase.
-
From this list, choose the check-box before the SCHEDULE NAME to select the matching schedules on the current page. If the results span more than one page, click Select all to select all the matching schedules across all pages. Then click:
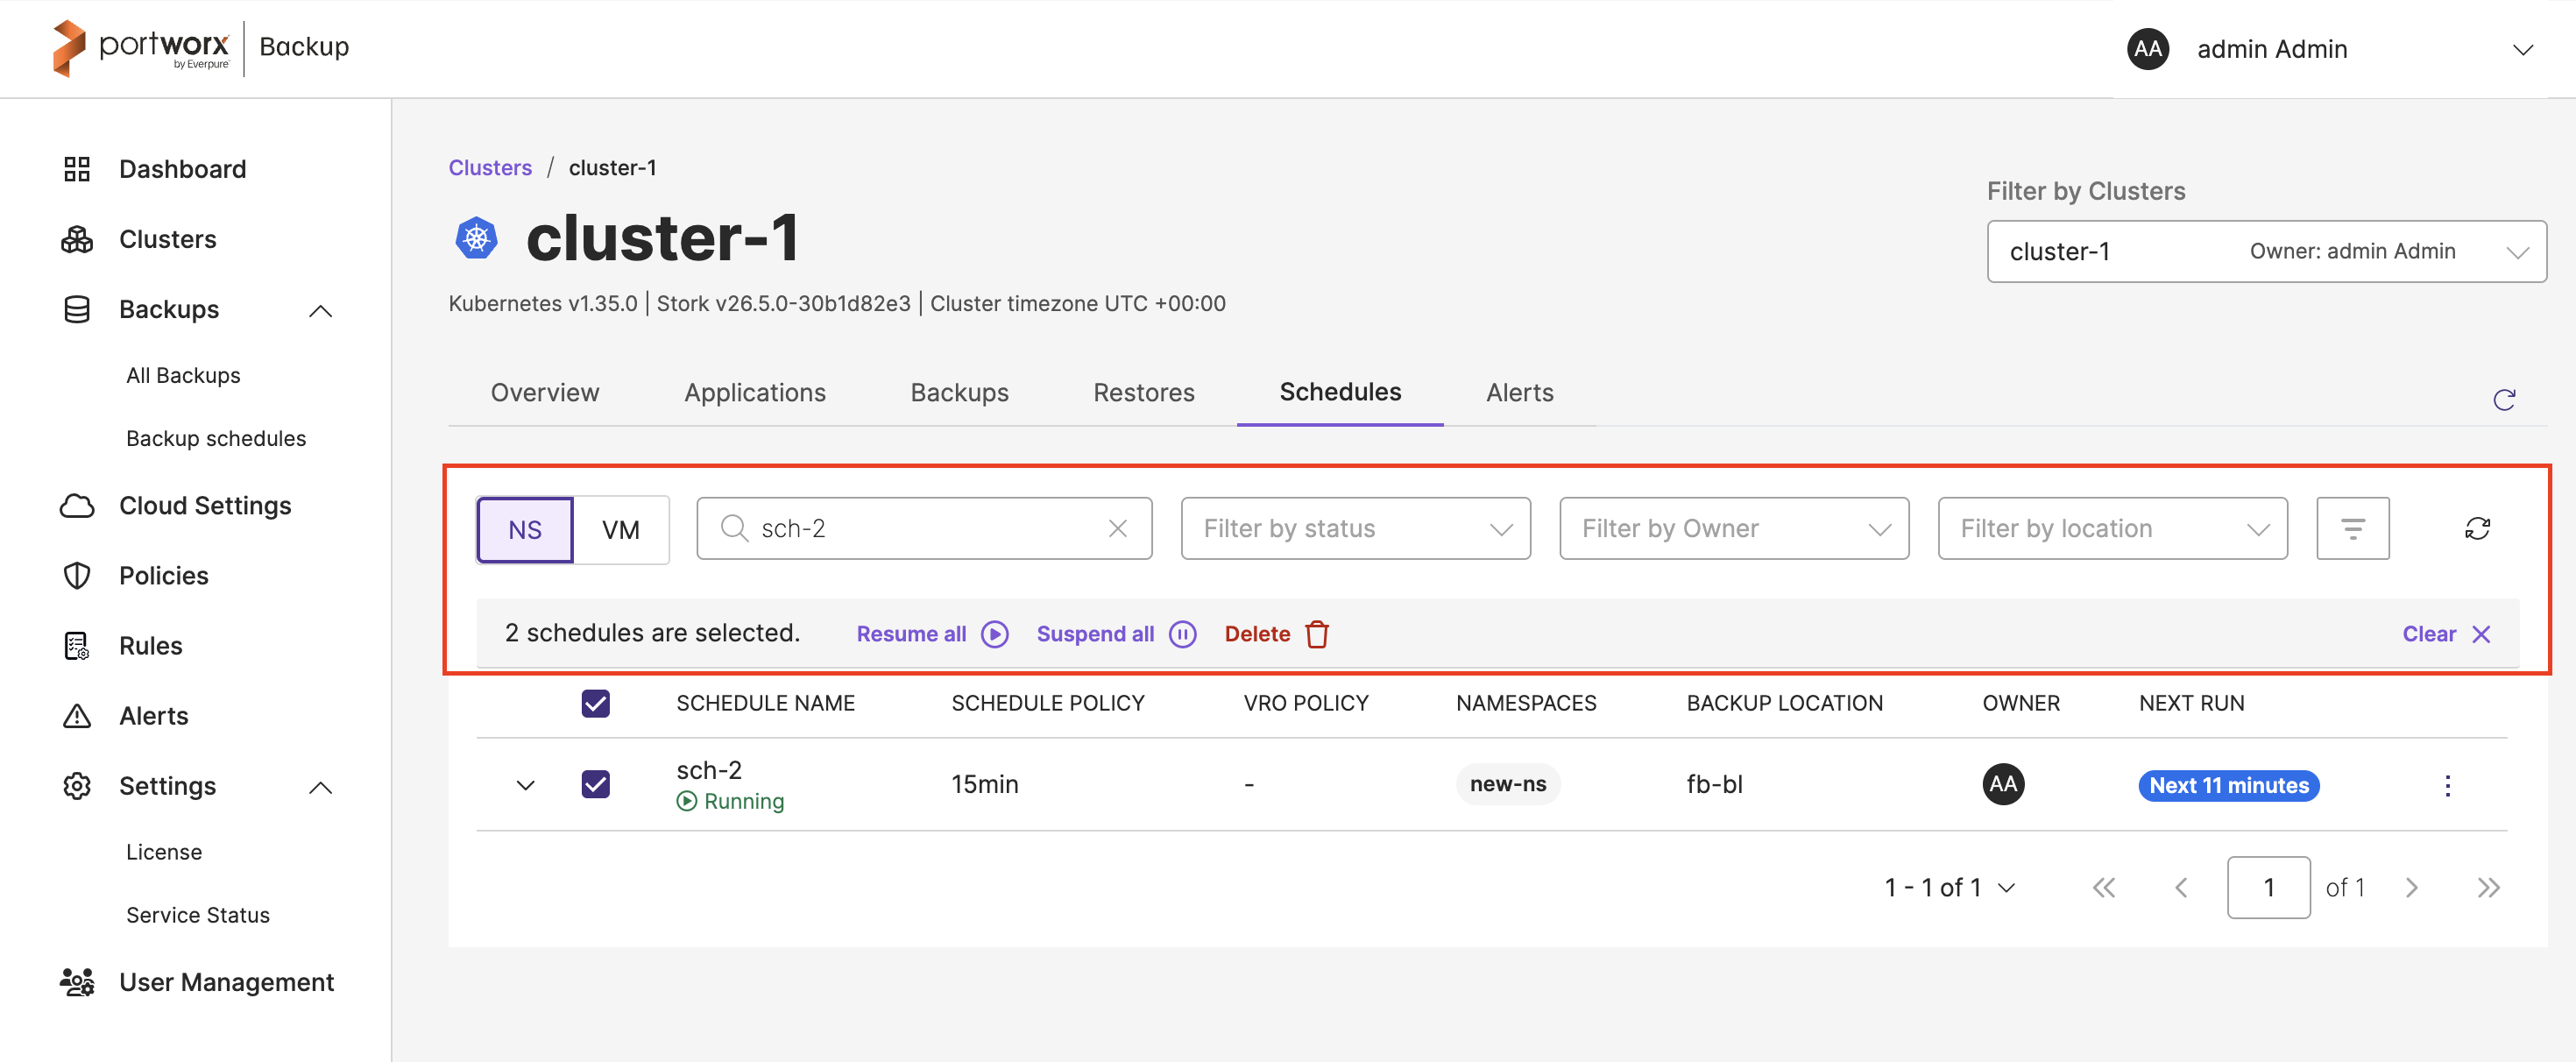
The illustration above shows the bulk operation options for the schedules that contain the string
sch-2in their name.- Resume all: to resume the selected schedules.
OR - Suspend all: to suspend the selected schedules.
OR - Delete: to delete the selected schedules.
- Resume all: to resume the selected schedules.
Manage schedules by schedule policy
If you want to perform bulk operations only on schedules associated with a schedule policy:
-
In the home page, from the left navigation pane, click Clusters.
-
Select the cluster that holds the schedules you want to perform bulk operations on.
-
In the cluster page, navigate to Schedules tab.
-
Choose NS or VM tab based on your environment.
-
Click the policy filter icon, choose the schedule policy of your interest from Filter by schedule policies, and click Apply. You can also select VRO policies from Filter by VRO policies, enter a search string in Search by Schedule Name, or use the Filter by status, Filter by Owner (super administrators only), and Filter by location filters to perform an advanced search with the combination of search and filter options.
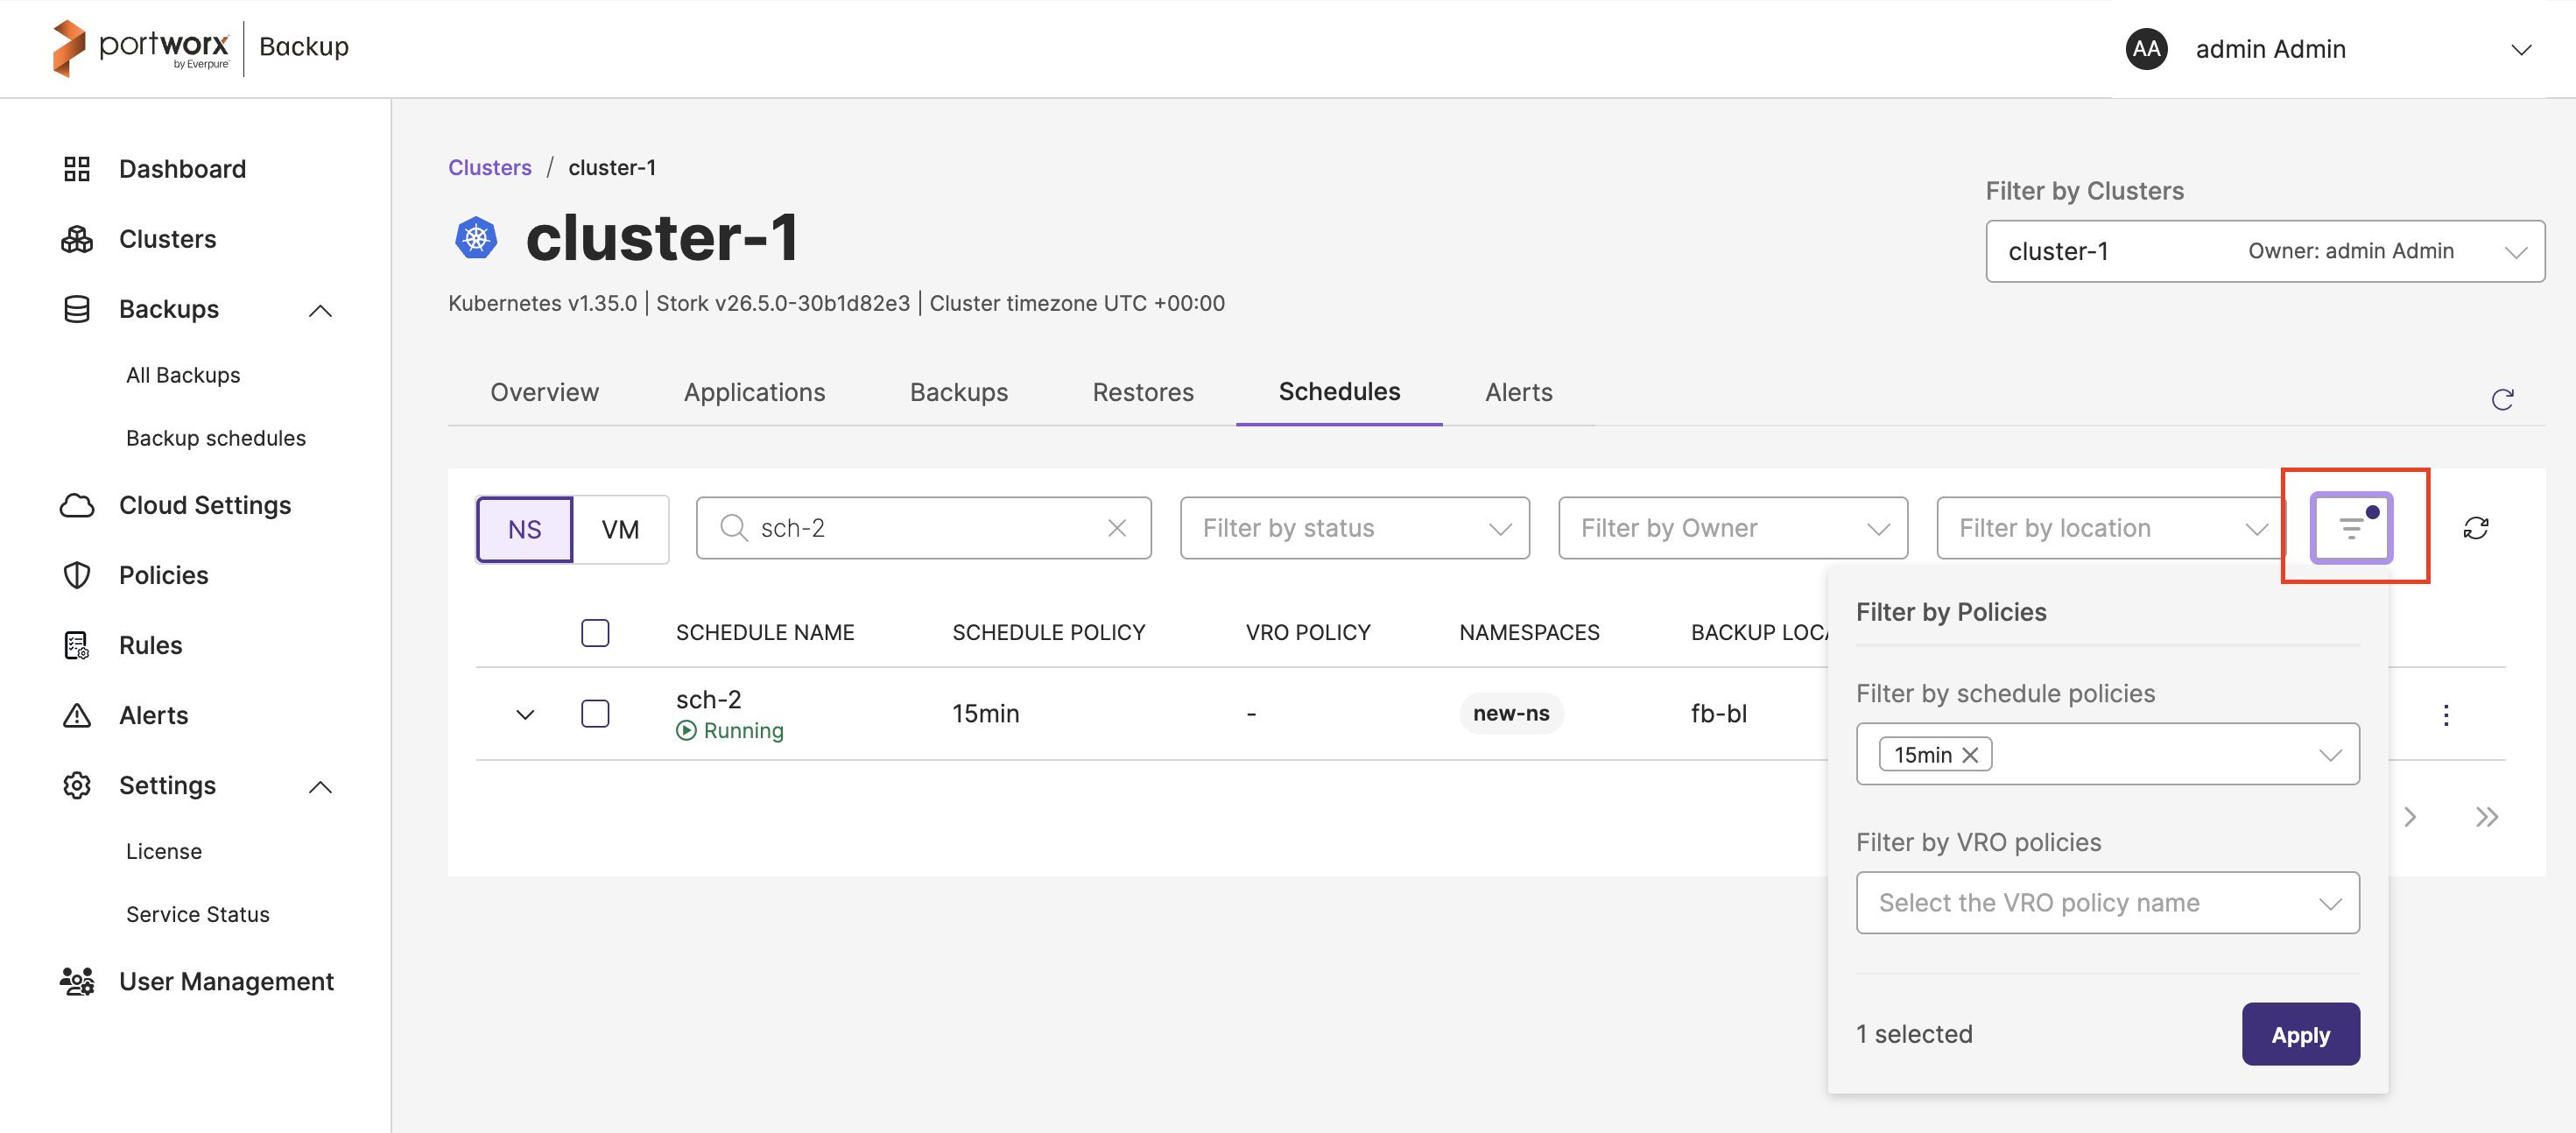
In the above illustration, the search operation displays backup schedules that are linked to the selected schedule policy
15minand match the search termsch-2. -
Choose the check-box before SCHEDULE NAME to select the matching schedules on the current page. If the results span more than one page, click Select all to select all the matching schedules across all pages. Then click:
- Resume all: to resume the selected schedules.
OR - Suspend all: to suspend the selected schedules.
OR - Delete: to delete the selected schedules.
- Resume all: to resume the selected schedules.
If you do not want to suspend/resume/delete all the schedules from the search filter, you can select the required ones and then carry out management operations.
When you click Select all to select schedules across all pages, the bulk operation applies only to the schedules that match all the search and filter criteria currently applied, including status, owner, backup location, schedule policy, and VRO policy filters.
Manage schedules across clusters
To suspend/resume/delete schedules that belong to one or more clusters from a single page:
-
In the home page, from the left navigation pane, click Backups > Backup schedules.
-
Choose the Namespaces or Virtual Machines tab based on your environment.
-
Optionally, select a cluster from Filter by cluster to limit the list to that cluster. You can also use the search and filter options to narrow down the list.
-
Select the checkboxes of the schedules you want to manage, or select the checkbox before Schedule name to select all the schedules on the current page. To select all the schedules that match your filters across all pages, click Select all in the toolbar. The Select all option appears only when the results span more than one page.
-
Click:
- Resume all: to resume the selected schedules.
OR - Suspend all: to suspend the selected schedules.
OR - Delete: to delete the selected schedules.
- Resume all: to resume the selected schedules.
The operation applies only to the schedules you selected. Selecting the checkbox before Schedule name selects only the schedules on the current page; the operation applies to all the schedules that match your current filters across all pages only when you click Select all. If a cluster filter is applied, the operation does not affect schedules on other clusters. For more information on this page, see Backup schedules.
When to suspend a backup schedule
Suspending a backup schedule can be necessary in several scenarios to avoid unintended data operations or resource usage. Here are common situations where suspending a backup schedule is appropriate:
-
During maintenance or upgrades
-
To optimize resources
-
If the application is inactive or deprecated
-
When backups are failing repeatedly
-
Before performing manual backups
-
During disaster recovery or restore processes
-
For debugging or configuration changes
Update a backup schedule
To update an object lock enabled backup schedule:
-
In the home page, click Clusters icon.
-
Select the cluster where you have created the object lock enabled backup schedule.
-
Navigate to the Schedules tab to view the list of all the object lock enabled backup schedules.
-
Select the Vertical ellipsis at the end of your object lock enabled backup schedule row (for which you need to update) and choose Edit.

You can click on your object lock enabled backup schedule to view its details.
-
When you're done, scroll down and select the Update button.