Create object lock enabled scheduled backup
To create an object lock enabled backup:
-
On the Portworx Backup clusters page, select the cluster you want to back up.
-
Select the namespaces and apply label selectors to filter the resources you want to back up.
-
Click Backup.
-
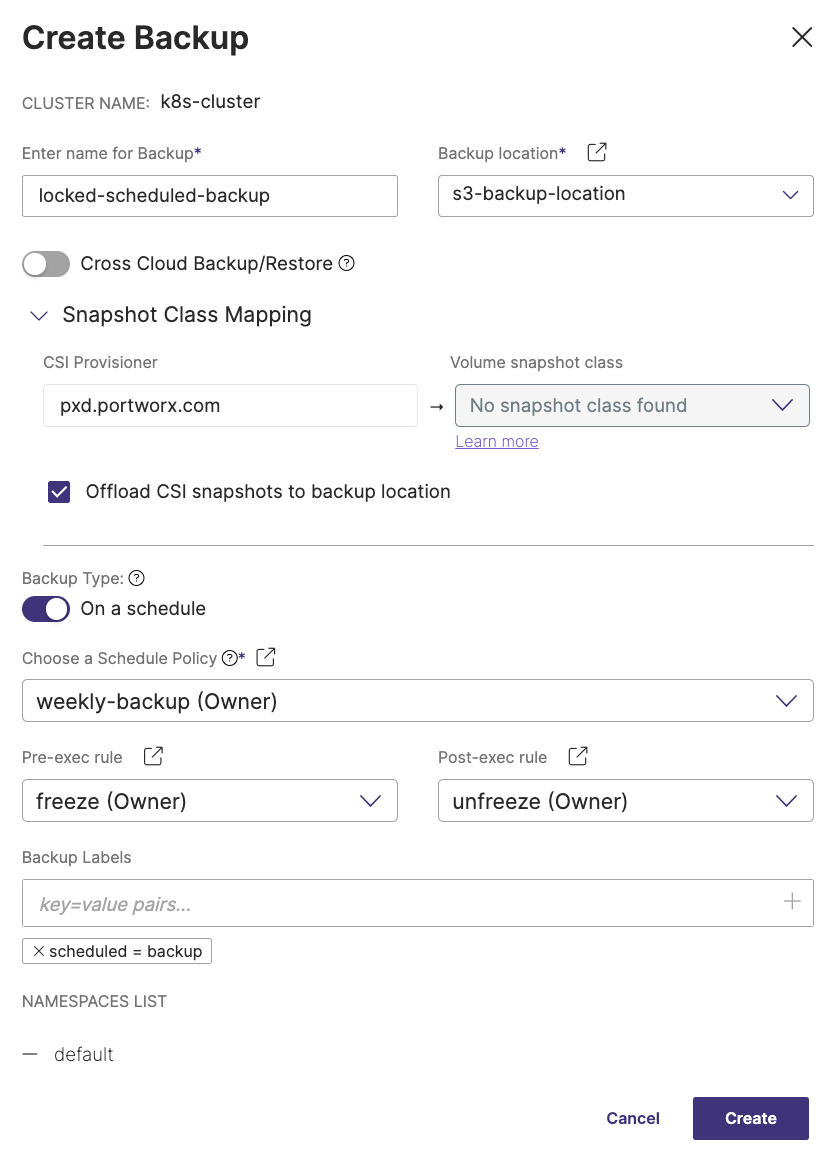
In the Create Backup window, specify the following fields, refer Create a backup for more information on these fields.

-
Enter name for Backup: provide a relevant name for your backup
-
Backup location: choose the object locked backup location you have created previously from the drop-down
noteBackup location drop-down displays only the successfully validated object store or NFS backup locations.
-
Cross Cloud Backup/Restore: you can enable or disable this option. For more information on this option, refer Create backup.
-
Snapshot Class Mapping: facilitates mapping of your storage provisioner with volume snapshot class
-
CSI Provisioner: lists the CSI provisioners associated with the PVCs present in the namespaces selected for the backup
-
Volume snapshot class: lists all the volume snapshot class (vsc) resources along with default vsc
-
Offload CSI snapshots to backup location: offloads the CSI snapshot to the specified backup location
-
-
Backup type: allows you to choose the type of backup required (manual or scheduled backup)
-
On a schedule: enable this option to create an object locked scheduled backup
-
Choose a schedule policy: select a schedule policy from the drop-down list
-
Allow parallel backup: select this option to enable PXB to trigger a new scheduled backup even when the previous scheduled backup is still in progress (uploading snapshots to the cloud). Refer to Parallel backup schedules for more information on how this feature works in the backend.
notePlease note that parallel backup option works for a backup object with Portworx volumes only.
-
-
-
Pre-exec rule: select a rule from the drop drown to execute before the backup is created
-
Post-exec rule: select a post rule you want to execute after the backup is created
-
Backup Labels: any labels that you want to add to the backup you are going to create
-
NAMESPACES LIST: lists all the namespaces selected for backup creation
noteIf you want to change the retention period between two scheduled backups, ensure that the retention period is set above the minimum default value.
-
-
Click Create.
A secure scheduled backup is created with a lock icon.
Update object lock enabled backups
You can either add new label(s) or delete a pre-applied label to your object lock enabled backups with Update option. To update an object lock enabled manual or scheduled backup:
-
In the home page, click Clusters icon.
-
Select the cluster where you have created the object lock enabled backup.
-
Select the Backup tab to view the list of all object lock enabled backups you have created.
-
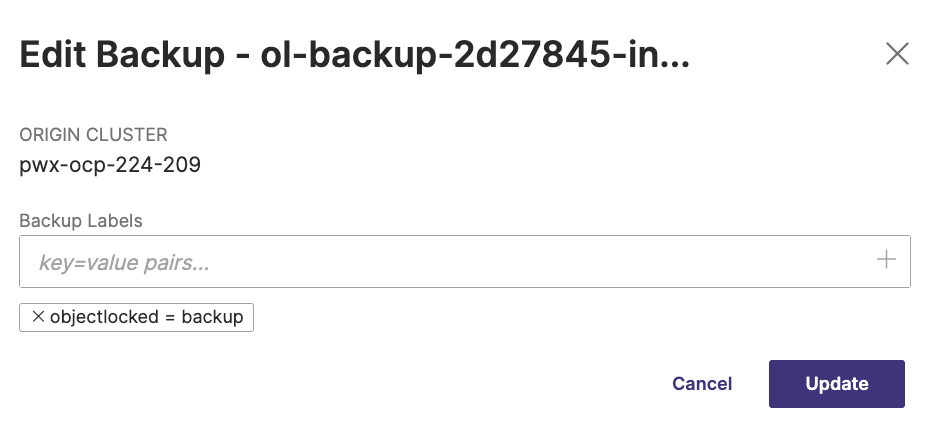
Select the Vertical ellipsis of the object lock enabled backup you need to update and choose Edit.

-
Enter new backup label(s) or delete a pre-applied label and select Update. You can apply multiple labels to your object lock enabled backup to filter them later based on the need.