Add AWS Backup Location
Perform the following steps to add AWS S3 compatible object store as backup location in Portworx Backup:
-
Login and access Portworx Backup home page.
-
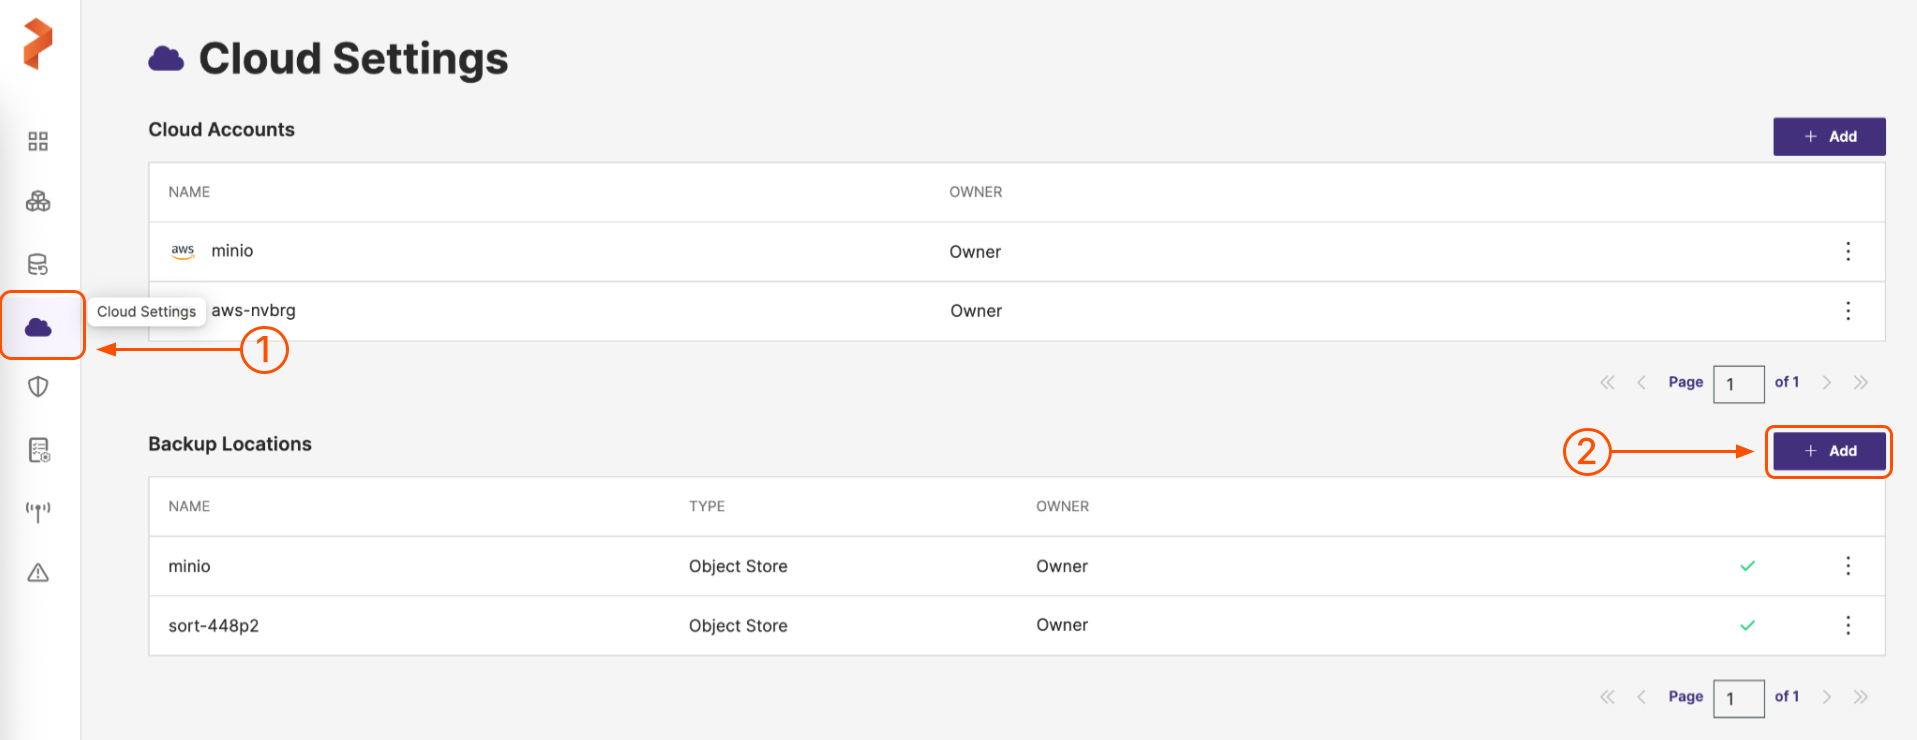
Select Cloud Settings from the left navigation pane. Under Backup Locations, choose the + Add button:

-
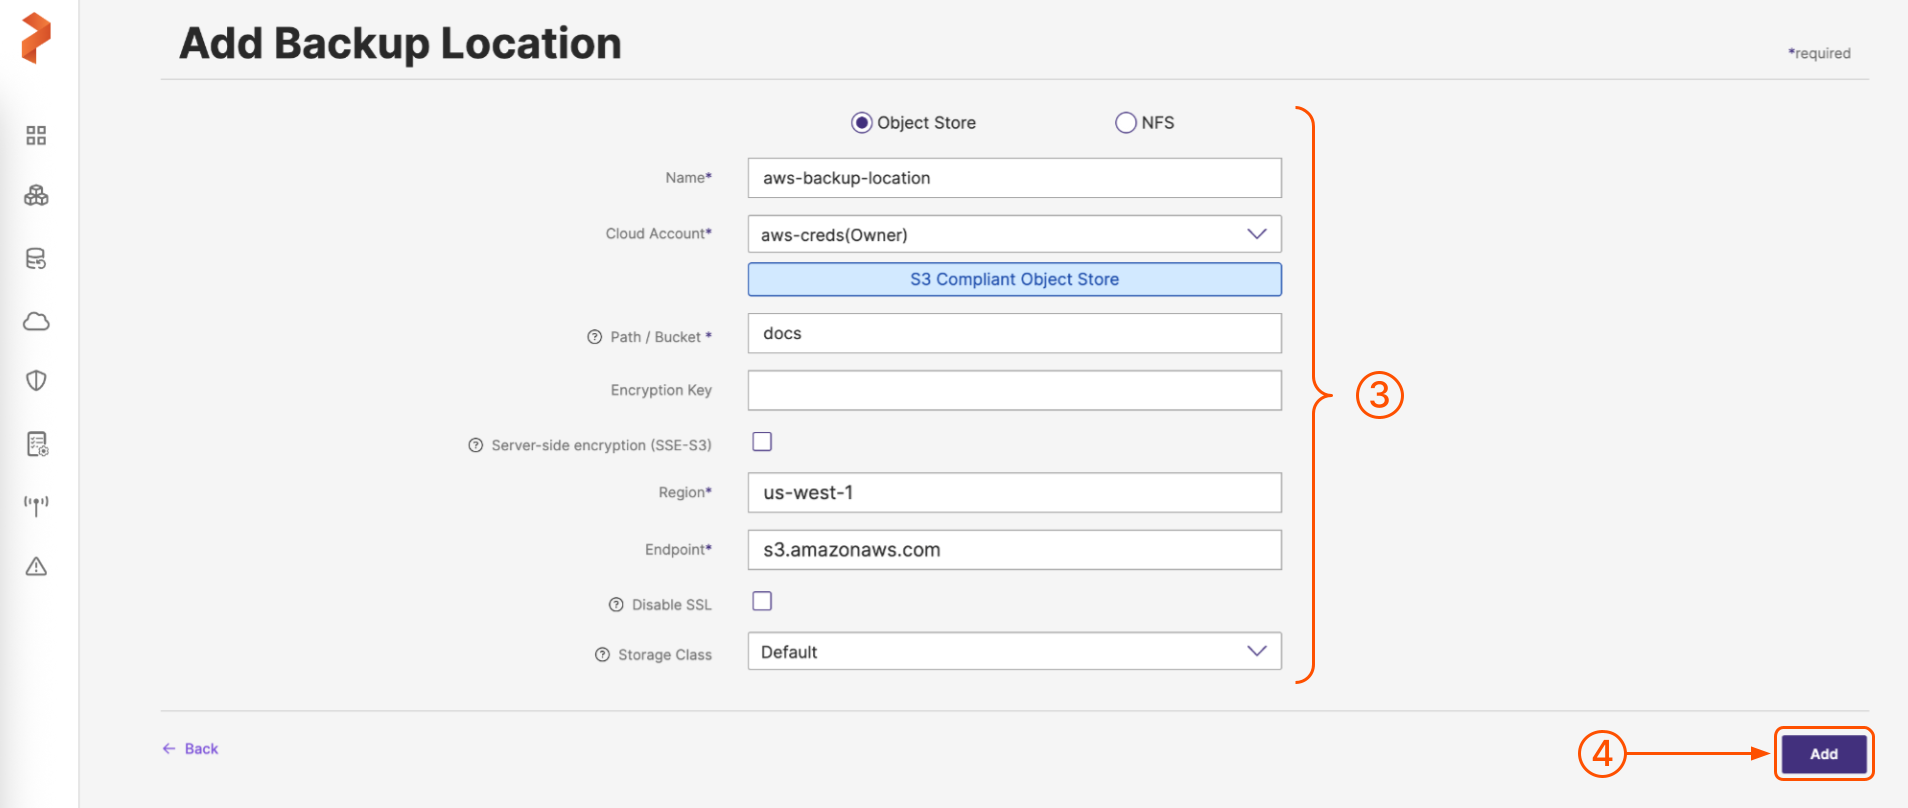
Populate the fields on the Add Backup Location page as follows:
-
Name: specify the name for the backup location, Portworx Backup displays this name as backup location name in the web console
-
Cloud Account: choose the AWS/S3 compatible object store account credentials this backup location should use to create backups.
-
Path / Bucket: specify the path of the bucket or the name of the bucket that this backup location will place backups into
-
Encryption key (Optional): enter the optional encryption key to encrypt your backups in-transit. For more information on encryption support, refer Transit data encryption matrix.
-
Server-side encryption (SSE-S3): select this option to encrypt the data (bucket-level or object-level) at destination. For more information, refer Server-side encryption matrix.
-
Region: with the name of your AWS/S3 compatible object store account region
-
Endpoint: with the URL of your cloud storage server or provider
-
Disable SSL: select this option if your on-premises S3-compliant object store does not support SSL/TLS
-
Storage class: choose the S3 storage class your cloud backups should use

For more information on the supported storage class types, refer S3 storage classes.
-
-
When you're done, select the Add button.
noteUpdate Stork deployment spec with add
hostNetwork: trueand wait for the Stork pods to restart before you take a backup (on S3 object store-based backup location and not for NFS backup locations) in OpenShift Cluster Platform (OCP) on cloud like ARO, ROSA, and ROKS on AWS/S3 compatible object store environments.