Create organization
Creating an organization in PDS allows you to establish a logical grouping of resources, projects, and user roles, enabling efficient administration and isolation of infrastructure within your account.
- By default, every account in PDS comes with one pre-created organization, called
px-system-tenant. This serves as the primary organization for managing initial resources, projects, and user roles. - Only the Account Admin can create organizations.
Create an organization
To create an organization in the PDS platform:
-
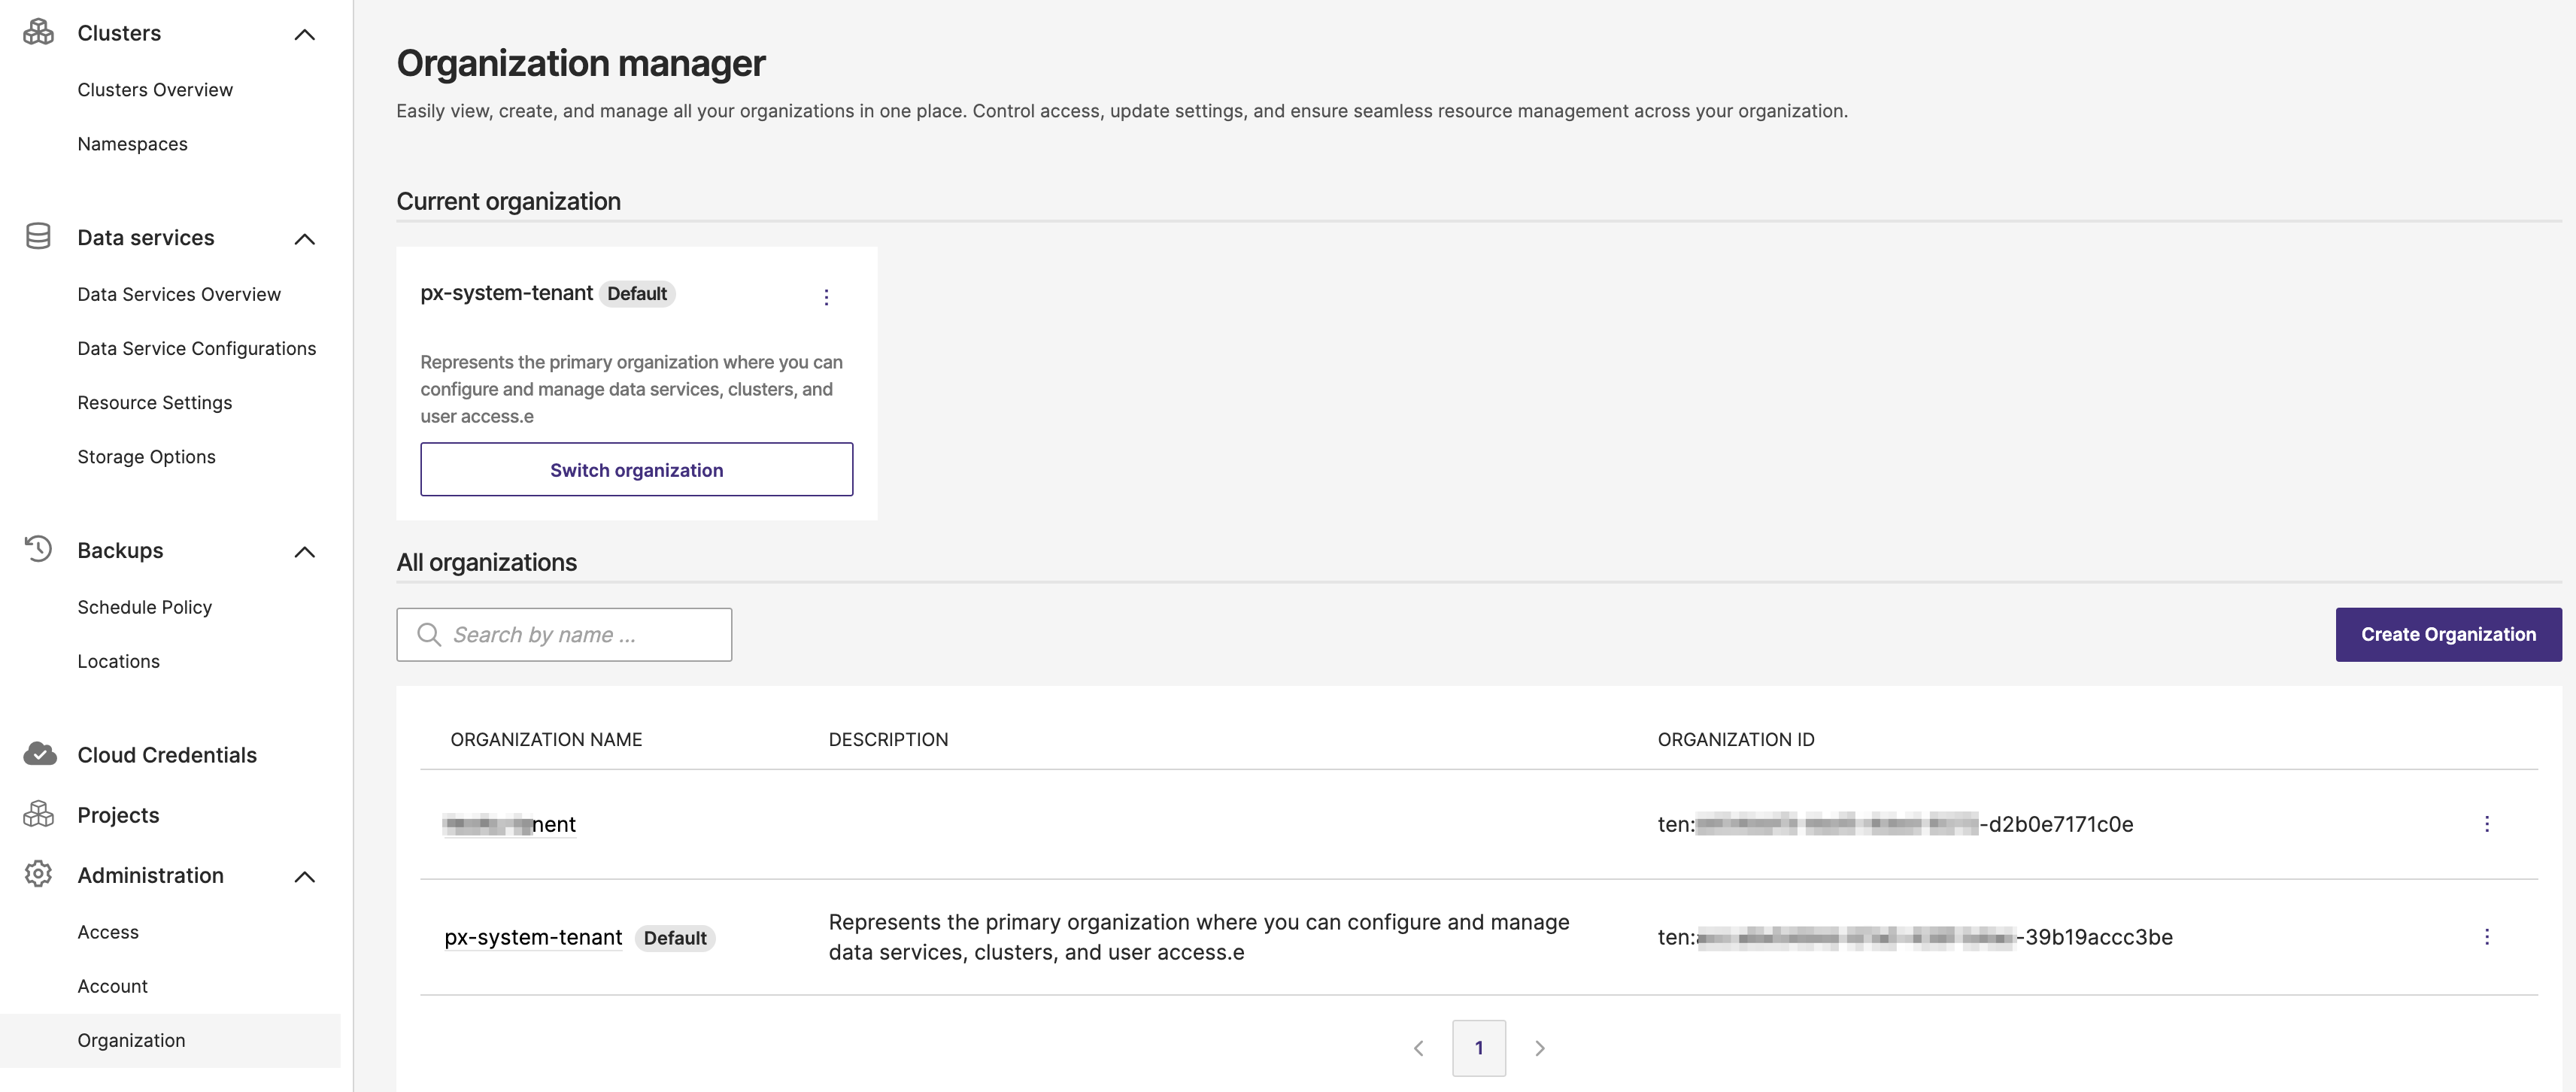
On the PDS landing page, navigate to Administration in the main menu and then select Organization from the dropdown to open the Organization manager page:

In the Organization manager page, you will see a section labeled Current organization, displaying the active organization. Below that, the All organizations section lists all existing organizations. Use this to view existing organizations if needed.
-
Click the Create Organization button on the right side of the page.
This will open the New organization page.
-
In the New organization form, fill in the required information:
- Name: Enter a unique name for the organization.
noteThe organization name is permanent and you cannot change it later.
- Description: Provide a brief description to specify the purpose or scope of this organization (optional but recommended for clarity).
On the right side of the form, under Organization Summary, verify the details you entered for Name and Description.
-
Once you have reviewed the information, select the Create organization button to finalize the creation.
If you need to make changes or decide not to proceed, click Cancel.
Invite members to an organization and assigning roles
After creating the organization, you will be directed to the Invite members and assign role page. Follow these steps to invite members and assign appropriate roles:
-
In the Email address field, enter the email address of the member you want to invite.
-
From the Role dropdown menu, select the desired role for the member (for example, Organization Admin, Project Admin, Project User).
-
Click the Add button to include additional members and assign roles to them. Repeat the process for each member.
-
Once all members have been added and roles assigned, click Continue to finalize the invitations.
-
(Optional) If you wish to invite members later, click Skip for now to proceed without adding members immediately.
You will be redirected to the Organization manager page, where the new organization will now appear under All organizations.