Add a FlashBlade File system as Network File System Backup Location
Portworx Backup allows you to add NFS File systems created with FlashBlade (FB) web console as backup location. FB file system is a service activated on FlashBlade, offering the capability to establish an NFS file system using the backend block storage.
Prerequisites
Ensure that the following prerequisites are met before you add a FlashBlade-based NFS as backup location in Protworx Backup:
- Configure the following setup requirements:
- If you have opted for Portworx Enterprise as the storage provider, an on-premise Kubernetes cluster with Portworx Enterprise version 2.13.6 or later.
- Portworx Backup version 2.5.0 or later.
- Stork version 23.6.0 or later.
- FlashBlade running Purity//FB 4.1.14 or above, 4.3 or above, or 4.4 or above.
- Pre-configured network data interface in FlashBlade web console.
- Mapping between FB File System and export policy in the FlashBlade web console.
- Observe the NFS Server prerequisites and Sample NFS server configuration
Creating an Export Policy in FlashBlade Web Console
To create an export policy in the FlashBlade web console, follow these steps:
-
From the home page navigation bar, navigate to Policies > NFS.
-
Under NFS Export Policies, click plus icon to create new export policy.
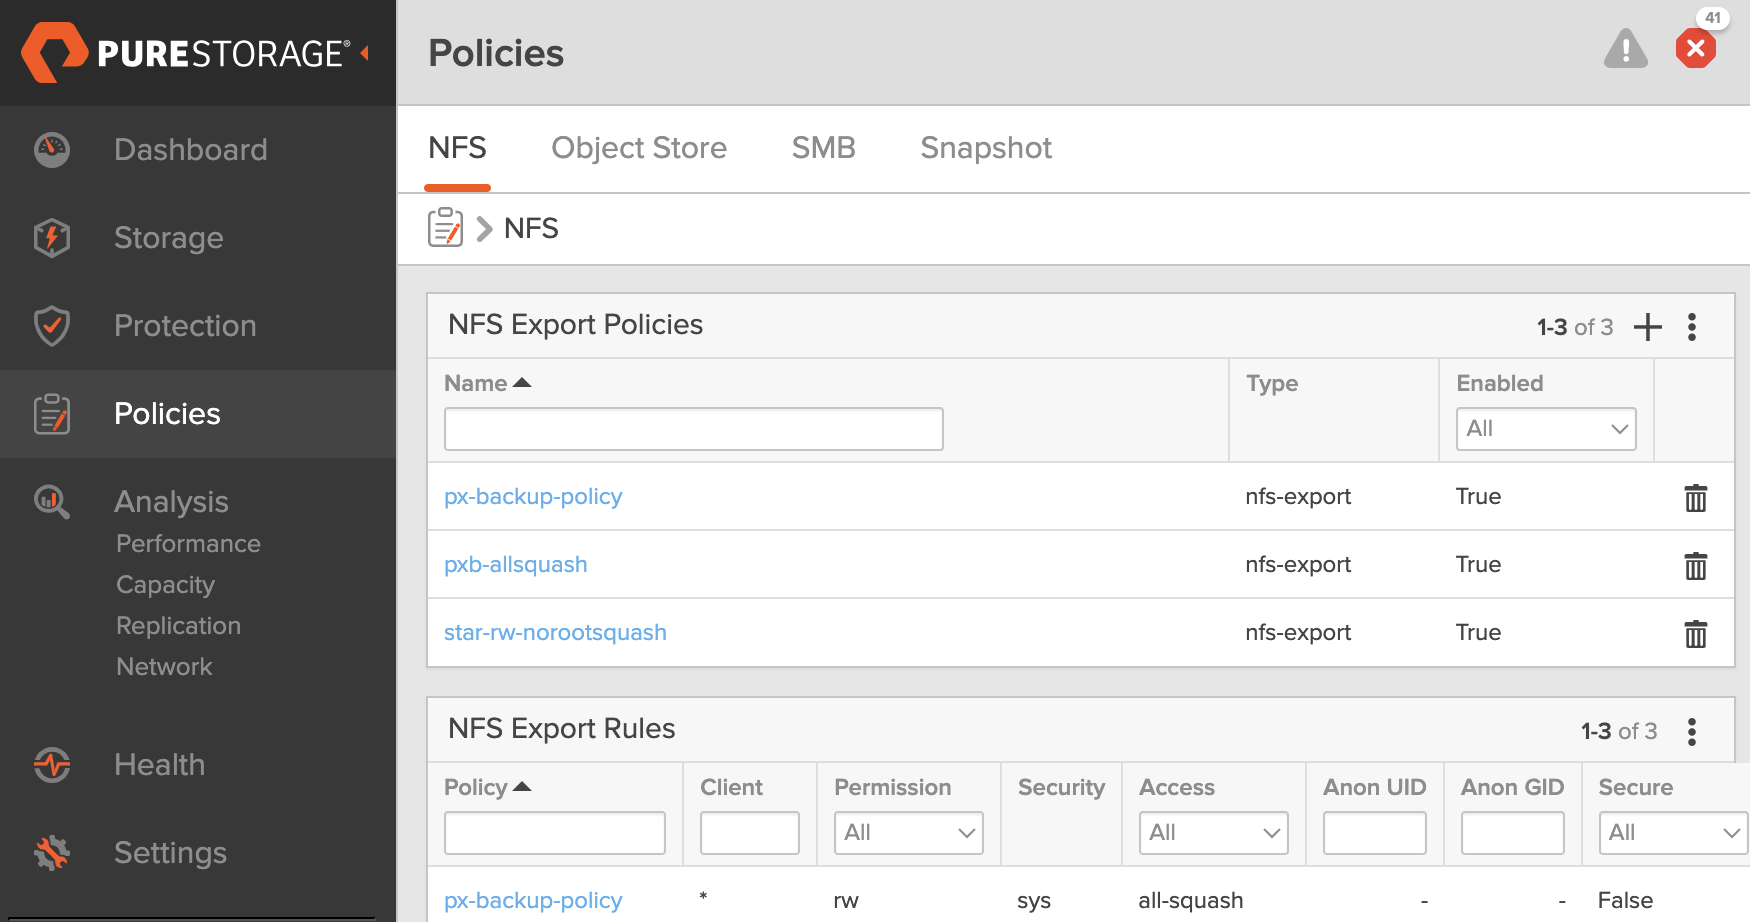
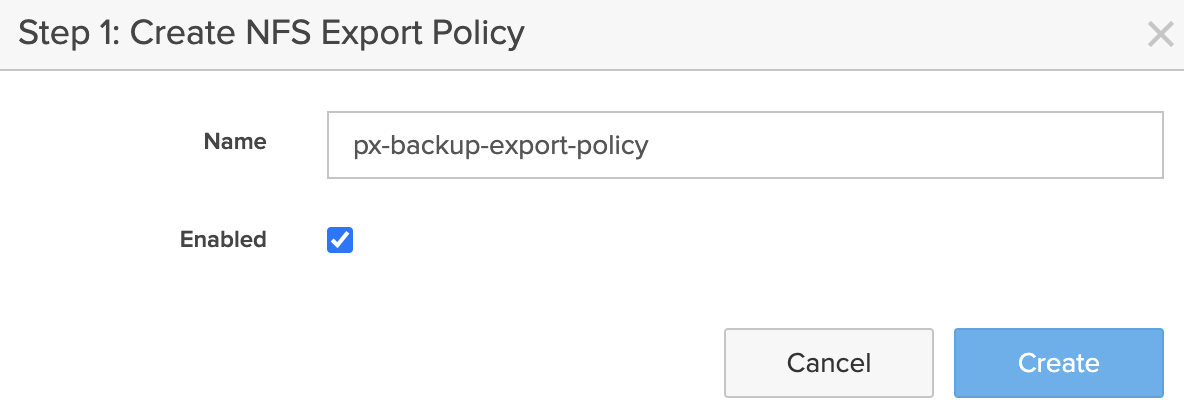
-
In the Create NFS Export Policy window specify policy name of your choice in the Name field and ensure Enabled option is checked and then click Create.
-
In the Add NFS Export Rule window, ensure that the following fields are populated:
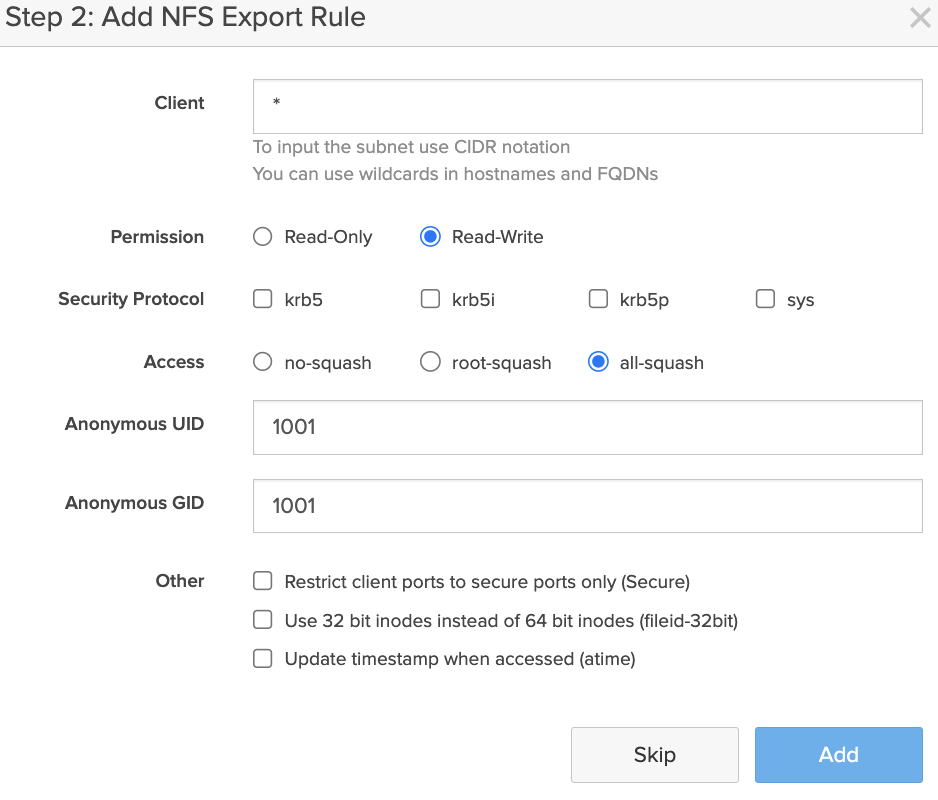
- Client: enter
*if you do not want to restrict any of the clients to access the NFS shares, otherwise enter the IP address(s) of the clients if you want to allow only a single or set of clients (application clusters) to access the NFS shares - Permission: Read-Write
- Security Protocol: optional, select the required option if needed
- Access: all-squash
- Anonymous UID: 1001, default non-root user ID
- Anonymous GID: 1001, default non-root group ID
- Other: optional, choose the preferred option if needed
- Client: enter
-
Click Add. An NFS export policy is created in NFS Export Policies section.
Creating a File System and Mapping Export Policy
To create a file system and map export policy, follow these steps
-
From the home page sidebar, navigate to Storage > File system.
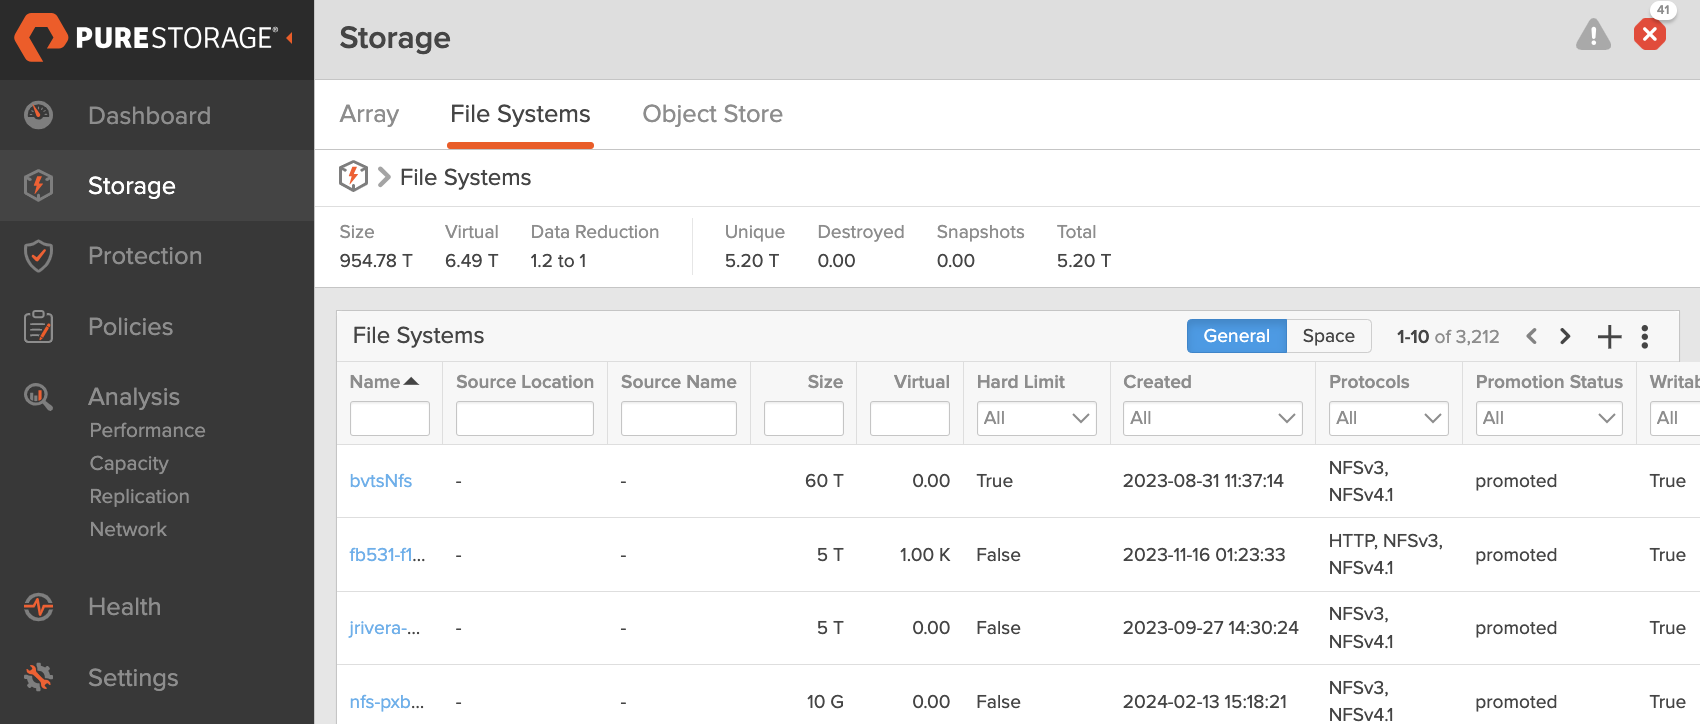
-
Under File Systems, click plus icon to create new file system.
-
In the Create File System window, populate the following fields:
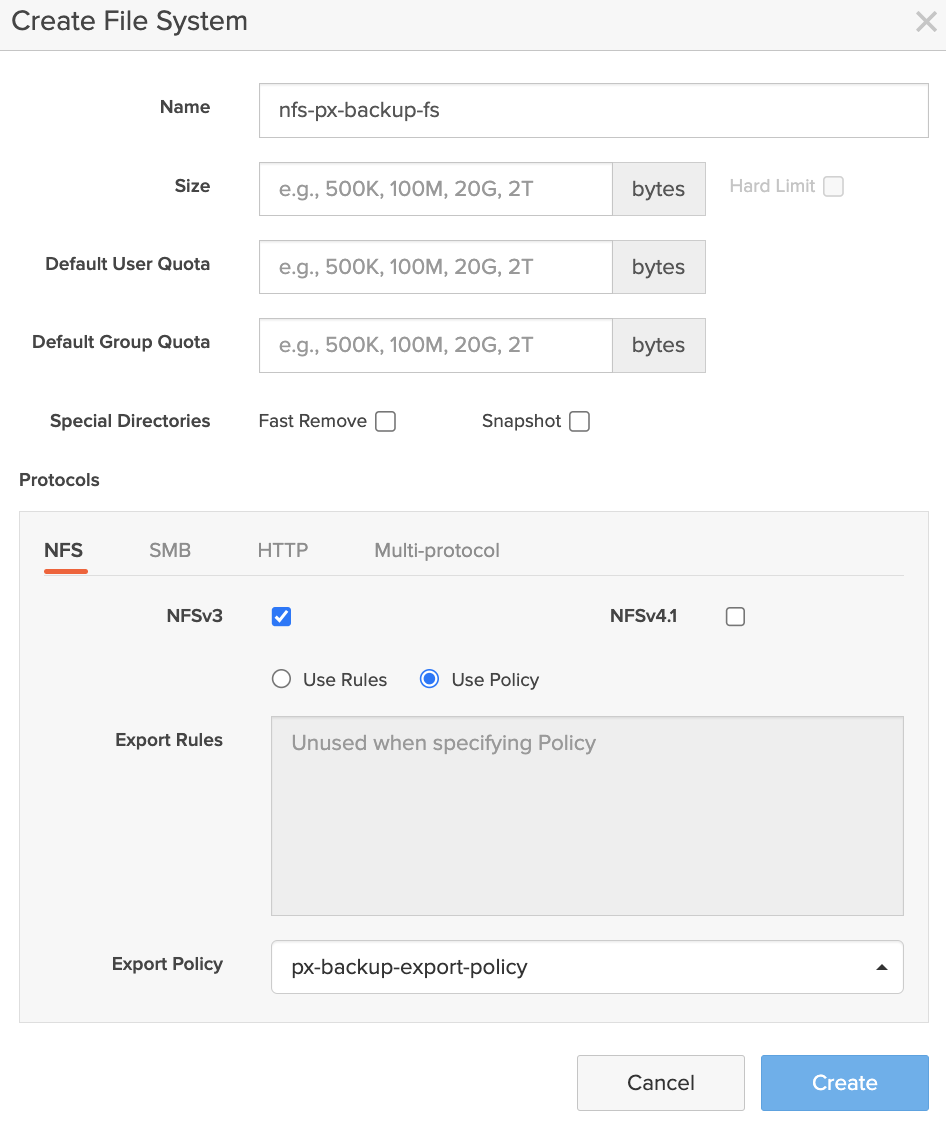
- Name: preferred name for the file system you want to create
- Size: allocate the required storage limit for your backup location
- Hard Limit: optional
- Default User Quota: optional
- Default Group Quota: optional
- Special Directories: optional
- Protocols:
- Choose NFS
- Select NFSv3 and/or NFSv4.1 based on your FB version
- Select Use Policy to map the policy.
- For Export Rules: ignore, because we need to map export policy here with the File System and not Export Rules
- For Export Policy: map the policy you created in Create export policy in FlashBlade web console.
-
Click Create. An NFS file system is created and the required NFS export policy is now mapped to the file system.
Procedure
To add a FlashBlade file system as backup location, follow these steps:
- Log in to the Portworx Backup UI.
- From the left navigation pane, click the Cloud Settings icon
 and select the Backup Locations tab.
 - Click Add Backup Location.
- On the Add Backup Location page, select the NFS option and specify the following information:
- Name: preferred name for the NFS backup location
- NFS Server Address: in the FB web console, from the home page navigate to Settings > Network > Subnets & Interfaces > Interfaces. Choose a pre-configured network data service and obtain the associated IP address.
- NFS Exported Path: navigate to FB web console, from the home page navigate to Storage > File systems >. Choose the NFS file system that you created here for NFS and copy the name of the file system and prefix this value with a forward slash(/).
- (Optional) Sub Path: an optional field if the user wants to specify a subfolder location within the export path
- (Optional) Mount Options: preferred option(s) for NFS mount, multiple mount options must be separated by a comma
- (Optional) Encryption Key: a key of to encrypt the backups in transit
- Click Add. Portworx Backups adds the NFS backup location of the File System you created through FlashBlade web console.