Install PXB through Argo CD
This topic details how to deploy Portworx Backup (PXB) using Argo CD, a GitOps-based continuous delivery tool for Kubernetes. It supports two types of environments:
-
Internet-connected environments
-
Air-gapped (offline) environments
The deployment leverages Helm charts and integrates with Git repositories or Helm repositories depending on the installation approach. It also emphasizes proper configuration, sync management, and customizations for smooth operations and upgrades.
For more information refer to the following topics in Argo CD documentation:
Prerequisites
-
Access to Argo CD web console
-
Helm-generated values using spec-gen
-
(For air-gapped setups) Internal Git repository and downloaded
.tgzHelm chart package
Install PXB (Internet-connected)
-
Login and access Argo CD web console.
-
Click NEW APP or CREATE APPLICATION.
-
Configure the application:
-
In the Create Application page, provide the following details:
-
General Settings:
- Application Name: provide a meaningful name to your application (for example,
pxb-deploy). - Project: choose the appropriate project from the drop-down.
- Sync Policy: select Manual.
- Sync Option: check the options Respect Ignore Differences, Auto-Create Namespace, Server-Side Apply
- Application Name: provide a meaningful name to your application (for example,
-
Source Configuration (Choose One Option):
-
Option A: using Git Repository (for latest versions)
- Repository URL:
https://github.com/portworx/helm - Revision:
master - Path:
charts/px-central
Recommended if you want to install or upgrade to the latest Portworx Backup version.
- Repository URL:
-
Option B: using Helm Repository (for older or specific versions)
- Repository URL:
http://charts.portworx.io/ - Chart:
px-central - Version: specify the desired version (Example: 2.9.1)
Recommended for installing or upgrading to older or pinned PXB versions.
- Repository URL:
-
-
Destination Configuration:
- Cluster URL: select the target Kubernetes cluster.
- Namespace: enter the target namespace (example:
px-backup)
-
Helm Configuration:
- Under the Helm section:
- Paste the values generated from spec-gen OR
- Manually configure values in the Parameters section
- Under the Helm section:
-
-
Click CREATE to proceed with application creation.
-
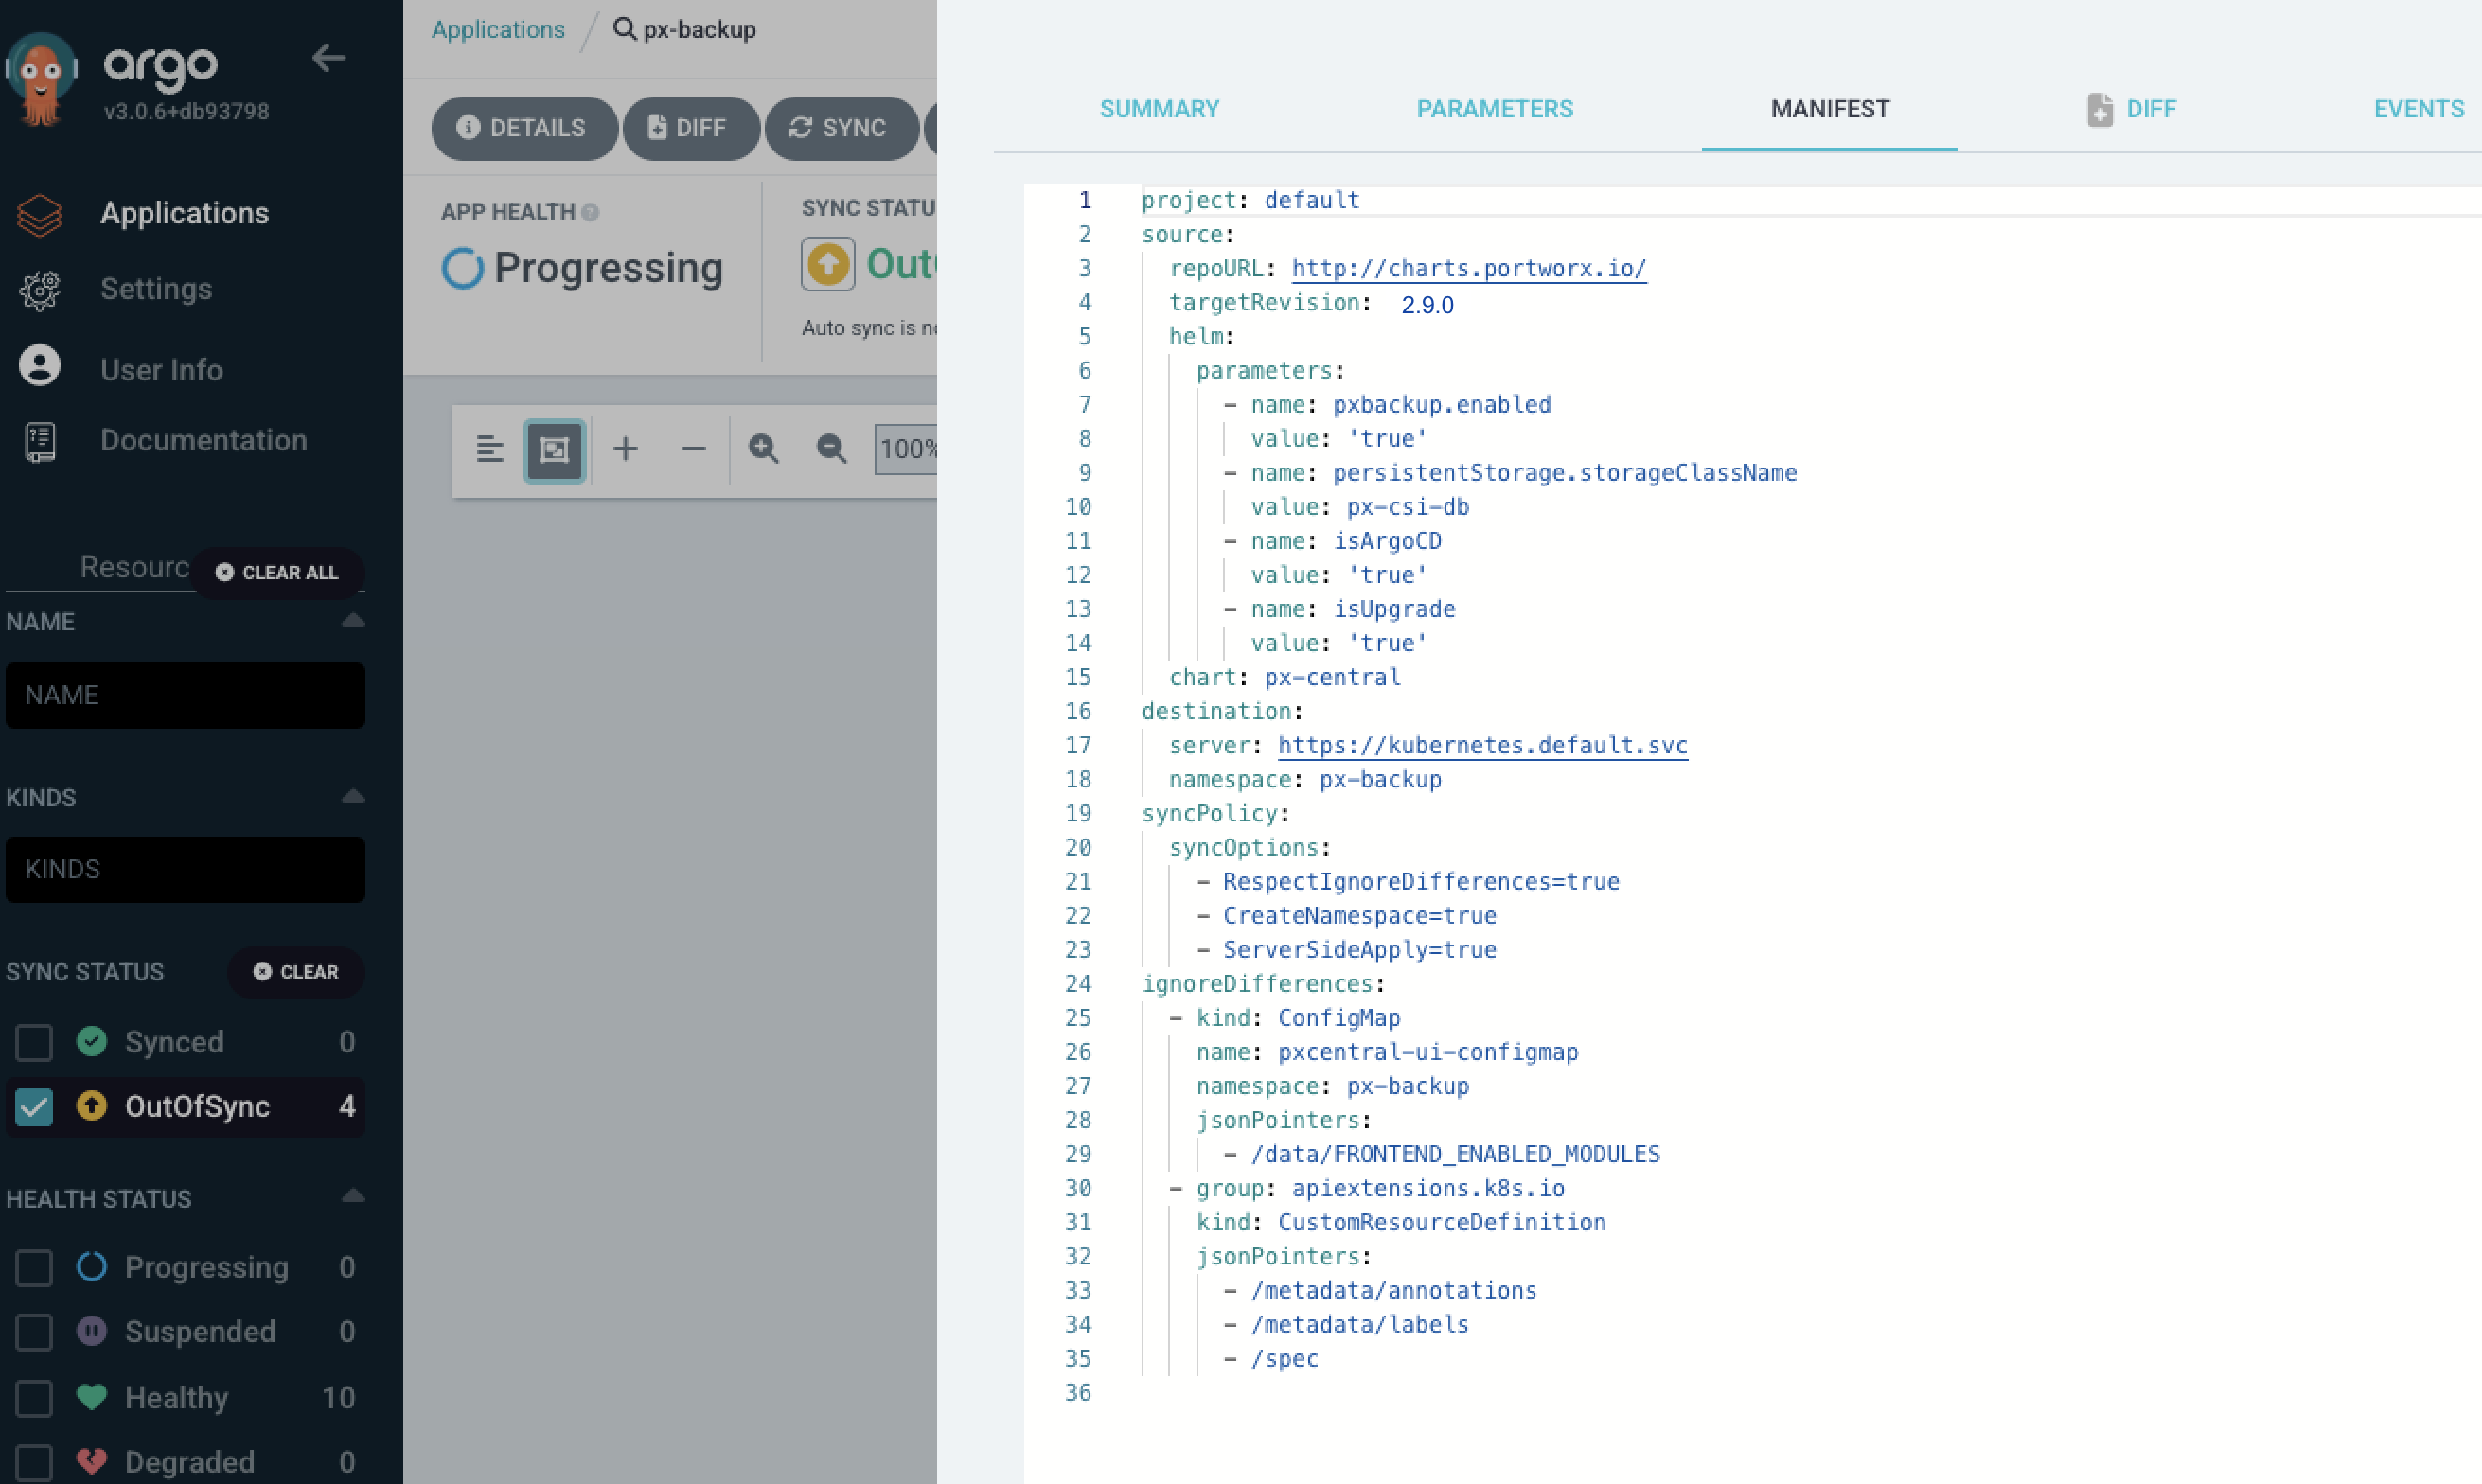
After creating the application, perform the following steps to configure the differences:
-
Open the created Application Card. For example:
px-backup -
Go to the DETAILS → MANIFEST section.
-
Click EDIT and append the following configuration:
ignoreDifferences:
  - kind: ConfigMap
    name: pxcentral-ui-configmap
    namespace: px-backup
    jsonPointers:
      - /data/FRONTEND_ENABLED_MODULES
  - group: apiextensions.k8s.io
    kind: CustomResourceDefinition
    jsonPointers:
      - /metadata/annotations
      - /metadata/labels
- /spec -
Click SAVE.
-
Click SYNC to deploy Portworx Backup.
-
After initial deployment, navigate to Applications → DETAILS → PARAMETERS. Set the Helm parameter
isUpgradetotrue, which is required for further syncs.
Install PXB (Air-gapped)
Prerequisite
From the node where you run the helm3 command:
- Download the latest
px-centralpackage with the following command:
curl -O https://raw.githubusercontent.com/portworx/helm/master/stable/px-central-<pxb-version>.tgz
Replace <pxb-version> with the PXB version you want to install.
Example: 2.9.0 or 2.9.1
- Extract the above downloaded file and commit it to the internal git repository.
To start the actual installation, carry out the following steps:
-
Login and access Argo CD web console.
-
Click NEW APP or CREATE APPLICATION.
-
Configure the application:
-
In the Create Application page, provide the following details:
-
General Settings:
- Application Name: provide a meaningful name to your application (for example,
pxb-deploy). - Project: choose the appropriate project from the drop-down.
- Sync Policy: select Manual.
- Sync Option: check the options Respect Ignore Differences, Auto-Create Namespace, and Server-Side Apply
- Application Name: provide a meaningful name to your application (for example,
-
Source Configuration (Choose One Option): Using Local Git Repository
- Repository URL:
https://github.com/portworx/helm - Revision:
master(or use a specific branch) - Path:
charts/px-central
- Repository URL:
-
Destination Configuration:
- Cluster URL: select the target Kubernetes cluster.
- Namespace: enter the target namespace (example:
px-backup)
-
Helm Configuration:
-
Under the Helm section:
- Paste the values generated from spec-gen. OR
- Manually configure values in the Parameters section.
note- For installation through Argo CD, set the below helm parameter:
isArgoCD=true - If the cluster where you are planning to deploy PXB is OpenShift with Argo CD then, set the following helm parameters to true:
isArgoCD=true
isOpenshift=true
-
-
-
Click CREATE to proceed with application creation.
-
After creating the application, perform the following steps to configure the differences:
-
Open the created Application Card.
-
Go to the DETAILS → MANIFEST section.

-
Click EDIT and append the following configuration:
ignoreDifferences:
  - kind: ConfigMap
    name: pxcentral-ui-configmap
    namespace: px-backup
    jsonPointers:
      - /data/FRONTEND_ENABLED_MODULES
  - group: apiextensions.k8s.io
    kind: CustomResourceDefinition
    jsonPointers:
      - /metadata/annotations
      - /metadata/labels
- /spec -
Click SAVE.
-
Click SYNC to deploy Portworx Backup.
-
After initial deployment, navigate to Applications → DETAILS → PARAMETERS. Set the Helm parameter
isUpgradetotrue, which is required for further syncs.
Upgrade PXB in internet-connected and air-gapped environments
To upgrade PXB through Argo CD web console either in internet-connected or air-gapped environments, From the Argo CD web console:
-
Navigate to Applications > PXB application card > Details > MANIFEST > Edit.
-
Ensure that
isUpgradeparameter is set totrue. -
Replace the
targetRevisionparameter value to the PXB version you want to upgrade to. -
Click Save.
-
Click SYNC.
After sometime Argo CD web console upgrades PXB version to the required version.