MinIO on Kubernetes on Portworx
Overview
MinIO is a high-performance distributed object store with an S3 compatible API.
The following steps deploy the latest version of the MinIO operator and tenant on Kubernetes. Refer to the MinIO documentation for more information.
Prerequisites
- Have a Kubernetes cluster running version 1.19 or newer.
- Have Portworx installed on your Kubernetes cluster. For details, see Install Portworx.
- Meet the MinIO prerequisites.
Deploy the MinIO Operator
Follow the steps in the MinIO documentation to deploy the MinIO Operator.
Create a MinIO Tenant using the command line
The example deployment in this document is not recommended for production environments. Refer to the MinIO documentation for more details.
There are multiple ways to deploy MinIO tenants. In this example, we will create a tenant using the command line.
Portworx offers a set of Storage classes out of the box. In the example, we are using the px-csi-db StorageClass to provision Portworx volumes.
-
Check the storage classes and make sure that px-csi-db is set as the default:
kubectl get scpx-csi-db (default) pxd.portworx.com Delete Immediate true 52mpx-csi-db-cloud-snapshot pxd.portworx.com Delete Immediate true 52mpx-csi-db-cloud-snapshot-encrypted pxd.portworx.com Delete Immediate true 52m...px-db kubernetes.io/portworx-volume Delete Immediate true 52mpx-db-cloud-snapshot kubernetes.io/portworx-volume Delete Immediate true 52mpx-db-cloud-snapshot-encrypted kubernetes.io/portworx-volume Delete Immediate true 52m...px-replicated kubernetes.io/portworx-volume Delete Immediate true 52mpx-replicated-encrypted kubernetes.io/portworx-volume Delete Immediate true 52mstork-snapshot-sc stork-snapshot Delete Immediate true 52mIf you have a different default storage class, mark it as non-default and mark the px-csi-db StorageClass as default. Refer to the Kubernetes documentation for information about marking non-default and default storage classes.
-
Create a MinIO tenant namespace:
kubectl create ns minio-demonamespace/minio-demo created -
Create a tenant:
kubectl minio tenant create \minio-demo \--capacity 100Gi \--servers 1 \--volumes 1 \--namespace minio-demo \--storage-class px-csi-dbTenant 'minio-demo' created in 'minio-demo' NamespaceUsername: <tenant-id>Password: <tenant-password>Note: Copy the credentials to a secure location. MinIO will not display these again.APPLICATION SERVICE NAME NAMESPACE SERVICE TYPE SERVICE PORTMinIO minio minio-demo ClusterIP 443Console minio-demo-console minio-demo ClusterIP 9443In this example, the required settings are as follows:
TENANT_NAME: The name of the tenant. In this example, we are usingminio-demoas the tenant name.--capacity: The total Raw size of storage across all volumes--servers: The total number of Server Pods in the Tenant--volumes: The total number of storage Volumes.--namespace: The namespace required by the MinIO Tenant.--storage-class: The storage class to use to provision Portworx Volumes.
-
Copy the credentials displayed in the output to a secure location.
noteWhen creating the tenant, the Operator displays the access credentials to use for the tenant. This is the only time the credentials display.
-
Check the tenant pod status:
kubectl get po -n minio-demoNAME READY STATUS RESTARTS AGEminio-demo-log-0 1/1 Running 0 2m20sminio-demo-log-search-api-6954696f58-rpr2n 1/1 Running 3 (119s ago) 2m20sminio-demo-prometheus-0 2/2 Running 0 80sminio-demo-ss-0-0 1/1 Running 0 2m20s -
Check Portworx volumes:
kubectl get pvc -n minio-demoNAME STATUS VOLUME CAPACITY ACCESS MODES STORAGECLASS AGE0-minio-demo-ss-0-0 Bound pvc-xxxxxxxx-xxxx-xxxx-xxxx-d456ddf8af1e 100Gi RWO px-csi-db 3m32sminio-demo-log-minio-demo-log-0 Bound pvc-xxxxxxxx-xxxx-xxxx-xxxx-af8b15bd9084 5Gi RWO px-csi-db 3m32sminio-demo-prometheus-minio-demo-prometheus-0 Bound pvc-xxxxxxxx-xxxx-xxxx-xxxx-0336eb868566 5Gi RWO px-csi-db 2m32s
Access the tenant
The Operator creates multiple services for the tenant.
-
To get service details, run the following command:
kubectl get svc -n minio-demominio ClusterIP 10.108.83.135 <none> 443/TCP 6m29sminio-demo-console ClusterIP 10.110.166.206 <none> 9443/TCP 6m29sminio-demo-hl ClusterIP None <none> 9000/TCP 6m29sminio-demo-log-hl-svc ClusterIP None <none> 5432/TCP 5m28sminio-demo-log-search-api ClusterIP 10.96.72.119 <none> 8080/TCP 5m28sminio-demo-prometheus-hl-svc ClusterIP None <none> 9090/TCP 4m28s
-
Applications should use the
minioservice for performing operations against the MinIO tenant. -
Administrators should use the
<TENANT-NAME>-consoleservice for accessing the MinIO Console and performing administrative operations.
-
Use port-forwarding to expose each service and access the MinIO tenant for applications or the console UI for administration.
To port-forward the MinIO tenant, run the following command:
kubectl port-forward service/minio 8443:443 -n minio-demoForwarding from 127.0.0.1:8443 -> 9000Forwarding from [::1]:8443 -> 9000To port-forward the MinIO console, run the following command:
kubectl port-forward service/minio-demo-console -n minio-demo 9443:9443Forwarding from 127.0.0.1:9443 -> 9443Forwarding from [::1]:9443 -> 9443
Access the MinIO tenant console and create a bucket
-
To temporarily connect to the MinIO tenant console, navigate to
https://localhost:9443. -
Use the credentials obtained during deployment and log in to the console.
-
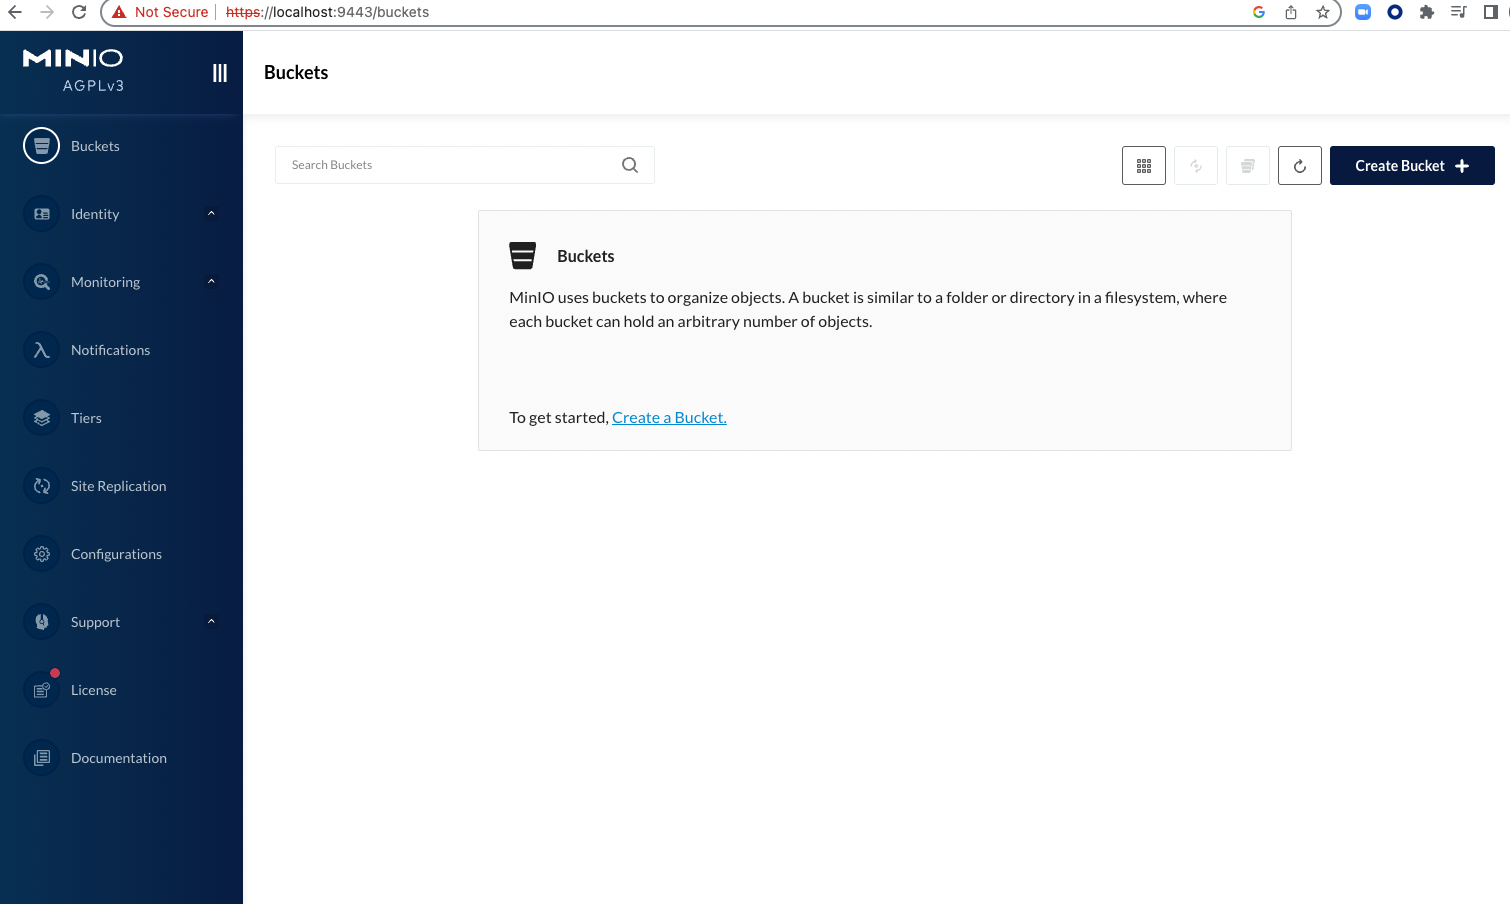
Click Create Bucket + to start bucket creation:
-
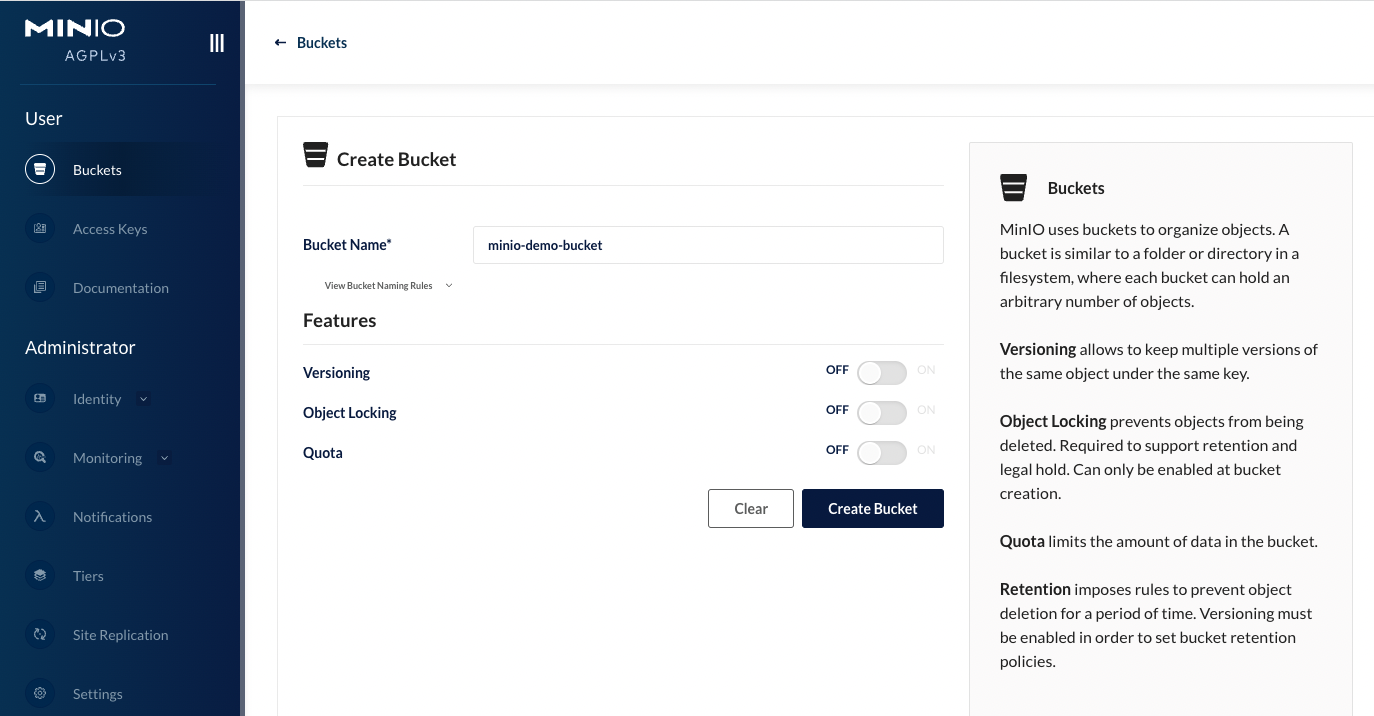
Click Create Bucket to finish bucket creation:
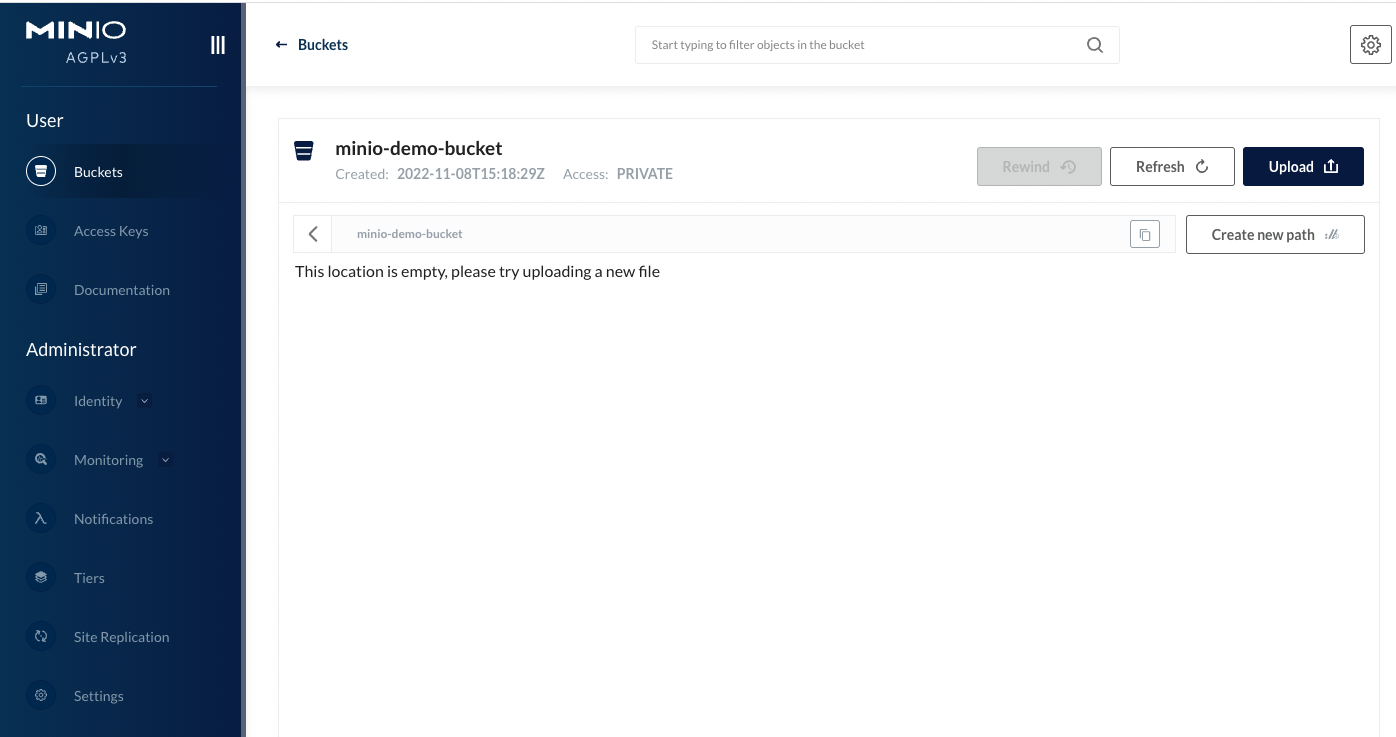
The tenant console UI displays the list of buckets, including the bucket that you created:
Application access to the MinIO tenant
Applications should use the minio service to perform operations against the MinIO tenant.
Use the credentials obtained during deployment for application access.