Install Portworx with Pure Storage FlashBlade as a Direct Access volume
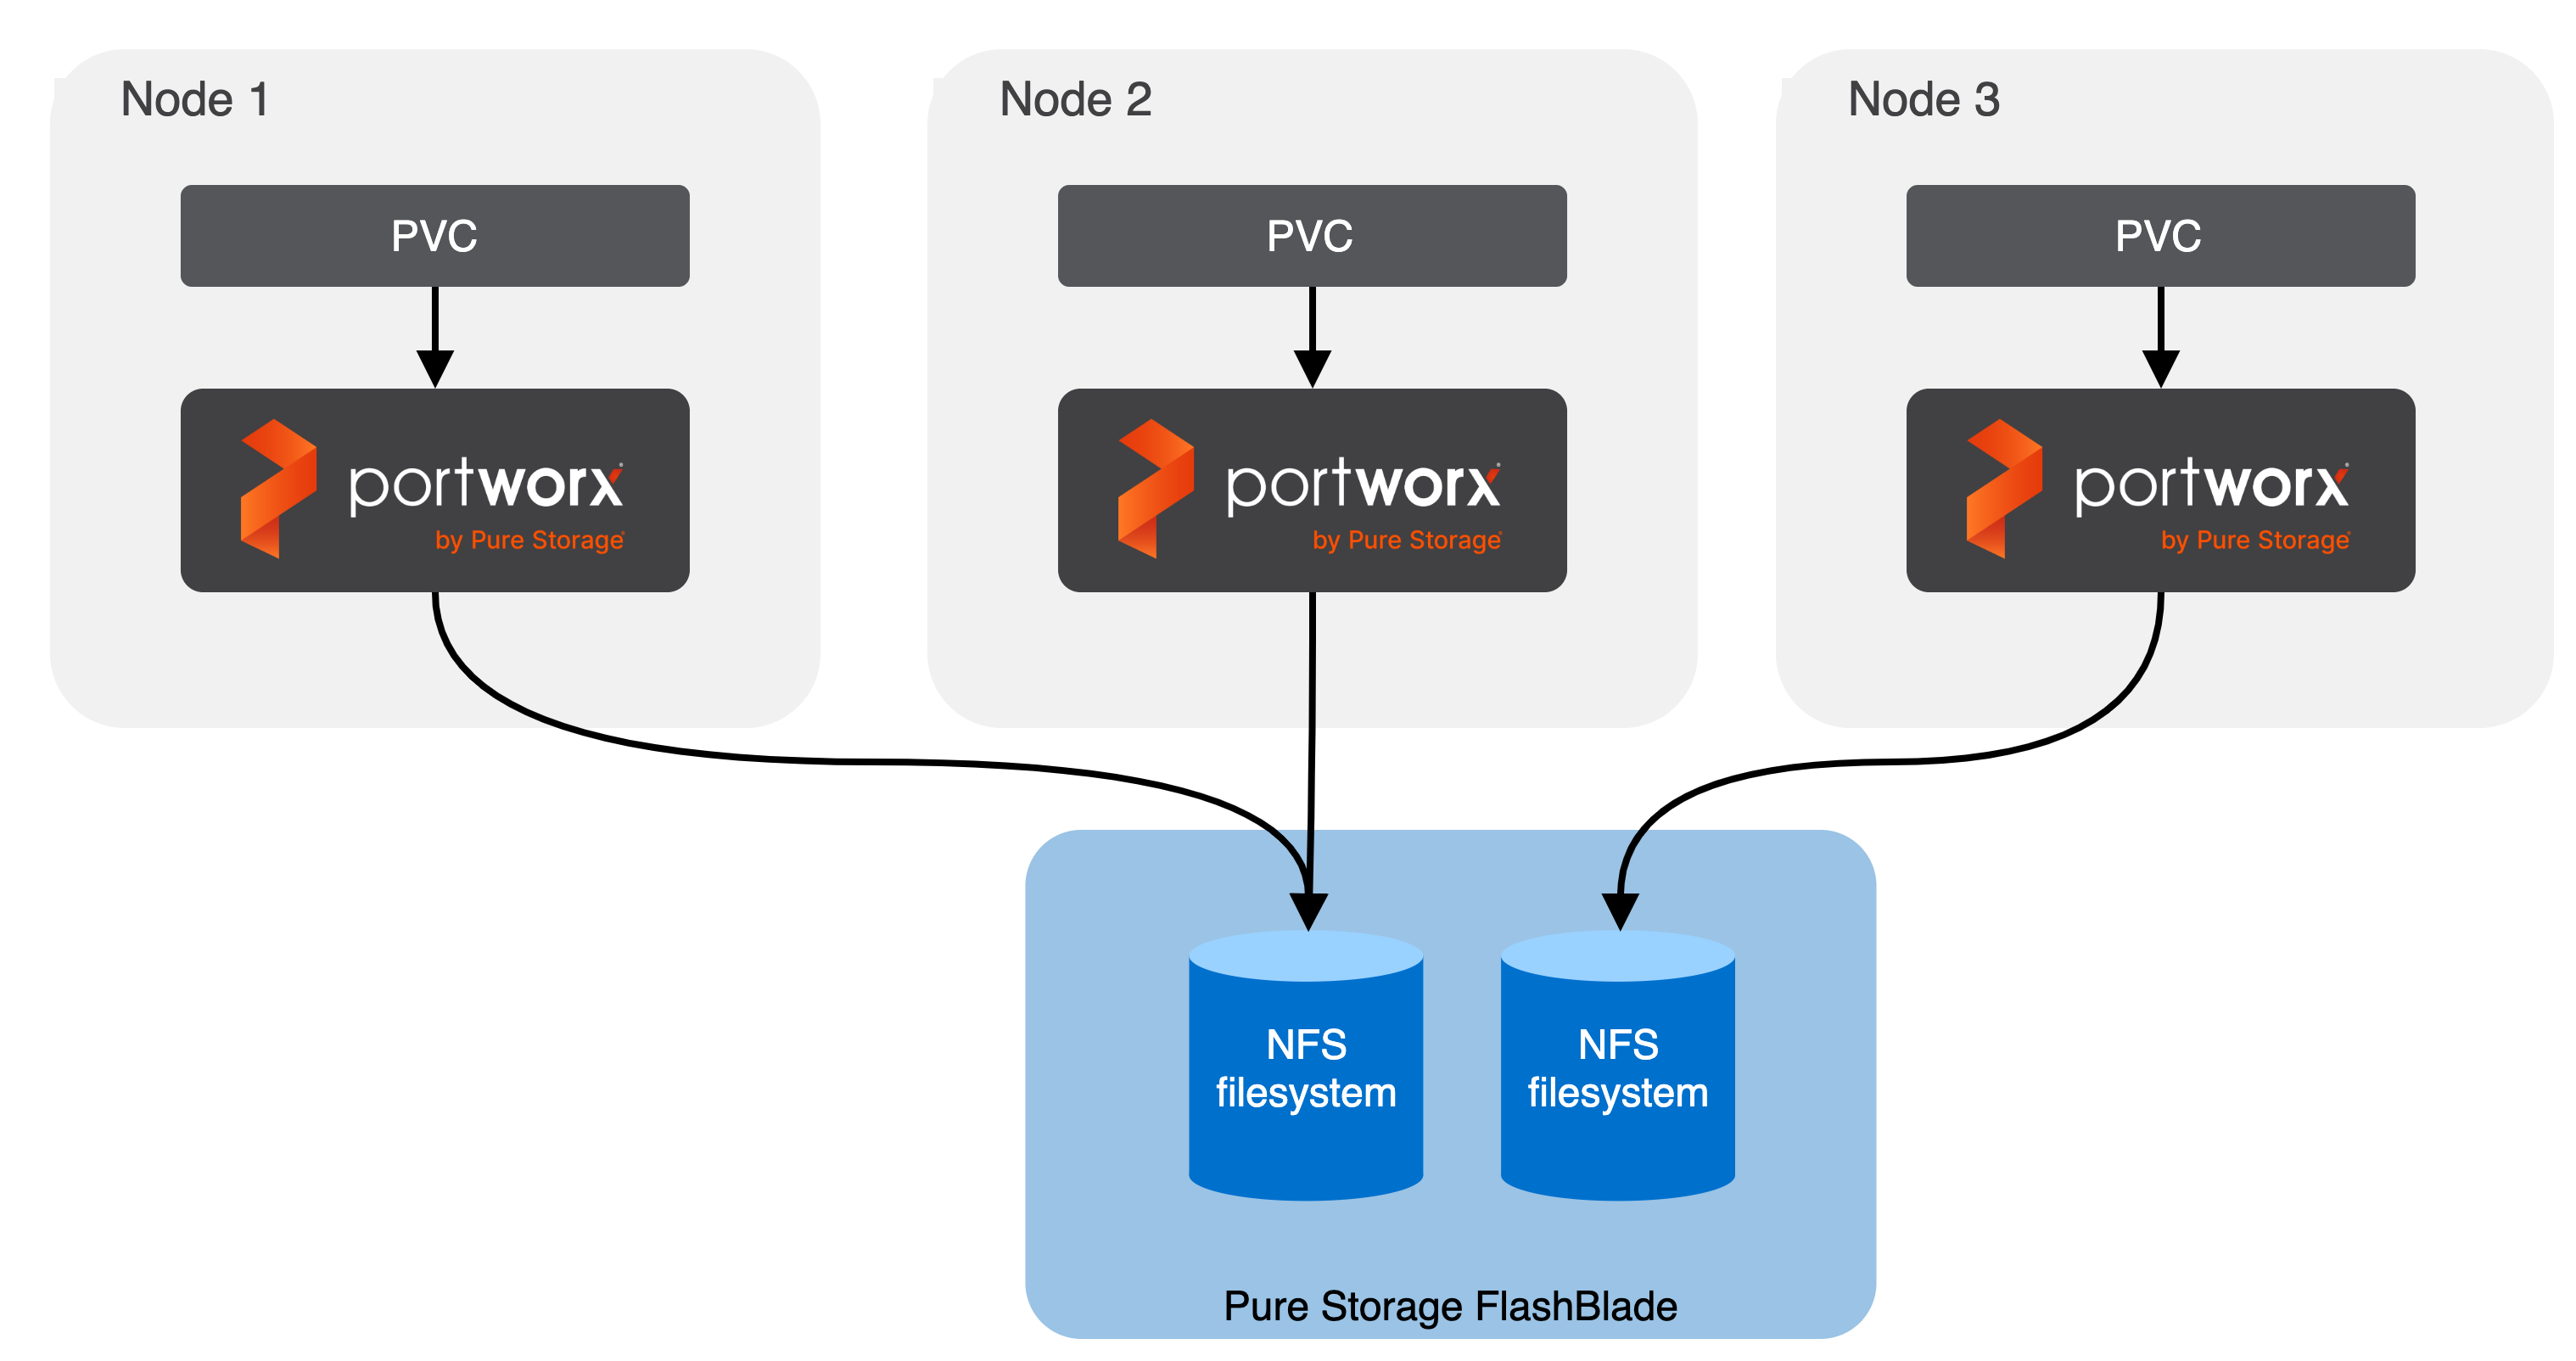
On-premises users who want to use Pure Storage FlashBlade with Portworx on Kubernetes can attach FlashBlade as a Direct Access filesystem. Used in this way, Portworx directly provisions FlashBlade NFS filesystems, maps them to a user PVC, and mounts them to pods. Once mounted, Portworx writes data directly onto FlashBlade. As a result, this mounting method doesn't use storage pools.
FlashBlade Direct Access filesystems support the following:
- Basic filesystem operations: create, mount, expand, unmount, delete
- NFS export rules: Control which nodes can access an NFS filesystem
- Mount options: Configure connection and protocol information
- NFS v3 and v4.1
- FlashBlade Direct Access filesystems do not support subpaths.
- Autopilot does not support FlashBlade volumes.
Mount options
You specify mount options through the CSI mountOptions flag in the storageClass spec. If you do not specify any options, Portworx will use the default options from the client side command instead of its own default options.
Mount options rely on the underlying host operating system and Purity//FB version. Refer to the FlashBlade documentation for more information on specific mount options available to you.
NFS export rules
NFS export rules define access writes and privileges for a filesystem exported from FlashBlade to an NFS client.
Differences between FlashBlade Direct Access filesystems and proxy volumes
Direct Access dynamically creates filesystems on FlashBlade that are managed by Portworx on demand, while proxy volumes are created by users and then used by Portworx as required.
The following existing Portworx parameters don't apply to Pure Direct Access filesystems:
- shared
- sharedv4
- secure
- repl
- scale should be 0
- aggregation_level should be less than 2
Direct Access Architecture
Portworx runs on each node. When a user creates a PVC, Portworx provisions an NFS filesystem on FlashBlade and maps it directly to that PVC based on configuration information provided in the storageClass spec.

Install Portworx and configure FlashBlade
Before you install Portworx, ensure that your physical network is configured appropriately and that you meet the prerequisites. You must provide Portworx with your FlashBlade configuration details during installation.
Prerequisites
- FlashBlade must be running Purity//FB version 2.2.0 or greater. Refer to the Supported models and versions topic for more information.
- Your cluster must have local or cloud drives accessible on each node. Portworx needs local or cloud drives on the node (block devices) for the journal and for at least one storage pool.
- The latest NFS software package installed on your operating system (nfs-utils or nfs-common)
- FlashBade can be accessed as a shared resource from all the cluster nodes. Specifically, both
NFSEndPointandMgmtEndPointIP addresses must be accessible from all nodes. - You've set up the secret, management endpoint, and API token on your FlashBlade.
- If you want to use Stork as the main scheduler, you must use Stork version 2.12.0 or greater.
Create FlashBlade configuration file and Kubernetes secret
- Multiple NFS endpoints
- Basic NFS endpoints
Create a JSON file, named pure.json containing details about FlashBlade instances. This configuration includes management endpoints, API tokens, NFS endpoints, and labeling for zones and regions to distinguish between different FlashBlades in various geographical locations. With zone and labels, the same FlashBlade array can be accessed across different zones using different NFS endpoints in the same cluster.
-
Create a JSON file named
pure.jsonthat contains your FlashBlade information:{
"FlashBlades": [
{
"MgmtEndPoint": "FB end point 1",
"APIToken": "<api-token-for-fb-management-endpoint1>",
"NFSEndPoint": "<fb-nfs-endpoint>",
"Labels": {
"topology.portworx.io/zone": "<zone-1>",
"topology.portworx.io/region": "<region-1>"
}
},
{
"MgmtEndPoint": "FB end point 2",
"APIToken": "<api-token-for-fb-management-endpoint2>",
"NFSEndPoint": "<fb-nfs-endpoint2>",
"Labels": {
"topology.portworx.io/zone": "<zone-1>",
"topology.portworx.io/region": "<region-2>"
}
}
]
}noteYou can add FlashArray configuration information to this file if you're configuring both FlashBlade and FlashArray together. Refer to the JSON file reference for more information.
-
Enter the following
kubectl createcommand to create a Kubernetes secret calledpx-pure-secretin the namespace where you will install Portworx. This secret securely stores the FlashBlade configuration file, allowing Kubernetes to access this sensitive information in a secure manner.kubectl create secret generic px-pure-secret --namespace <px-namespace> --from-file=pure.json=<file path>noteThe secret must be named specifically as
px-pure-secretbecause Portworx expects this name when integrating with FlashBlade.
Create a JSON file, named pure.json containing details about FlashBlade instances.
-
Create a JSON file named
pure.jsonthat contains your FlashBlade information:{
"FlashBlades": [
{
"MgmtEndPoint": "<fb-management-endpoint>",
"APIToken": "<fb-api-token>",
"NFSEndPoint": "<fb-nfs-endpoint>"
}
]
}noteYou can add FlashArray configuration information to this file if you're configuring both FlashBlade and FlashArray together. Refer to the JSON file reference for more information.
-
Enter the following
kubectl createcommand to create a Kubernetes secret calledpx-pure-secretin the namespace where you will install Portworx:kubectl create secret generic px-pure-secret --namespace <px-namespace> --from-file=pure.json=<file path>secret/px-pure-secret creatednoteYou must name the secret
px-pure-secret.
Deploy Portworx
Deploy Portworx on your on-premises Kubernetes cluster. Ensure CSI is enabled.
Once deployed, Portworx detects that the FlashBlade secret is present when it starts up, and can use the specified FlashBlade as a Direct Access filesystem.
Create a FlashBlade PVC
Follow the instruction in the Use FlashBlade as a Direct Access volume section to create your first PVC.