Share Portworx Backup resources
The procedures in this topic explain how you can make the Portworx Backup resources (cloud accounts, backup locations, schedule policies, and rules) public or share access credentials only with specific users and user groups.
Share cloud account credentials
Ensure that a valid cloud account exists in the Portworx Backup. If not, refer to the Configure cloud credentials topic to add one.
If a user creates a Portworx Backup object (cloud credentials, schedule, rules, and so on), then the user is the owner of the object. The Owner label appears for all user created objects:
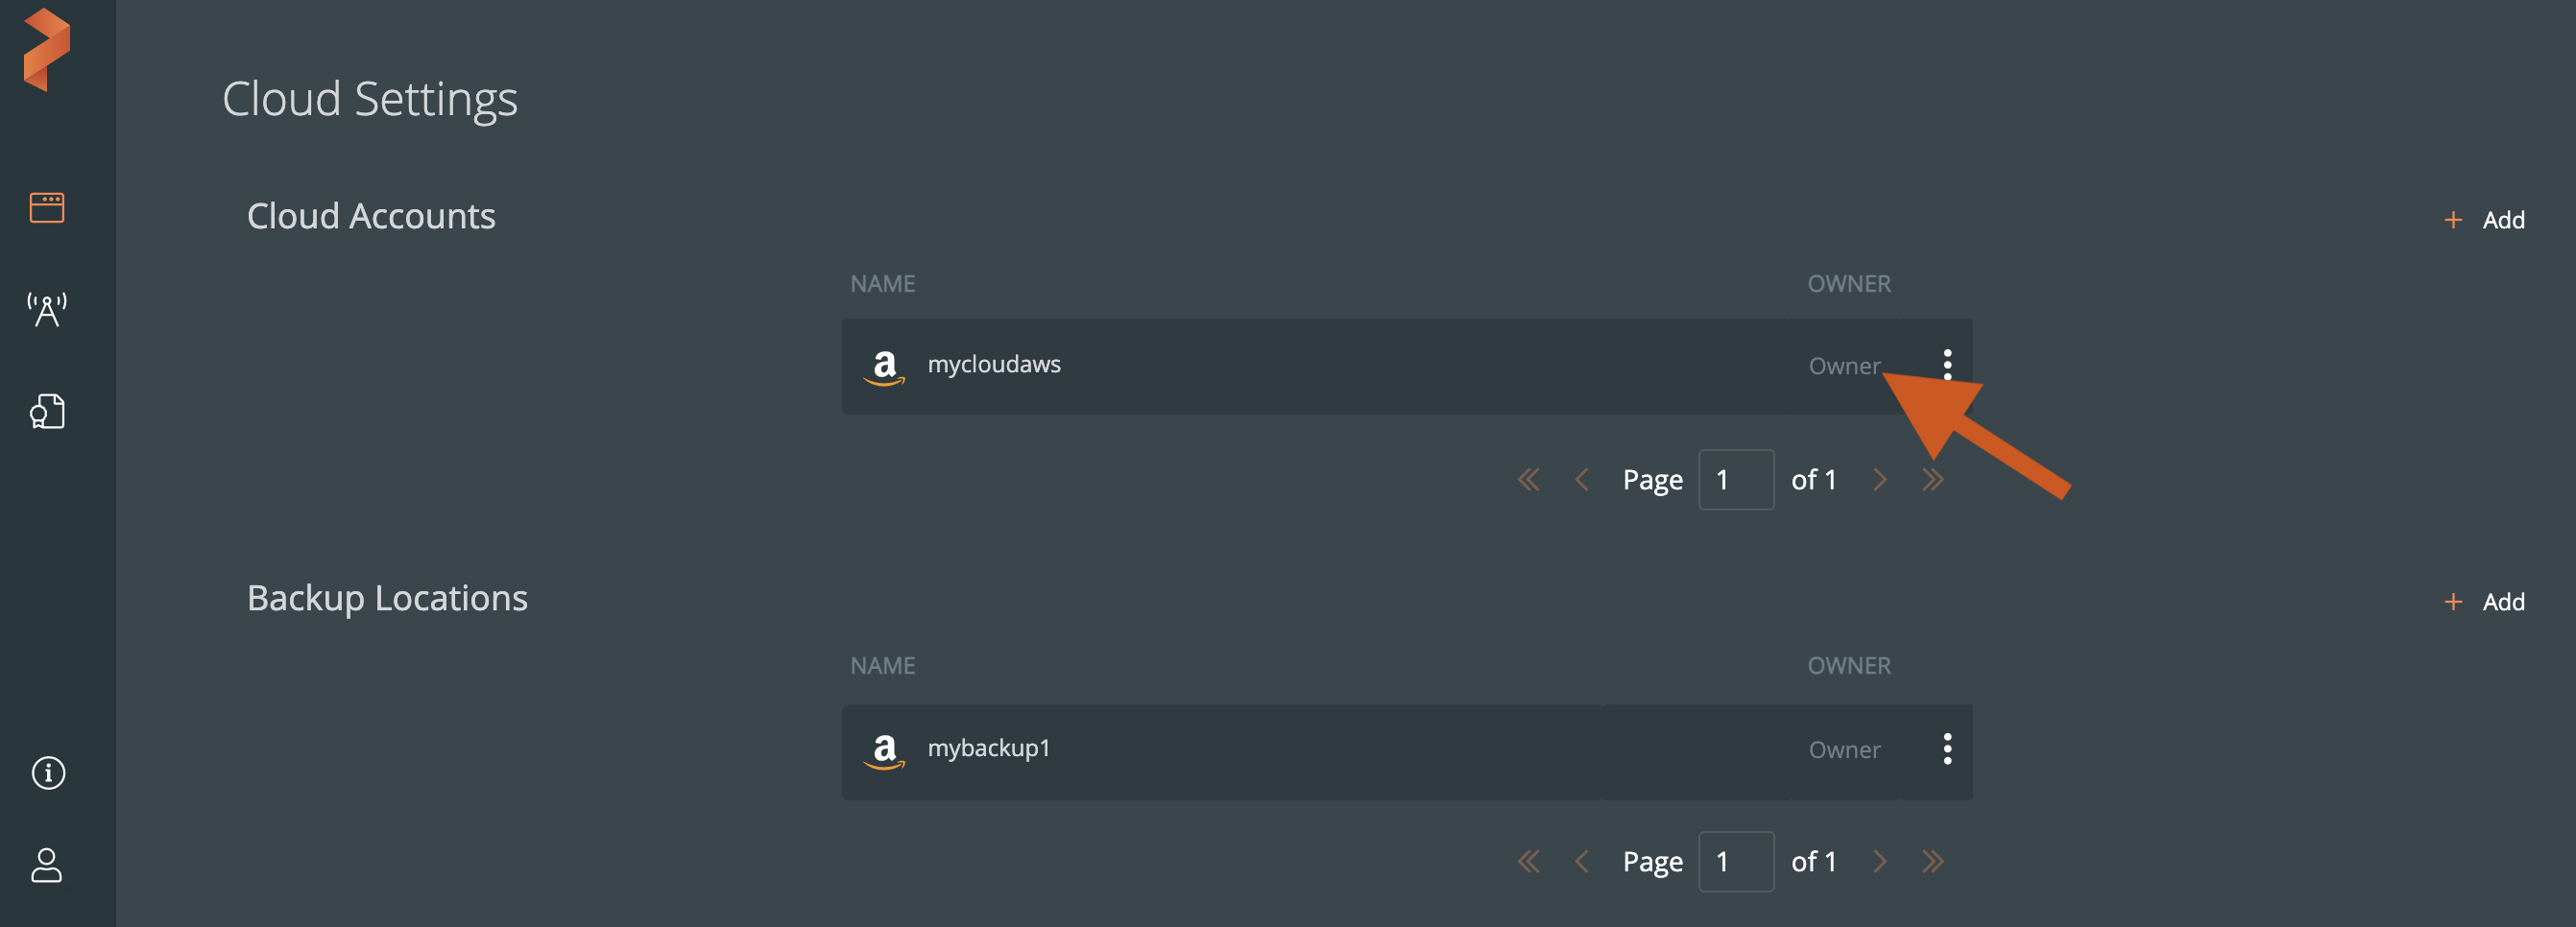
To make a cloud account access public:
-
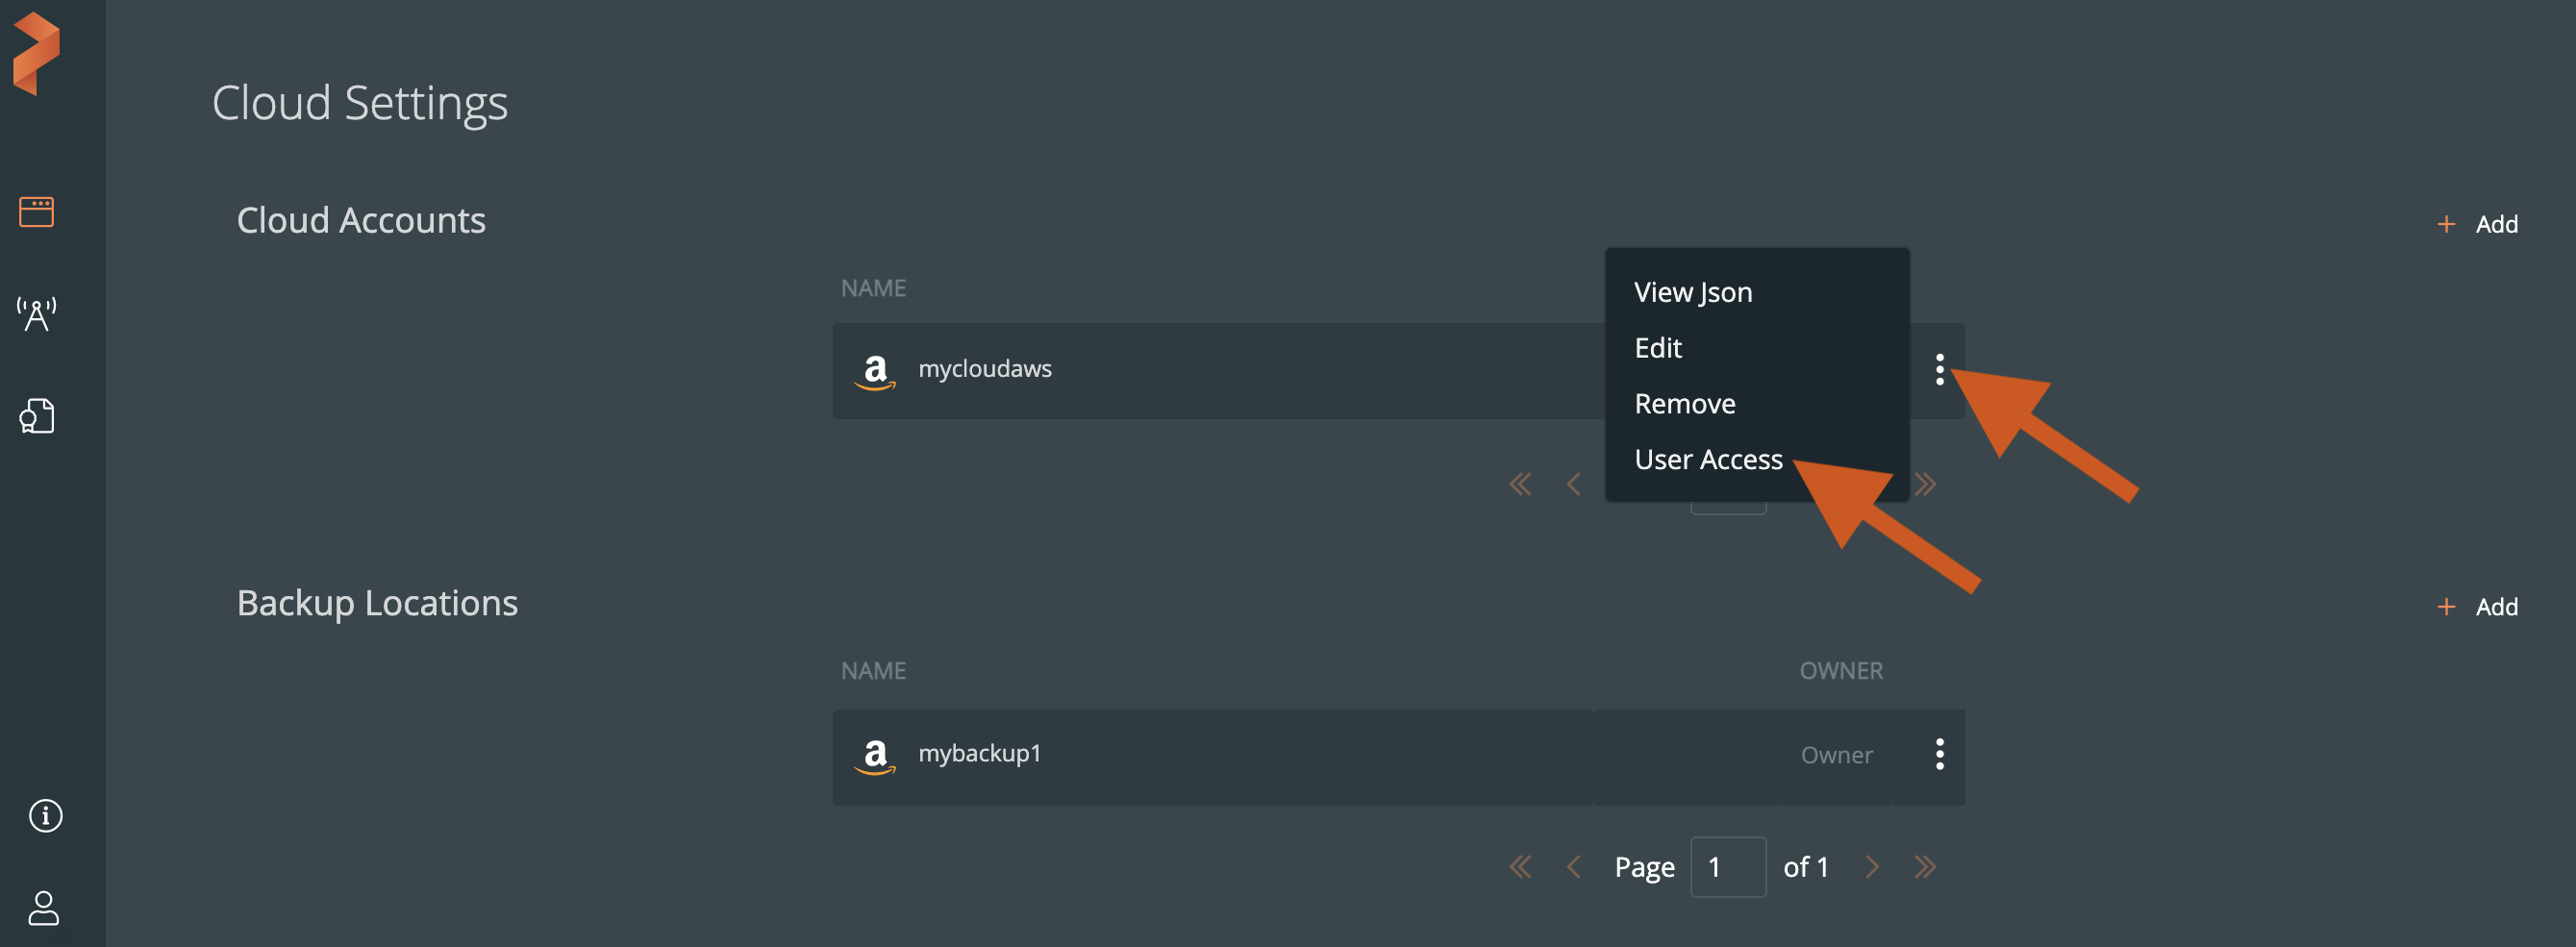
From the Cloud Settings page -> Cloud Accounts section, select the vertical menu icon on a cloud account row and select User Access.
-
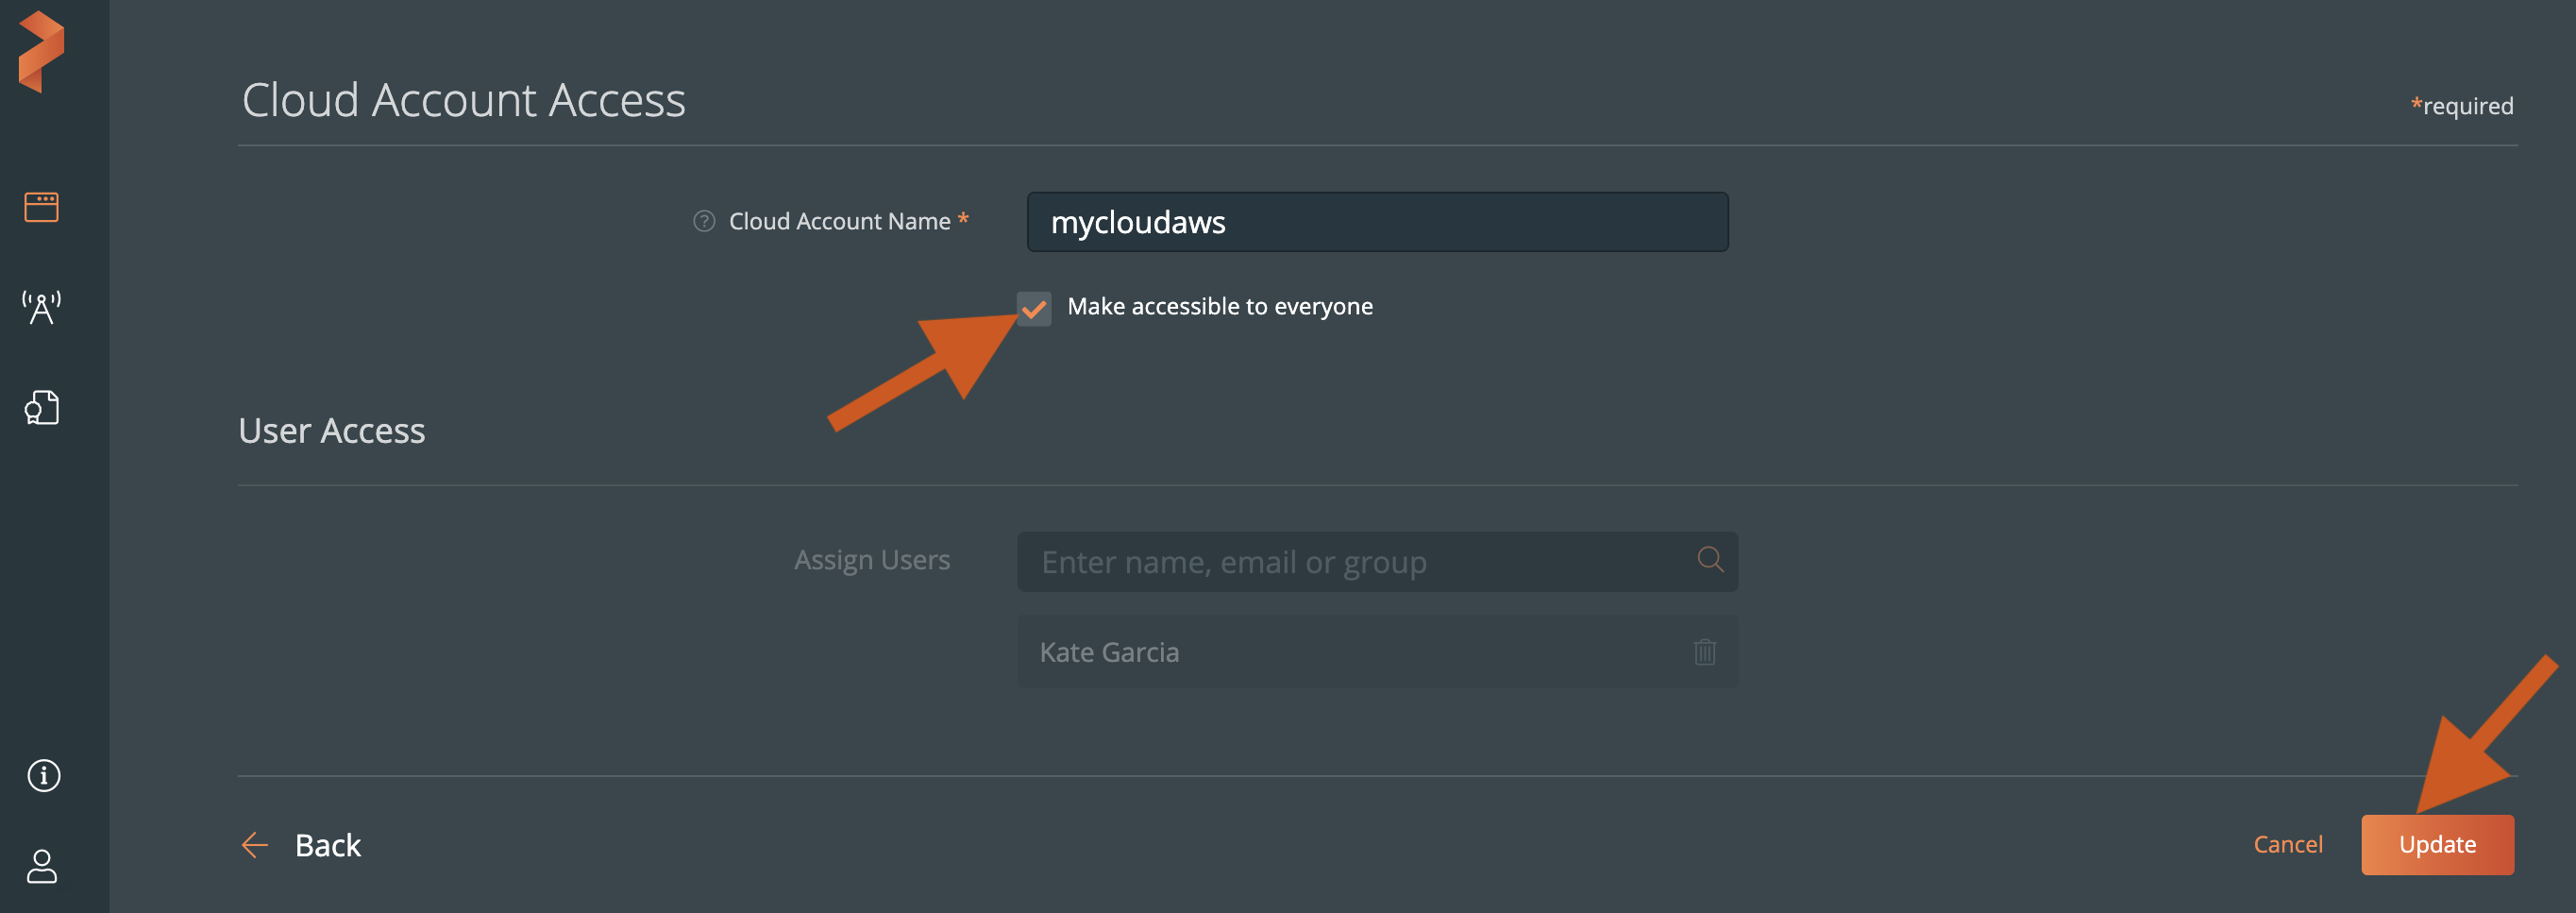
In the Cloud Accounts Access page, select the Make accessible to everyone check box.
-
Click Update.
Access to the selected cloud account is available to all Portworx Backup users.
To add other users or user groups as collaborators to a cloud account:
-
From the Cloud Accounts Access page -> User Access section -> Assign Users search box, type any character of an existing user or user group name, or email.
-
From the users and user groups list that appears, click the + icon to add a user or user group that you want to add as a collaborator to access the cloud account.
The added collaborators appear below the Assign Users search box.
-
Click Update.
The cloud account appears in the Portworx Backup Cloud Accounts page of a collaborator to access:
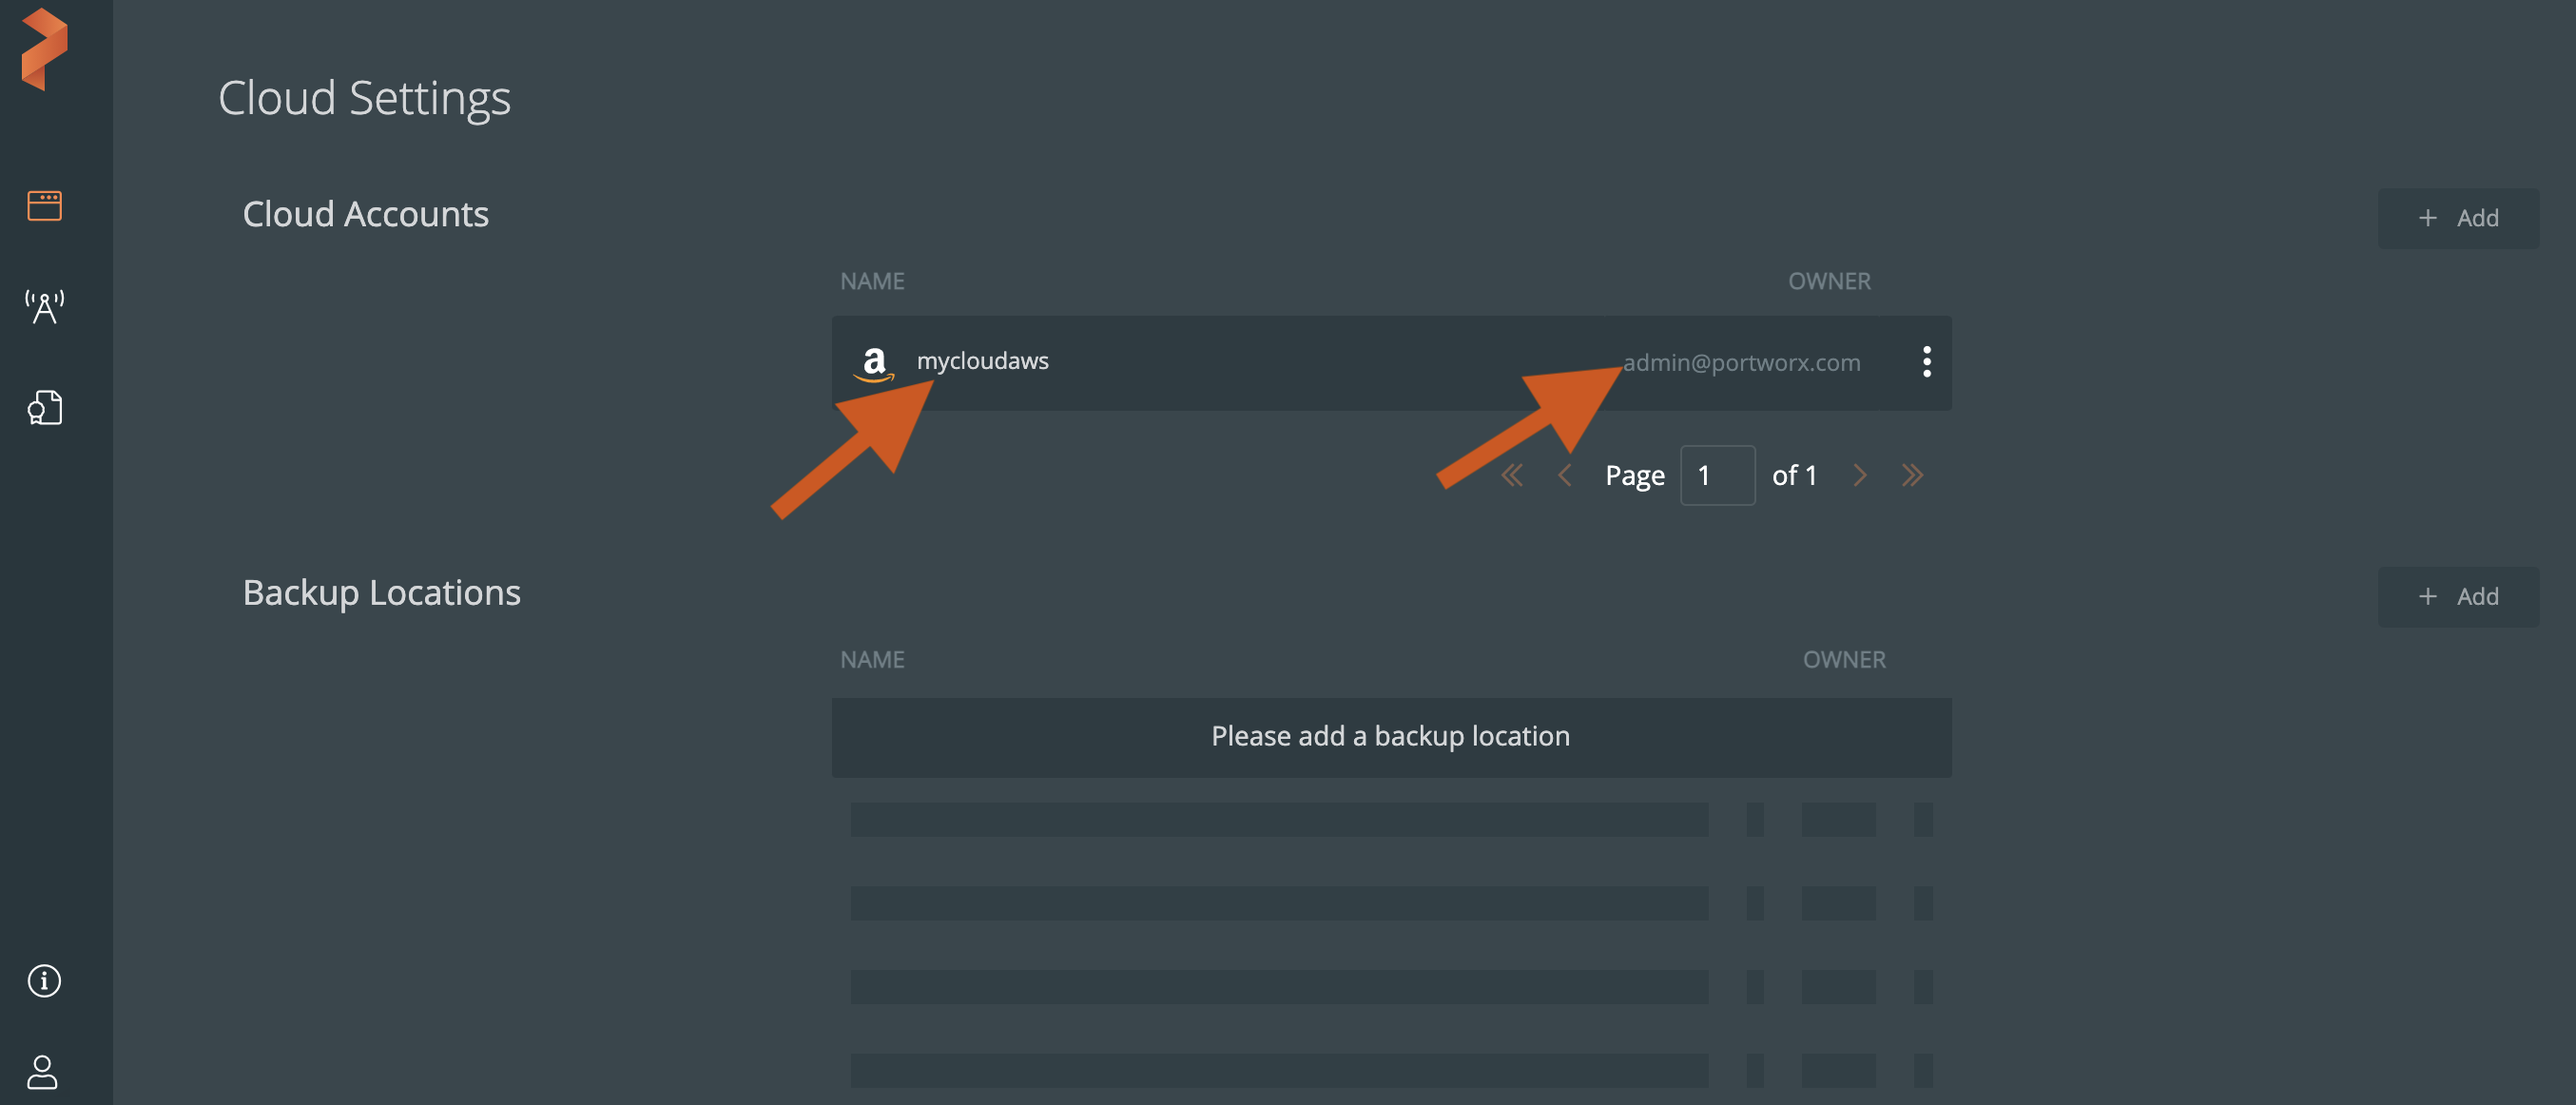
You can see that the collaborator cloud account displays administrator as the owner of the shared cloud account.
The following procedures to make the backup locations, schedule policies, and rules public or share access to selected users or user groups is similar to sharing access to the cloud account.
Share backup locations
Ensure that a backup location exists in your Portworx Backup. If not, refer to Configure a backup location topic to add one.
To make a backup location access public:
-
From the Cloud Settings page -> Backup Locations section, select the vertical menu icon on the backup location you want to share access and select User Access.
-
In the Backup Location Access page, select the Make accessible to everyone check box.
-
Click Update.
All Portworx Backup users can access the shared backup location.
To add existing users or users groups as collaborators to a backup location:
-
From the Backup Location Access page -> User Access section -> Assign Users search box, type any character of an existing user or user group name, or email.
-
From the users and user groups list that appears, click the + icon to add a user or user group as a collaborator to access the backup location.
The added collaborators appear below the Assign Users search box.
-
Click Update.
The backup location appears in the Backup Location Access page of the collaborators to access.
Share schedule policies
Ensure that a schedule policy exists in Portworx Backup. If not, refer to the Create schedule policies topic to add one.
To make a schedule policy access public:
-
In the Schedule Policies page, select the vertical menu icon on the schedule policy you want to share access and select User Access.
-
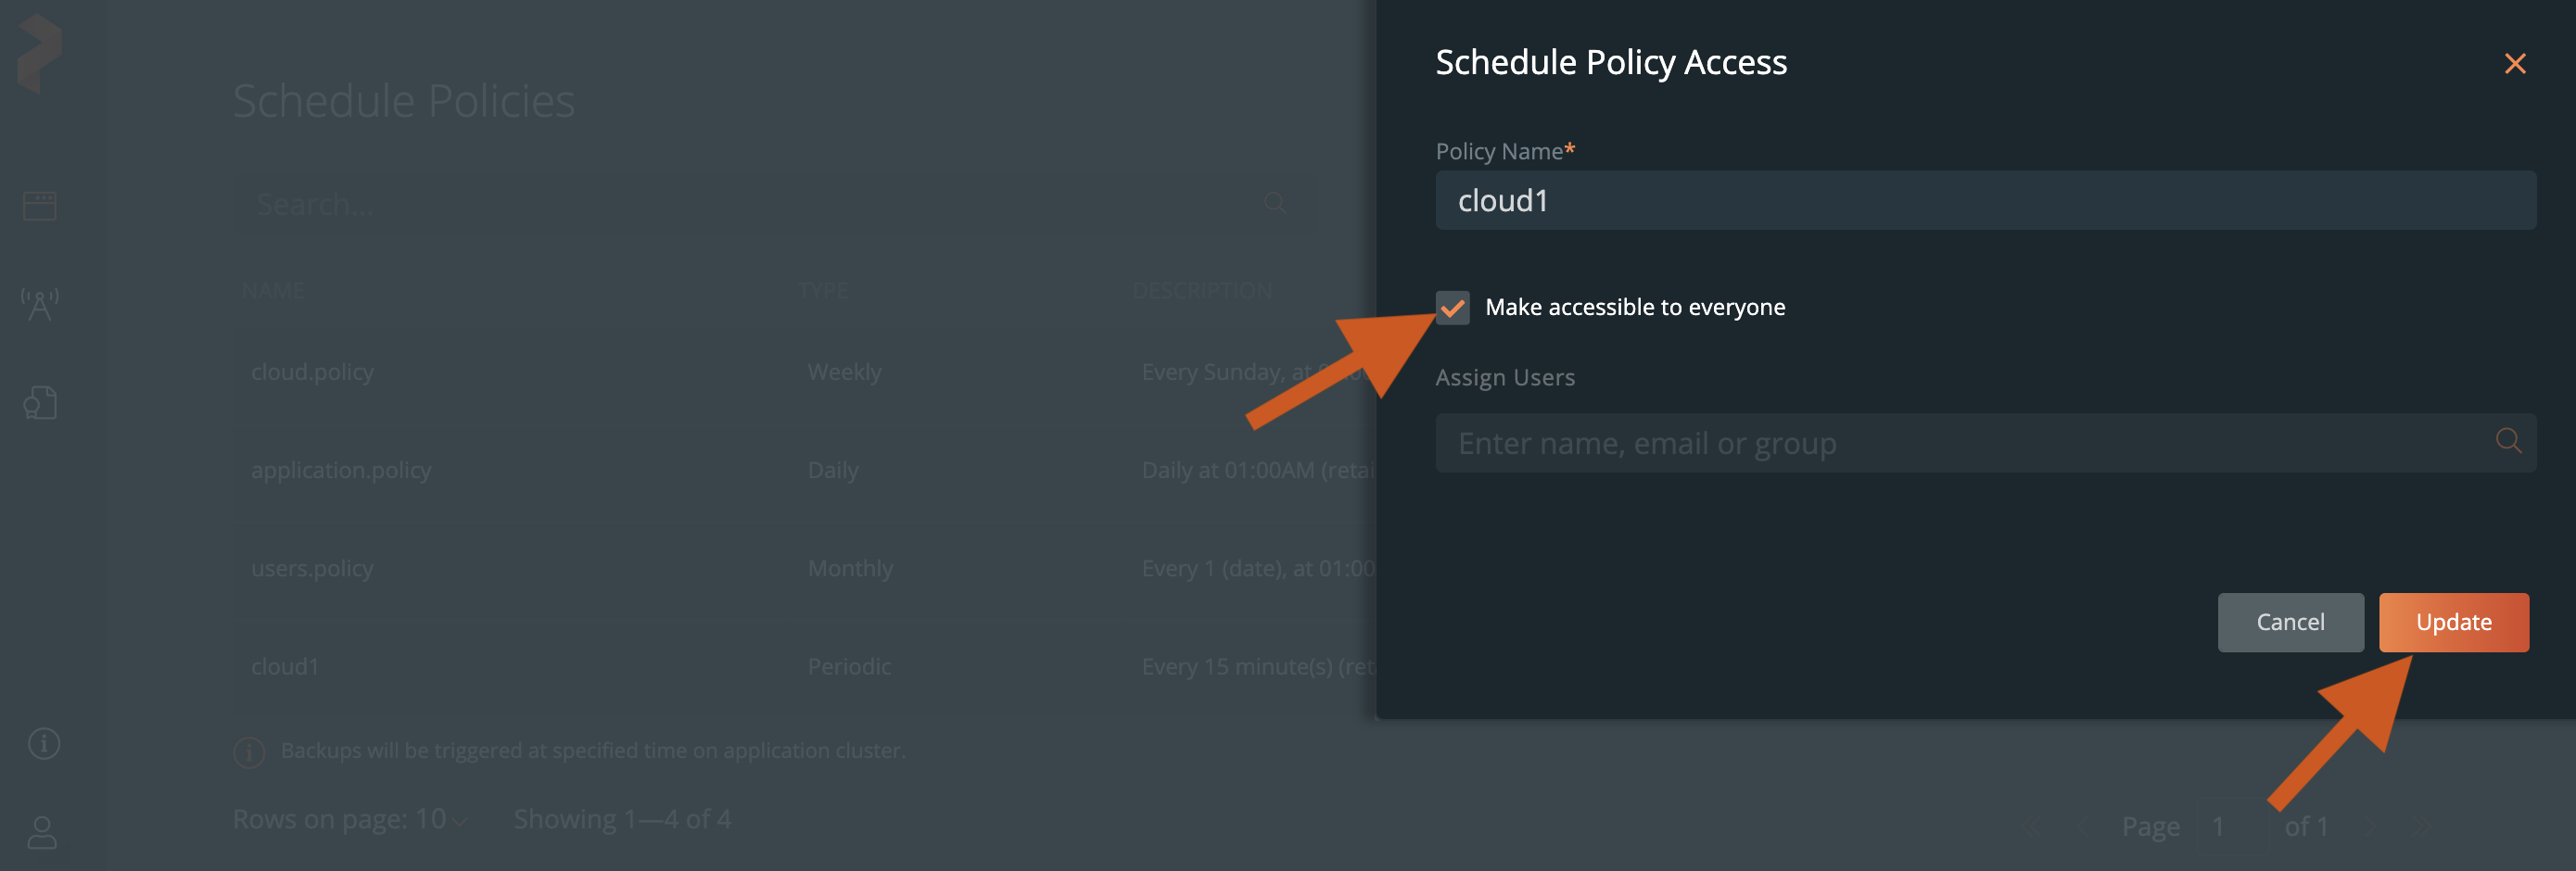
In the Schedule Policies Access window, select the Make accessible to everyone check box.
-
Click Update.
All Portworx Backup users can access the shared schedule policy.
To add existing users or user groups as collaborators to a schedule policy:
-
In the Schedule Policies page, select the vertical menu icon in a schedule policy that you want to share access with collaborators and select User Access.
-
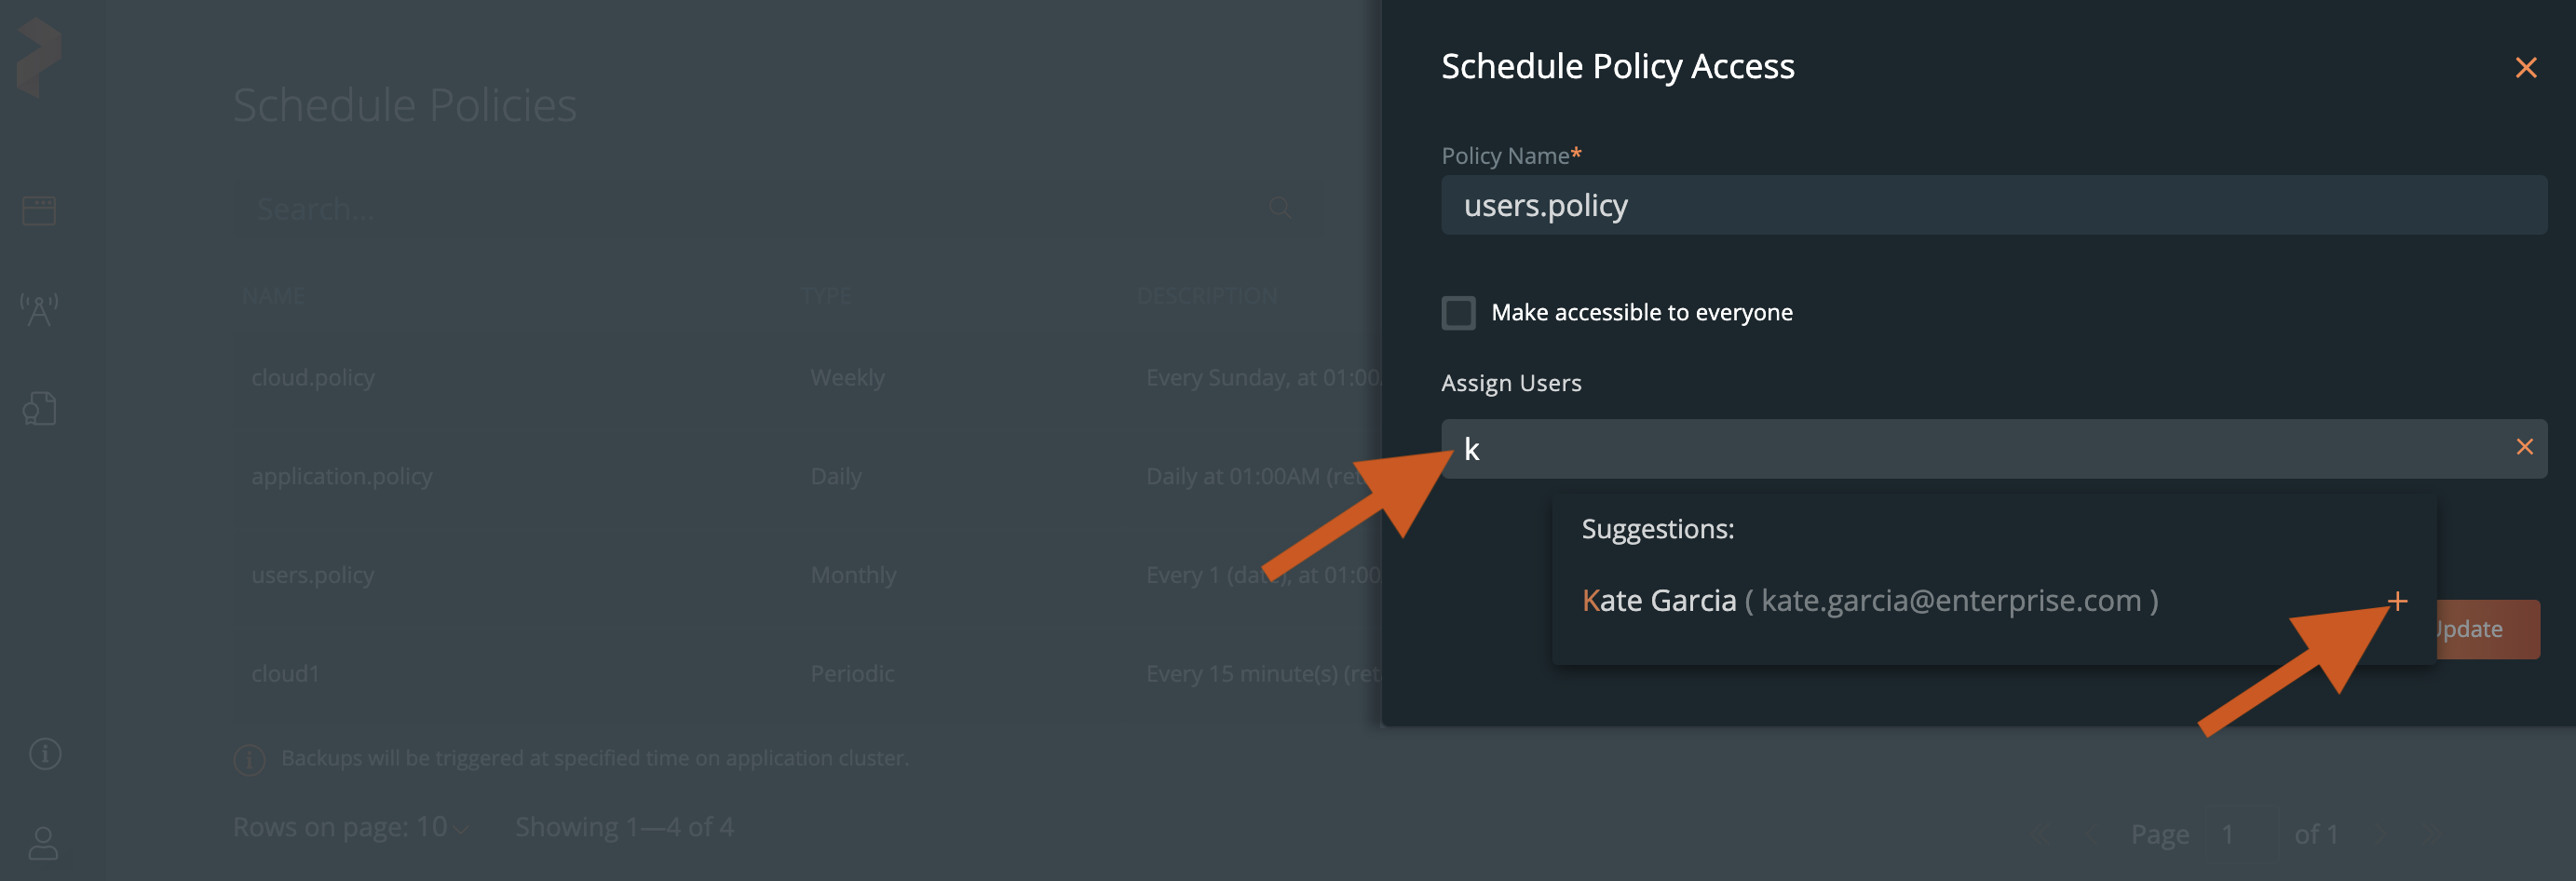
From the Schedule Policy Access window -> Assign Users search box, enter any character of a user or user group name, or email.
-
From the existing users and user groups list that appear, click the + icon to add the schedule policy.
-
Click Update.
The added schedule policy appears in the Schedule Policies page of the collaborators to access:

Share backup rules
Ensure that a backup rule exists in your Portworx Backup. If not, refer to the Create a backup rule topic to add one.
To make a backup rule access public:
-
From the Backup Rules page, select the vertical menu icon on the backup rule you want to share access and select User Access.
-
In the Rule Access page that appears, select the Make accessible to everyone check box.

-
Click Update.
All Portworx Backup users and user groups can access the shared backup rule.
To add other users or user groups as collaborators to a backup rule:
-
In the Rule Access page -> User Access section -> Assign Users search box, type any character of an existing user or user group name, or email.
-
From the users and user groups list that appears, click the + icon to add a user or user group as a collaborator to access the backup rule.
The added collaborators appear under the Assign Users search box.
-
Click Update.
The added backup rule appears in the Rule Access page of the collaborators to access.
Remove users or user groups as collaborators
The procedure to remove existing collaborators is similar for all Portworx Backup resources. Ensure that you are in the specific resource access page where the collaborators are listed. For example, the following procedure explains how to remove a collaborator from the Cloud Accounts Access page.
To remove collaborators from the Cloud Accounts Access page:
-
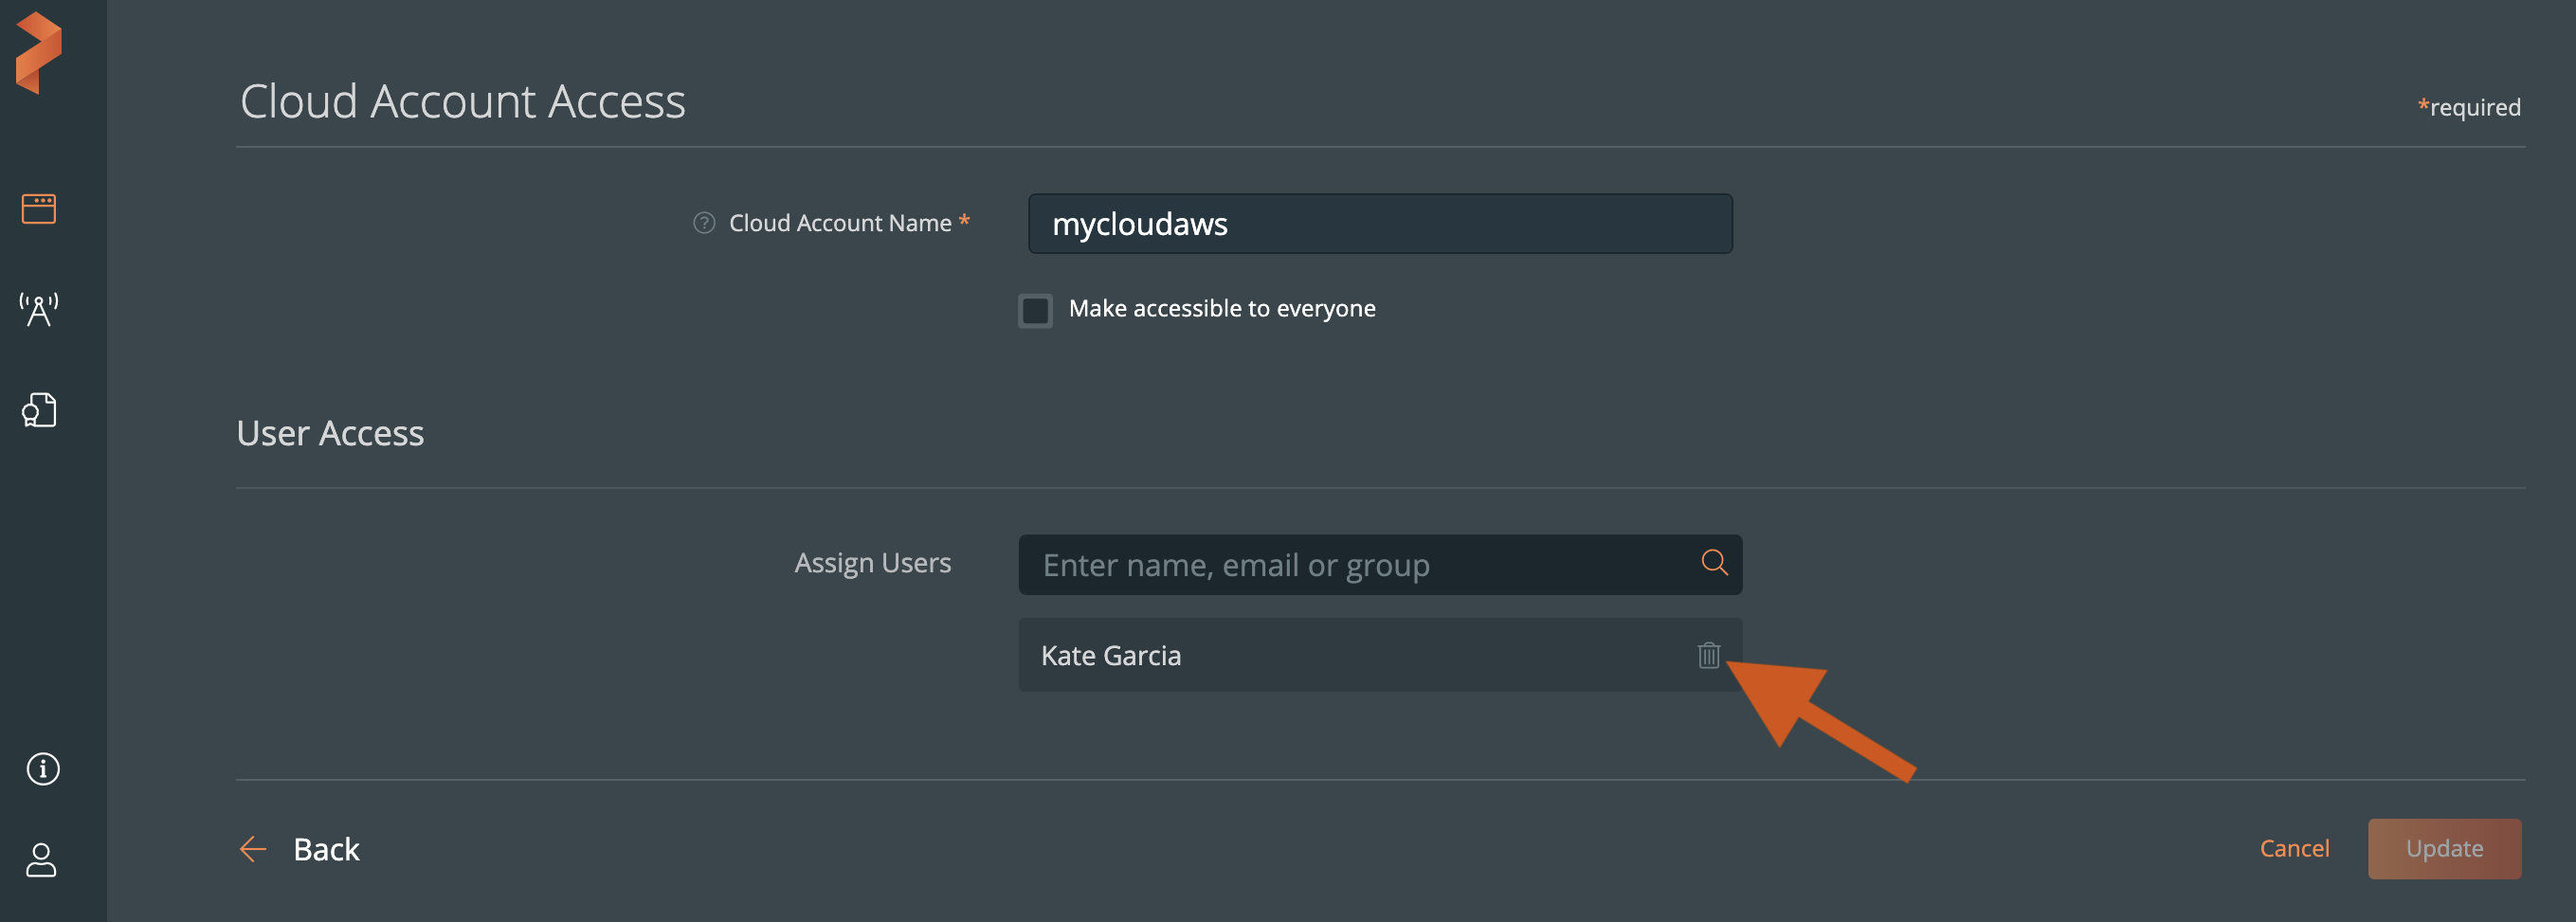
From the Cloud Accounts Access page -> User Access section -> Assign Users, click the Recycle Bin icon on a user or user group row that you want to remove as a collaborator.
-
Click Update.